Diese Version enthält möglicherweise inkorrekte Änderungen. Wechsle zur letzten geprüften Version.
Was du brauchst
-
-
Hebe mit deinem Fingernagel die Rückseite ab und gleite mit dem Finger die Außenseiten ab, bis der Rückdeckel sich abnehmen lässt.
-
-
-
Entferne die 13 schwarzen Schrauben und die einzelne silberne Schraube von der Rückseite des Telefons mit einem JIS00 Schraubendreher.
-
Die schwarzen Schrauben haben eine Länge von 2,8 mm.
-
Die silberne Schraube ist 5,5 mm lang.
-
-
-
Verwende ein Plastic Opening Tool, um die innere Abdeckung zu entfernen.
-
-
-
Der Lautsprecher ist nicht mehr befestigt und sollte sich einfach aus dem Gehäuse entnehmen lassen.
-
-
Dieser Schritt ist noch nicht übersetzt. Hilf mit, ihn zu übersetzen!
-
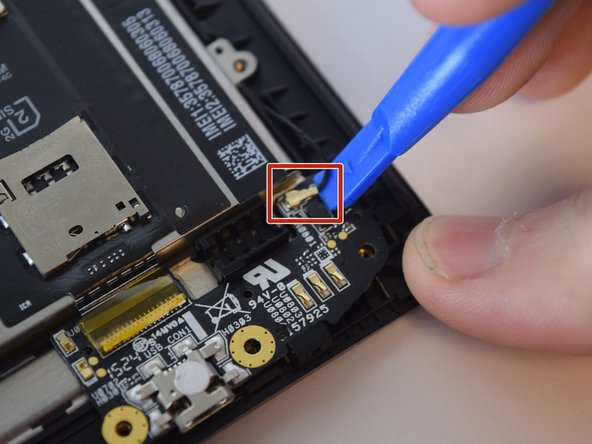
Use a plastic opening tool to gently pry up both ends of the antenna.
-
Carefully remove the antenna wire from the plastic keepers along the side. Note their position for reassembly.
-
-
-
Dieser Schritt ist noch nicht übersetzt. Hilf mit, ihn zu übersetzen!
-
Using the plastic opening tool, unlock the ribbon cable attaching the battery to the circuit board by prying up the yellow tab.
-
-
Dieser Schritt ist noch nicht übersetzt. Hilf mit, ihn zu übersetzen!
-
Using a plastic opening tool, gently pry the vibration motor from its mount.
-
-
Dieser Schritt ist noch nicht übersetzt. Hilf mit, ihn zu übersetzen!
-
Gently remove the circuit board from the phone by gently pulling it away from the bottom of the phone.
-
-
Dieser Schritt ist noch nicht übersetzt. Hilf mit, ihn zu übersetzen!
-
Using the plastic opening tool, disconnect the ribbon cables from their connectors by gently prying them up.
-
-
Dieser Schritt ist noch nicht übersetzt. Hilf mit, ihn zu übersetzen!
-
Carefully remove the battery pack from the phone using your hand. The battery is glued in placed by a strip of adhesive on the top side so some force may be necessary.
-
-
Dieser Schritt ist noch nicht übersetzt. Hilf mit, ihn zu übersetzen!
-
Using a plastic opening tool, lift the copper sheet heat strip from the body of the phone by sticking the tool into one of the upper corner of the copper sheet and slowly sliding it along the edges.
-
-
Dieser Schritt ist noch nicht übersetzt. Hilf mit, ihn zu übersetzen!
-
Using a plastic opening tool, unplug the ribbon cable indicated in the picture.
-
-
Dieser Schritt ist noch nicht übersetzt. Hilf mit, ihn zu übersetzen!
-
Using a plastic opening tool, disconnect the display cable from the side of the motherboard by carefully sticking the tool underneath the display cable and gently pulling outward.
-
-
Dieser Schritt ist noch nicht übersetzt. Hilf mit, ihn zu übersetzen!
-
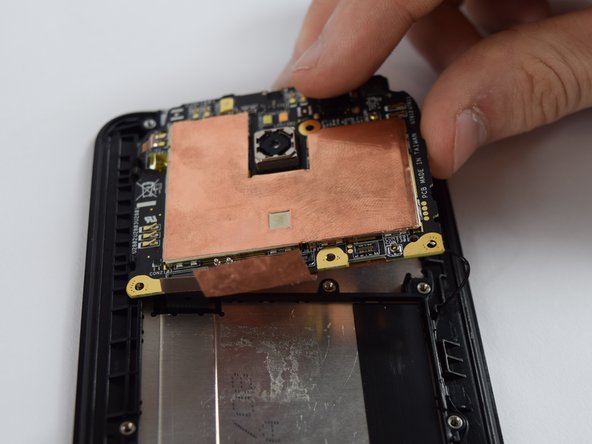
There are four black plastic retainers, two on each side, that keep the motherboard fix in place. To get the motherboard out, stick a plastic opening tool under one top corner of the motherboard and carefully lift upward using a small amount of force to pop this side of the motherboard out of the plastic retainers.
-
-
Dieser Schritt ist noch nicht übersetzt. Hilf mit, ihn zu übersetzen!
-
Once one side of the motherboard is out of the black plastic retainers, remove the whole motherboard from the phone.
-
Rückgängig: Ich habe diese Anleitung nicht absolviert.
41 weitere Nutzer:innen haben diese Anleitung absolviert.
20 Kommentare
Hi!I
After replacing the complete appliance front but the unit turns on but nothing appears on the screen, what may have happened?
Check if the screen ribbon cable is firmly attached to the motherboard. If it is you may have a faulty motherboard replaced or a faulty screen
Thanks this helped a lot, Download Asus full firmware here: https://www.droidtechie.com/official-ful...
Is there any place where I can order just the audio jack?
Is there a reliable source to buy a motherboard you can suggest? I need to replace the audio jack. Thank you for the neat guide.


