Einleitung
If the mouse on your Asus Zenbook UX303L is not moving, moving incorrectly, not clicking, or clicking incorrectly, use this guide to replace its trackpad. Before using this guide, be sure to clean your trackpad of any dirt or debris that might be obstructing the trackpad’s movement and see if that fixes the problem.
The track pad is the small rectangular surface just below the space bar that is used to control the mouse. If available, attach an external USB mouse and verify that the cursor moves and clicks correctly with it. If it does not, the issue may be with the mouse settings.
Before beginning, make sure to power off your Asus Zenbook UX303L completely and disconnect it from any external power source.
Was du brauchst
-
-
Make sure the device is turned off and disconnected from the battery charger.
-
-
-
Remove all nine screws from the bottom of the device using a T5 screwdriver.
-
Carefully remove the bottom cover.
-
-
-
Unhook the red, black, and white coiled switch.
-
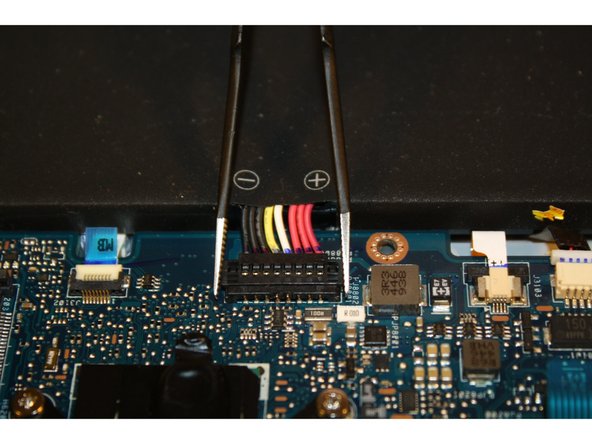
Detach the positive and negative red, black, yellow, and white switch from the motherboard.
-
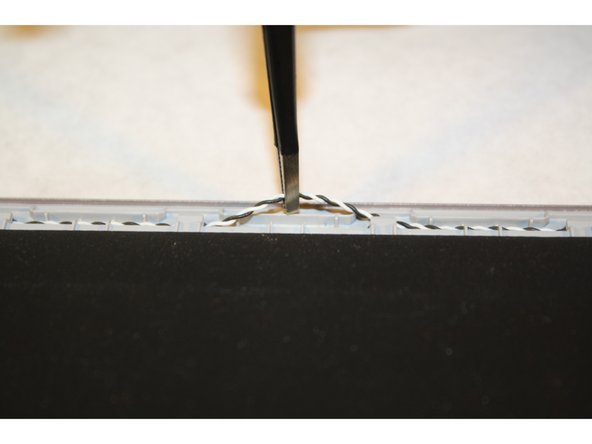
Unhook the black and white coiled wire from the top of the battery pack.
-
-
-
-
Remove the three screws connecting the SSD to the motherboard.
-
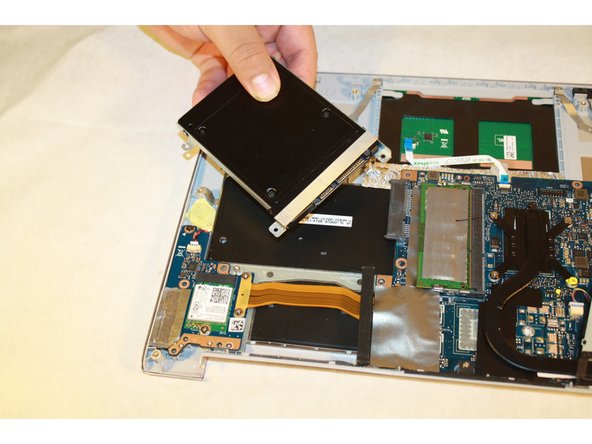
Gently lift and pull out the SSD.
-
-
-
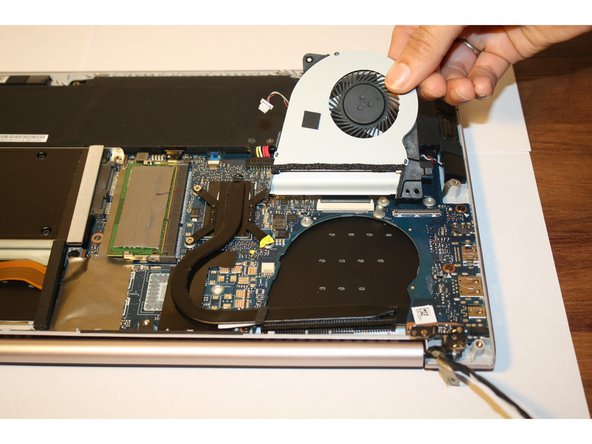
Remove the screw attaching the cooling fan to the motherboard.
-
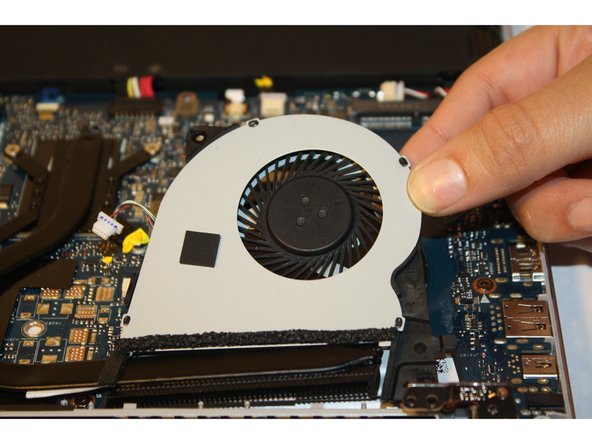
Lift and remove the cooling fan.
-
-
-
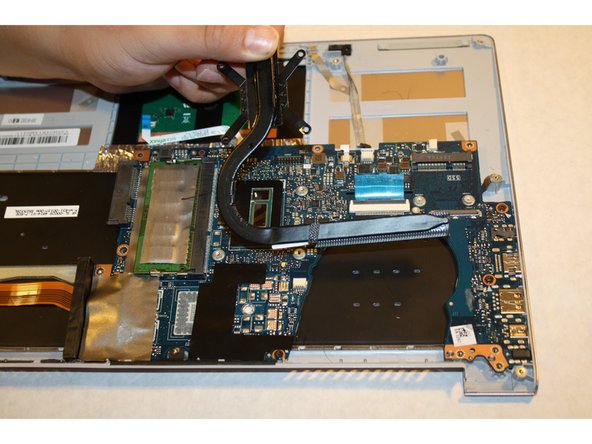
Remove the four Phillips #1 screws attached to the black covered copper bar next to the cooling fan.
-
Gently lift and remove the copper bar.
-
-
-
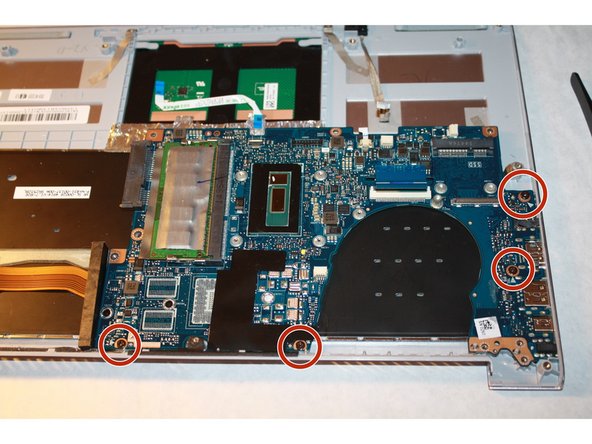
Remove the silver tape to reveal the fourth screw on the motherboard.
-
Detach the motherboard by removing the four Phillips #1 screws.
-
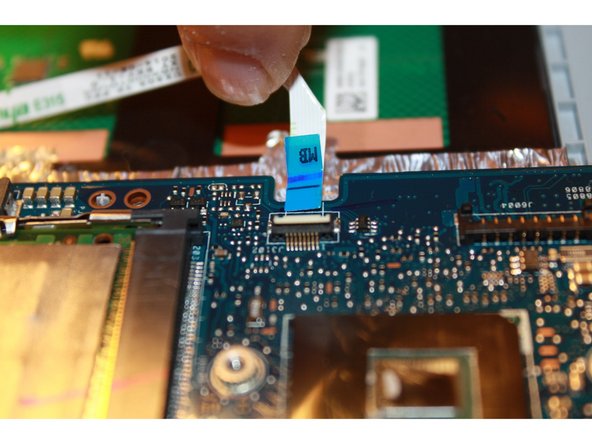
Detach the white wire connecting the motherboard by lifting the black flap and pulling it out.
-
-
-
By using ESD-safe tweezers, remove the gray colored wire.
-
Remove the white wire using tweezers.
-
Remove the blue colored wire by lifting the black flap and pulling the blue flap out.
-
-
-
Remove the white wire with the blue ends by lifting the black flap with tweezers and gently pulling out.
-
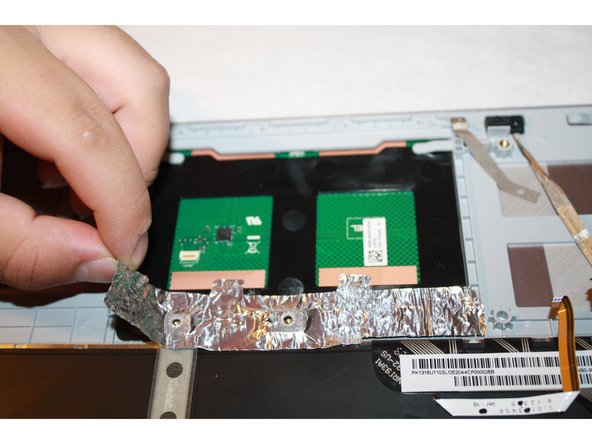
Gently remove the silver tape using tweezers.
-
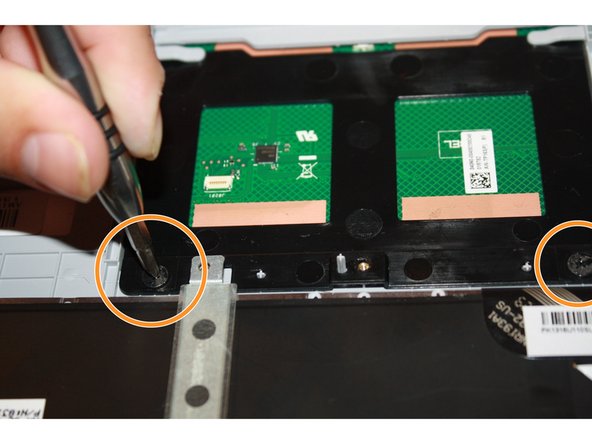
Remove the Phillips #1 screws.
-
-
-
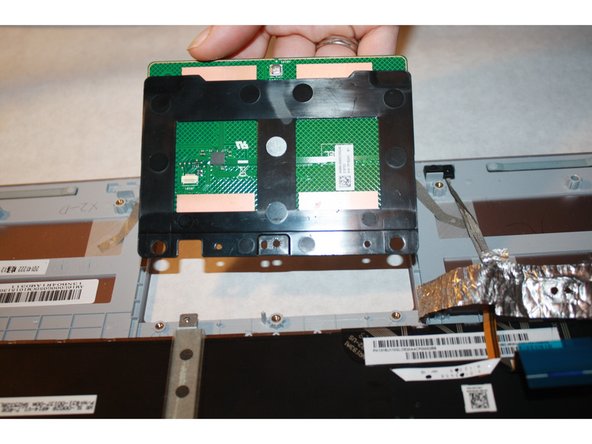
Place the plastic opening tools under the trackpad.
-
Gently pull out and remove the trackpad.
-


To reassemble your device, follow these instructions in reverse order.
To reassemble your device, follow these instructions in reverse order.
Rückgängig: Ich habe diese Anleitung nicht absolviert.
3 weitere Personen haben diese Anleitung absolviert.
Team

Sam Houston State, Team 1-3, Blackburne Fall 2015 Mitglied von Sam Houston State, Team 1-3, Blackburne Fall 2015
SHSU-BLACKBURNE-F15S1G3
3 Mitglieder
4 Anleitungen geschrieben