Diese Version enthält möglicherweise inkorrekte Änderungen. Wechsle zur letzten geprüften Version.
Was du brauchst
-
Dieser Schritt ist noch nicht übersetzt. Hilf mit, ihn zu übersetzen!
-
Remove the twelve 3 mm bottom panel screws with a T5 Torx Screwdriver.
-
-
Dieser Schritt ist noch nicht übersetzt. Hilf mit, ihn zu übersetzen!
-
Use a plastic opening tool to pry along the perimeter of the bottom panel until it can be easily removed.
-
Remove the bottom panel from the body of the laptop.
-
Set aside the bottom panel.
-
-
Dieser Schritt ist noch nicht übersetzt. Hilf mit, ihn zu übersetzen!
-
Remove the eight 3 mm Phillips #0 screws on the bottom panel.
-
-
-
Dieser Schritt ist noch nicht übersetzt. Hilf mit, ihn zu übersetzen!
-
Pry up each side of the flat connectors by hand or with a plastic opening tool.
-
Lift the connector straight up from its socket.
-
-
Dieser Schritt ist noch nicht übersetzt. Hilf mit, ihn zu übersetzen!
-
Unplug the two bundled cable connectors on each side of the battery.
-
Pull the cable away from the connector in the same direction as the individual wires are running.
-
-
Dieser Schritt ist noch nicht übersetzt. Hilf mit, ihn zu übersetzen!
-
Remove the battery completely.
-
-
Dieser Schritt ist noch nicht übersetzt. Hilf mit, ihn zu übersetzen!
-
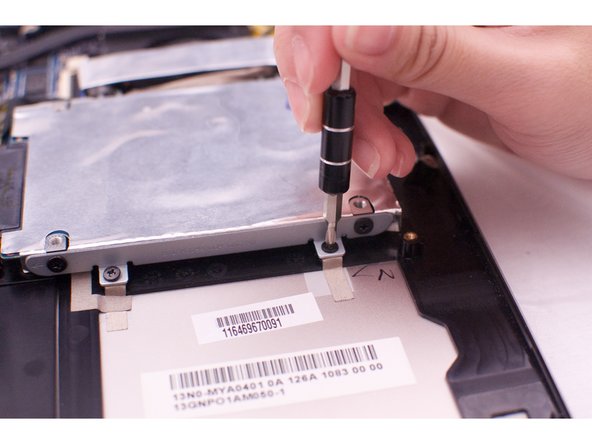
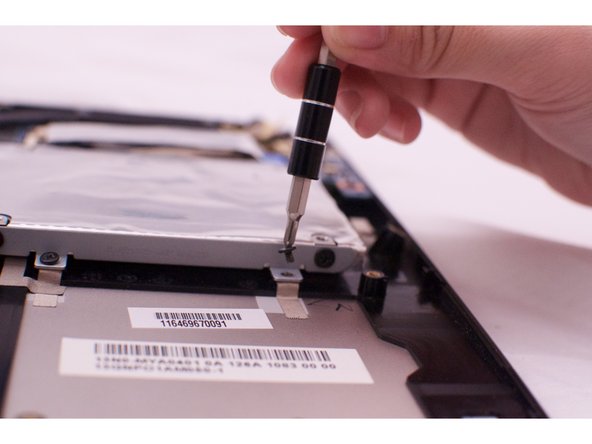
Remove the four 3mm hard drive screws with a Phillips #0 Screwdriver.
-
-
Dieser Schritt ist noch nicht übersetzt. Hilf mit, ihn zu übersetzen!
-
Lift the hard drive slightly and gently pull the hard drive from the socket.
-
Remove the hard drive completely.
-


Rückgängig: Ich habe diese Anleitung nicht absolviert.
12 weitere Nutzer:innen haben diese Anleitung absolviert.
Team

CSU Fullerton, Team 2-2, Bruce Fall 2015 Mitglied von CSU Fullerton, Team 2-2, Bruce Fall 2015
CSUF-BRUCE-F15S2G2
4 Mitglieder
6 Anleitungen geschrieben
4 Kommentare
Excellent! Precise and concise to the point!Thank you!
can someone confirm to me that samsung evo 860 will work or not for this asus please