Diese Version enthält möglicherweise inkorrekte Änderungen. Wechsle zur letzten geprüften Version.
Was du brauchst
-
Dieser Schritt ist noch nicht übersetzt. Hilf mit, ihn zu übersetzen!
-
Locate the orange slider on the front side of the gun.
-
Pull the orange slider towards the back of the gun while lifting up on the nose the gun.
-
-
Dieser Schritt ist noch nicht übersetzt. Hilf mit, ihn zu übersetzen!
-
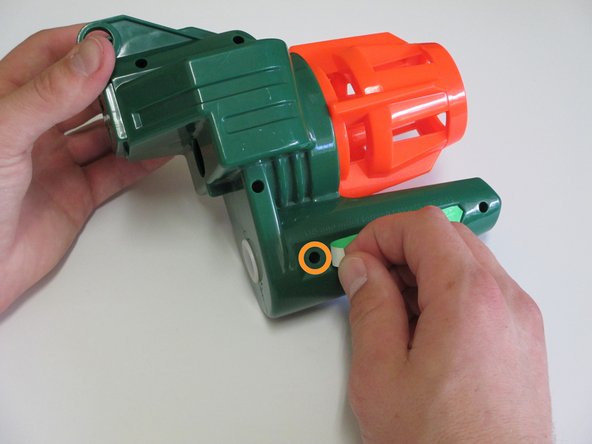
Remove the single 1/8 in. screw at the junction of the body and the nose using a Philips #00 Screwdriver.
-
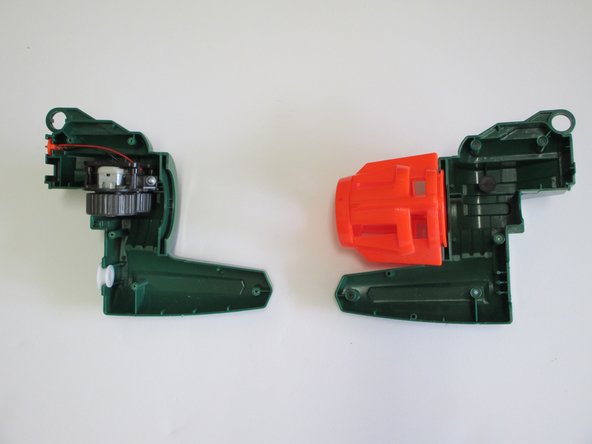
Remove all parts within the chamber to be able to completely detach the nose of the gun.
-
-
-
Dieser Schritt ist noch nicht übersetzt. Hilf mit, ihn zu übersetzen!
-
Remove all five 1/16 in. screws holding the nose of the gun together using a Phillips #00 screwdriver.
-
Look out for the hidden fifth screw behind the thin light green tape near the bushing itself. Peel the tape using your finger to gain access.
-
-
Dieser Schritt ist noch nicht übersetzt. Hilf mit, ihn zu übersetzen!
-
Pick up the now split half of the nose of the gun that does not still have the orange tip attached to it.
-
Remove the bushing by simply pulling it away from the plastic.
-
-
Dieser Schritt ist noch nicht übersetzt. Hilf mit, ihn zu übersetzen!
-
Unscrew the two screws holding the accelerator in place with a Phillips #00 screwdriver
-
-
Dieser Schritt ist noch nicht übersetzt. Hilf mit, ihn zu übersetzen!
-
Pull back on the accelerator away from the plastic to remove from frame.
-


Rückgängig: Ich habe diese Anleitung nicht absolviert.
3 weitere Nutzer:innen haben diese Anleitung absolviert.
Team

Cal Poly, Team 6-22, Maness Fall 2014 Mitglied von Cal Poly, Team 6-22, Maness Fall 2014
CPSU-MANESS-F14S6G22
4 Mitglieder
6 Anleitungen geschrieben