Diese Version enthält möglicherweise inkorrekte Änderungen. Wechsle zur letzten geprüften Version.
Was du brauchst
-
Dieser Schritt ist noch nicht übersetzt. Hilf mit, ihn zu übersetzen!
-
Look at the side of the speaker that has the red interface plate. Using a Phillips head PH1 screwdriver head, remove screws on the top and bottom of the black face plate. There will be one screw on top and one on the bottom.
-
Both screws are 0.55 cm in depth
-
-
Dieser Schritt ist noch nicht übersetzt. Hilf mit, ihn zu übersetzen!
-
Separate the black face plate from the tube by pulling them apart.
-
-
Dieser Schritt ist noch nicht übersetzt. Hilf mit, ihn zu übersetzen!
-
For the top horn replacement, you will be working with the blue and white wire pair.
-
For the bottom horn replacement you with the yellow and white wire pair.
-
-
-
Dieser Schritt ist noch nicht übersetzt. Hilf mit, ihn zu übersetzen!
-
To remove the plastic coating around the desired horn, look on the back of the black face plate you removed and use the philips head ph1 screwdriver fitting to remove the two 0.3 cm Philips Head screw and washer combos on the left and right of the horn.
-
Screw depth of 0.7 cm
-
-
Dieser Schritt ist noch nicht übersetzt. Hilf mit, ihn zu übersetzen!
-
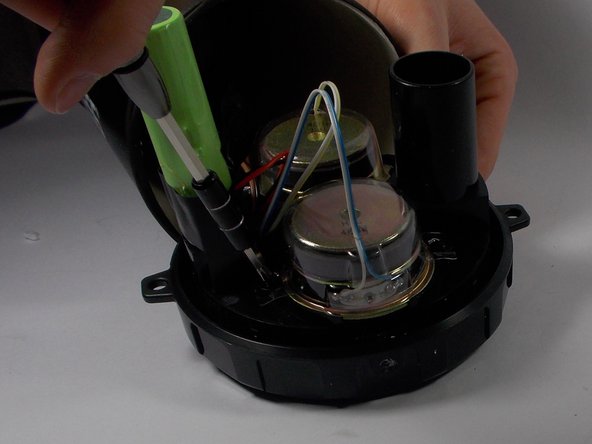
Lift the horn from its fitting by pulling it. Position it in a manner that is easy to work with.
-
-
Dieser Schritt ist noch nicht übersetzt. Hilf mit, ihn zu übersetzen!
-
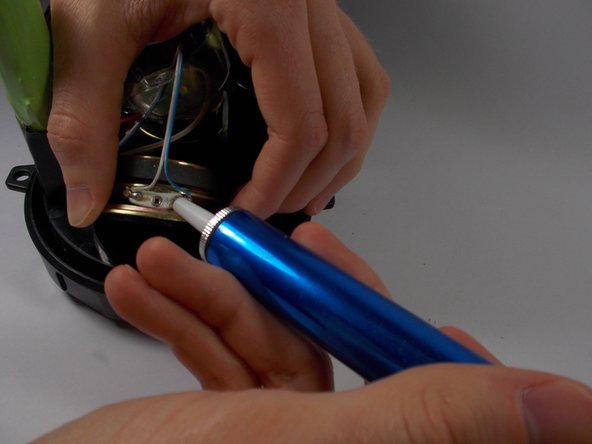
Use a soldering iron to heat the two contact points.
-
Then use a desoldering pump to remove the liquid solder.
-
-
Dieser Schritt ist noch nicht übersetzt. Hilf mit, ihn zu übersetzen!
-
Remove the wires--blue or yellow wire depending on the horn you are replacing--from the old speaker and remove the speaker from the fitting location.
-


Rückgängig: Ich habe diese Anleitung nicht absolviert.
3 weitere Nutzer:innen haben diese Anleitung absolviert.
Team

UMass Dartmouth, Team 8-6, Botvin Spring 2016 Mitglied von UMass Dartmouth, Team 8-6, Botvin Spring 2016
UMASSD-BOTVIN-S16S8G6
3 Mitglieder
8 Anleitungen geschrieben