Diese Version enthält möglicherweise inkorrekte Änderungen. Wechsle zur letzten geprüften Version.
Was du brauchst
-
Dieser Schritt ist noch nicht übersetzt. Hilf mit, ihn zu übersetzen!
-
Flip the phone over so that the screen is facing down.
-
Slide the opening tool between the micro-USB port and the back cover.
-
Use the opening tool to create a gap.
-
-
Dieser Schritt ist noch nicht übersetzt. Hilf mit, ihn zu übersetzen!
-
Use your thumb to pry off the back panel once the gap is large enough.
-
-
Dieser Schritt ist noch nicht übersetzt. Hilf mit, ihn zu übersetzen!
-
Once the back panel is off, locate the indent at the bottom of the battery.
-
Use your thumb to slip the battery out of the case.
-
-
Dieser Schritt ist noch nicht übersetzt. Hilf mit, ihn zu übersetzen!
-
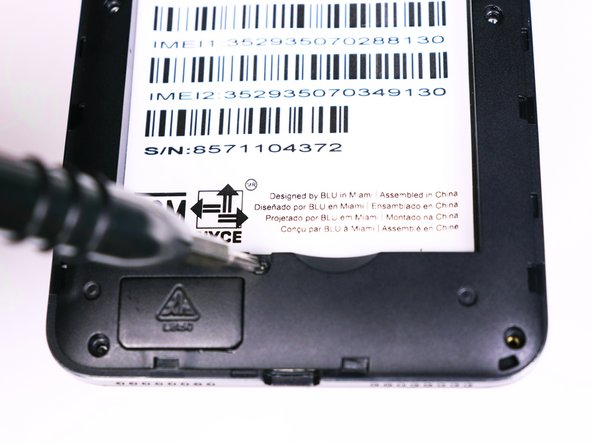
Use the Phillips #00 bit to undo the nine 1.5mm screws from the back of the device.
-
-
-
Dieser Schritt ist noch nicht übersetzt. Hilf mit, ihn zu übersetzen!
-
Wedge the opening tool into the seam of between the screen and the gray frame.
-
Run the opening tool along the seam to release the clips that hold the two pieces together.
-
-
Dieser Schritt ist noch nicht übersetzt. Hilf mit, ihn zu übersetzen!
-
Once all the clips have been released, lift the frame and set it aside.
-
-
Dieser Schritt ist noch nicht übersetzt. Hilf mit, ihn zu übersetzen!
-
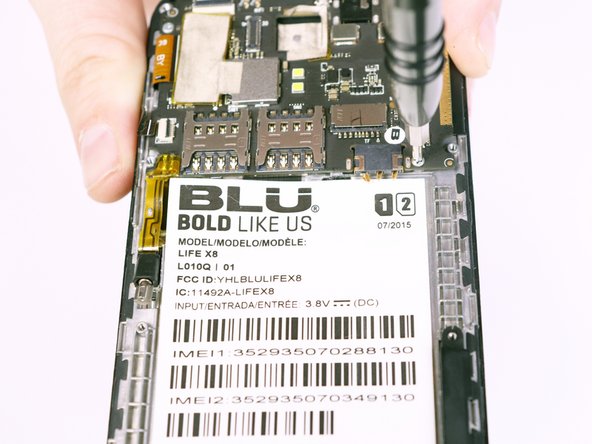
Use the Phillips #00 Phillips bit to undo the two 1.5mm screws from the motherboard.
-
-
Dieser Schritt ist noch nicht übersetzt. Hilf mit, ihn zu übersetzen!
-
Use the tweezers to peel away the mesh tape and reveal the ribbon connectors.
-
Use the tweezers to lift the brown and black tabs to release the ribbon cables and unlock them.
-
-
Dieser Schritt ist noch nicht übersetzt. Hilf mit, ihn zu übersetzen!
-
The ribbon cables should be free. Pull back on the ribbons to release them from their connectors.
-
-
Dieser Schritt ist noch nicht übersetzt. Hilf mit, ihn zu übersetzen!
-
Slowly lift the vibration motor away from the frame and peel up the tape.
-


Rückgängig: Ich habe diese Anleitung nicht absolviert.
Ein:e weitere:r Nutzer:in hat diese Anleitung absolviert.
Team

USF Tampa, Team S1-G2, Nance Fall 2017 Mitglied von USF Tampa, Team S1-G2, Nance Fall 2017
USFT-NANCE-F17S1G2
4 Mitglieder
6 Anleitungen geschrieben