Einleitung
This guide will show you how to replace the volume button on your Blu Studio 5.0 II phone.
Was du brauchst
-
-
Use your finger to open the back case by slowly pulling it on the open slot.
-
Once the case is lifted on the corner, slide your finger along the edge of the phone to remove the rest of the case.
-
-
-
-
Locate the opening slot at the bottom of the battery.
-
Use your finger to lift the battery and remove it from the case.
-
-
-
Locate the four 3mm screws on each side of the back panel.
-
Use a Phillips #00 screwdriver to remove the eight screws.
-
-
-
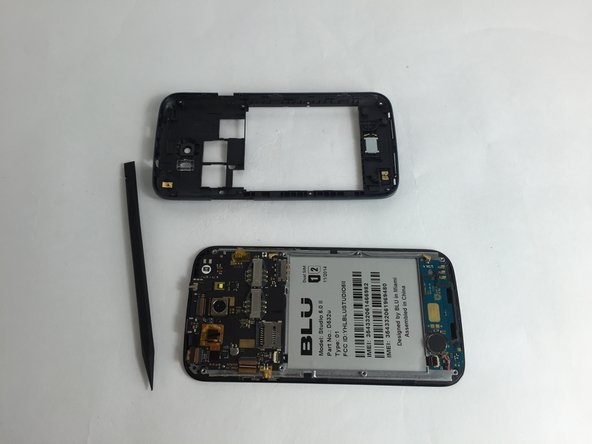
Carefully use a spudger to start opening the back case by inserting it between the black and blue lines on the side of the phone.
-
With the help of your fingers, continue to remove the back case by sliding it through the opening.
-
-
-
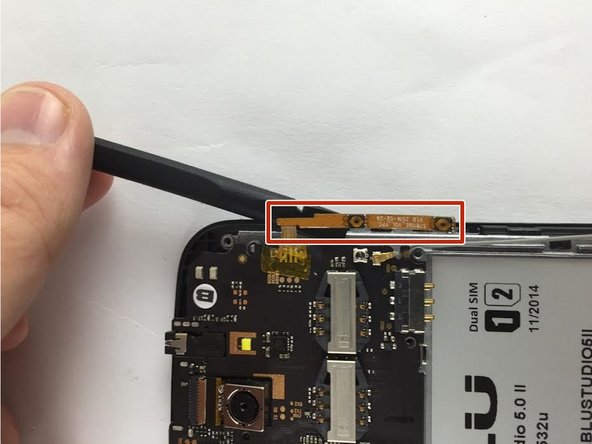
Locate the volume button on the right side of the phone after removing back case.
-
Using a spudger carefully wedge between button and phone and carefully pry away from the phone.
-
Once removed the yellow buttons will be visible.
-
To reassemble your device, follow these instructions in reverse order.
To reassemble your device, follow these instructions in reverse order.
Rückgängig: Ich habe diese Anleitung nicht absolviert.
2 weitere Nutzer:innen haben diese Anleitung absolviert.


