Diese Version enthält möglicherweise inkorrekte Änderungen. Wechsle zur letzten geprüften Version.
Was du brauchst
-
Dieser Schritt ist noch nicht übersetzt. Hilf mit, ihn zu übersetzen!
-
Using the T5 Torx screwdriver, remove the black screws on both sides of the outside of the headband.
-
4 (2 per side) Torx type T5, 3.5mm long screws.
-
-
Dieser Schritt ist noch nicht übersetzt. Hilf mit, ihn zu übersetzen!
-
Use the plastic opening tool to gently pry the black plastic hinge piece directly away from the headband as shown.
-
-
Dieser Schritt ist noch nicht übersetzt. Hilf mit, ihn zu übersetzen!
-
Remove the small metal hinges from their housings. There are a total of 4 hinges, two per side of the headphones.
-
-
Dieser Schritt ist noch nicht übersetzt. Hilf mit, ihn zu übersetzen!
-
Using a T5 Torx screwdriver, remove the silver screws from the silver segment of the headband.
-
4 (2 per side) Torx type T5, 4.0mm long screws.
-
-
-
Dieser Schritt ist noch nicht übersetzt. Hilf mit, ihn zu übersetzen!
-
Using the plastic opening tool, gently pry the headband cushion directly away from the plastic portion of the headband as shown. Pry the plastic portion a small amount and then move the opening tool sideways along on the headband. Repeat on both sides until the cushion separates from the top plastic part of the headband.
-
-
Dieser Schritt ist noch nicht übersetzt. Hilf mit, ihn zu übersetzen!
-
Carefully remove the metal band from each of the hinge housings on each side. These should come off quite easily, provided that you have removed the hinges as instructed in step 3.
-
Congratulations, you have completely removed the headband! This will allow for ease of accessibility to the speakers should you choose to delve further into the depths of your headphones.
-
-
Dieser Schritt ist noch nicht übersetzt. Hilf mit, ihn zu übersetzen!
-
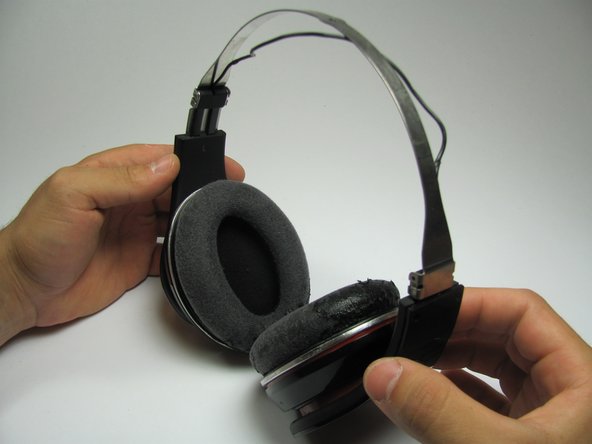
Pinch the ear cushion between your thumb and forefinger.
-
Carefully pull the cushion directly away from the earpiece.
-
Repeat for the other ear cushion.
-
-
Dieser Schritt ist noch nicht übersetzt. Hilf mit, ihn zu übersetzen!
-
Use the plastic opening tool to remove the black ring from the speaker. This will allow you to access the screws on the metal ring.
-
Congratulations, you now have access to the rest of the speaker!
-
The black lip is located on the back side of the ear cushion.
-
-
Dieser Schritt ist noch nicht übersetzt. Hilf mit, ihn zu übersetzen!
-
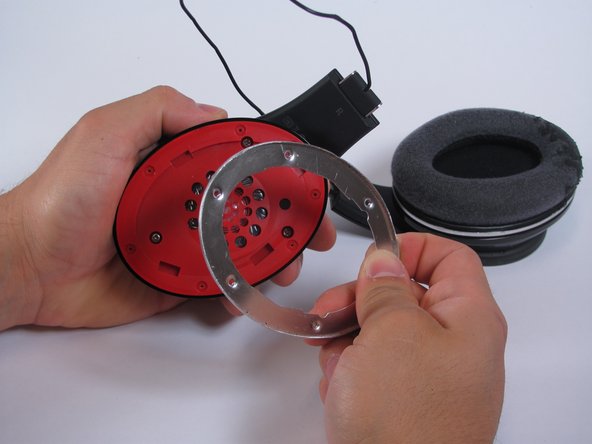
Use a 00 Phillips head screwdriver to remove the 3.9 mm Phillips screws holding the metal ring in place. There should be 7 in each earpiece.
-
Once all the screws are removed, the metal ring can be removed by hand.
-
-
Dieser Schritt ist noch nicht übersetzt. Hilf mit, ihn zu übersetzen!
-
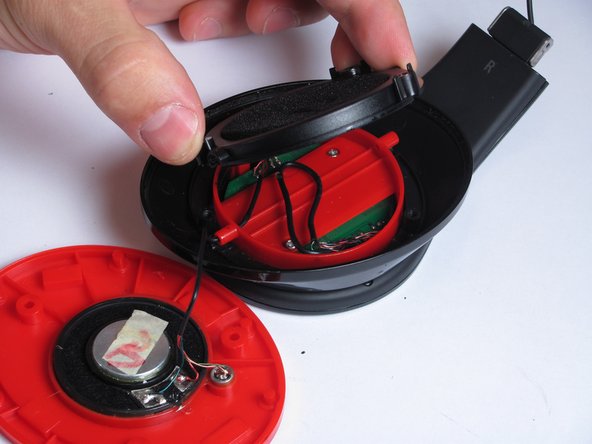
Use a 0 Phillips head screwdriver to remove the 8 mm Phillips screws holding the speaker assembly in place. There should be 3 screws in each earpiece.
-
When all screws have been removed, the speaker assembly can be moved by hand. Remove the speaker carefully since the wires connect to it on the backside.
-
-
Dieser Schritt ist noch nicht übersetzt. Hilf mit, ihn zu übersetzen!
-
Flipping the speaker assembly over reveals the speaker wire connections to the speaker itself.
-
Check that the wire is intact and not frayed anywhere.
-
If necessary, the wires can be de-soldered to disconnect and replace the speaker assembly.
-
-
Dieser Schritt ist noch nicht übersetzt. Hilf mit, ihn zu übersetzen!
-
If the black part directly beneath the speaker assembly is broken and needs to be replaced, it can be easily removed by hand.
-


Rückgängig: Ich habe diese Anleitung nicht absolviert.
13 weitere Nutzer:innen haben diese Anleitung absolviert.
Team

Cal Poly, Team 9-18, Regan Spring 2014 Mitglied von Cal Poly, Team 9-18, Regan Spring 2014
CPSU-REGAN-S14S9G18
4 Mitglieder
11 Anleitungen geschrieben
5 Kommentare
where do you find the replacement parts for what they really cost? not what beats by dre is trying to charge?
where can I buy the actual speaker that goes in the headphone
where can I buy the speakers for the Beats Studio headphones
where can I buy the actual speakers for the Beats Studio headphones