Zum Hauptinhalt wechseln

Bem Wireless HL2739B Speaker Replacement

Was du brauchst

  1. Bem Wireless HL2739B Speaker Replacement, Speaker Battery: Schritt 1, Bild 1 von 1
    • Peel the rubber cover back from the corner of the speaker to reveal the screw.

    • Repeat for the three remaining corners.

  2. Bem Wireless HL2739B Speaker Replacement: Schritt 2, Bild 1 von 3 Bem Wireless HL2739B Speaker Replacement: Schritt 2, Bild 2 von 3 Bem Wireless HL2739B Speaker Replacement: Schritt 2, Bild 3 von 3
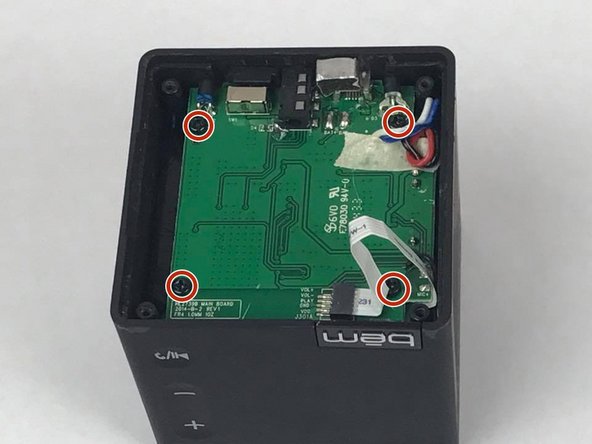
    • Use the J1 bit attached to the screwdriver to remove the four 10mm screws from the bottom of the speaker.

  3. Bem Wireless HL2739B Speaker Replacement: Schritt 3, Bild 1 von 1
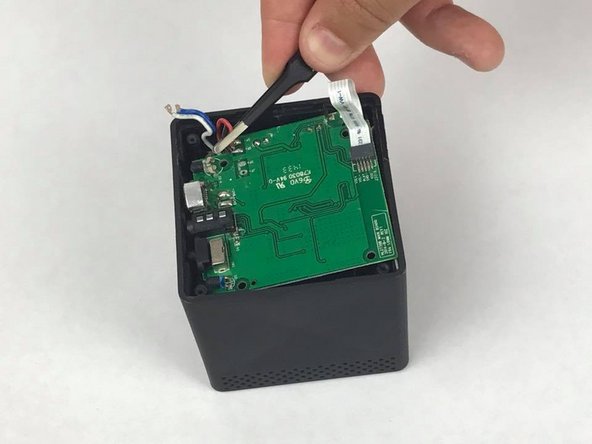
    • Lift the bottom cover away from the rest of the speaker.

    • There are wires connecting the battery and cover to the rest of the speaker. Be careful when removing the base cover.

    • Using the tweezers, pull the wires from the speaker's internal chip.

    • Be careful not to damage the chip when you remove the wires.

    • It will likely require soldering to reassemble the speaker after this step.

  4. Bem Wireless HL2739B Speaker Replacement: Schritt 4, Bild 1 von 1
    • Using a plastic opening tool, gently pry the battery from the metal base.

  5. Bem Wireless HL2739B Speaker Replacement: Schritt 5, Bild 1 von 1
    • Using tweezers, pull the wires from the metal base connection.

  6. Bem Wireless HL2739B Speaker Replacement, Speaker Motherboard: Schritt 6, Bild 1 von 2 Bem Wireless HL2739B Speaker Replacement, Speaker Motherboard: Schritt 6, Bild 2 von 2
    • Unscrew the four 10mm screws from the motherboard.

  7. Bem Wireless HL2739B Speaker Replacement: Schritt 7, Bild 1 von 2 Bem Wireless HL2739B Speaker Replacement: Schritt 7, Bild 2 von 2
    • Using tweezers, remove the blue/white and red/black wires from motherboard.

  8. Bem Wireless HL2739B Speaker Replacement: Schritt 8, Bild 1 von 2 Bem Wireless HL2739B Speaker Replacement: Schritt 8, Bild 2 von 2
    • Gently re-position the motherboard so you can access the bus wire connected to the speaker.

    • Remove bus wire from the speaker and lift out the motherboard.

  9. Bem Wireless HL2739B Speaker Replacement, Speaker: Schritt 9, Bild 1 von 1
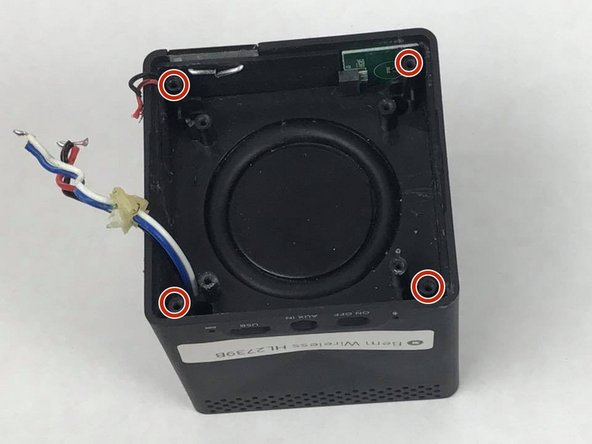
    • Using tweezers remove excess glue that may be covering the screw holes of the speaker's driver.

  10. Bem Wireless HL2739B Speaker Replacement: Schritt 10, Bild 1 von 2 Bem Wireless HL2739B Speaker Replacement: Schritt 10, Bild 2 von 2
    • Remove the four 10mm screws from speaker's base.

  11. Bem Wireless HL2739B Speaker Replacement: Schritt 11, Bild 1 von 2 Bem Wireless HL2739B Speaker Replacement: Schritt 11, Bild 2 von 2
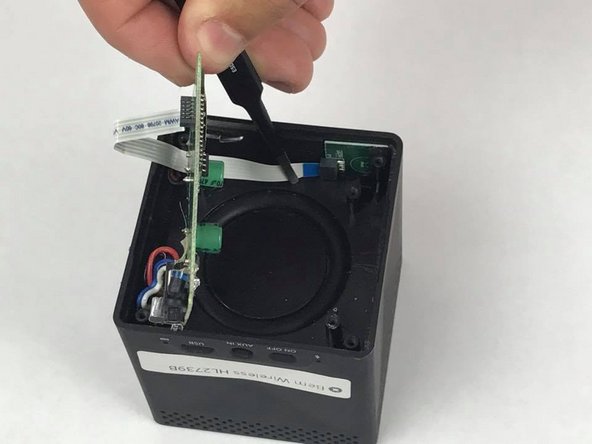
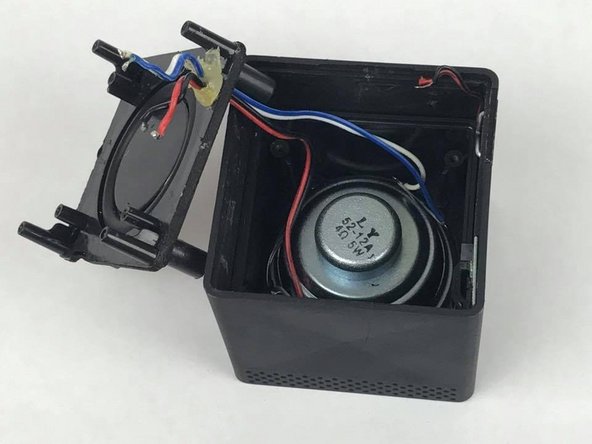
    • Using the metal spudger, pry up on the speaker's base.

    • This will require a moderate amount of force.

    • Pull the wire from the speaker's driver's base from the hole it was in.

  12. Bem Wireless HL2739B Speaker Replacement: Schritt 12, Bild 1 von 2 Bem Wireless HL2739B Speaker Replacement: Schritt 12, Bild 2 von 2
    • Remove the two 5mm screws from the speaker.

    • Lift the driver from the speaker.

Abschluss

To reassemble your device, follow these instructions in reverse order.

Ryan McQueeney

Mitglied seit: 02/28/17

446 Reputation

4 Anleitungen geschrieben

Team

USF Tampa, Team S2-G4, Nance Spring 2017 Mitglied von USF Tampa, Team S2-G4, Nance Spring 2017

USFT-NANCE-S17S2G4

4 Mitglieder

5 Anleitungen geschrieben

0 Kommentare

Kommentar hinzufügen

Seitenaufrufe:

Letzte 24 Stunden: 0

Letzte 7 Tage: 3

Letzte 30 Tage: 7

Insgesamt: 990