Zum Hauptinhalt wechseln
Gemeinsam reparieren - Jetzt registrieren

Bissell Bolt ION 2-in-1 Cordless Battery Replacement

Was du brauchst

    1. Bissell Bolt ION 2-in-1 Cordless Battery Replacement, Battery: Schritt 1, Bild 1 von 2 Bissell Bolt ION 2-in-1 Cordless Battery Replacement, Battery: Schritt 1, Bild 2 von 2
      • Push the silver button to disconnect the dirt dish from the handheld vacuum.

      Frag FixBot

      Kommentar hinzufügen

    2. Bissell Bolt ION 2-in-1 Cordless Battery Replacement: Schritt 2, Bild 1 von 2 Bissell Bolt ION 2-in-1 Cordless Battery Replacement: Schritt 2, Bild 2 von 2
      • Remove the four 4 .4cm screws using your P0 screwdriver head and screwdriver.

      • Remove the Bissell sign to remove the two 4.4cm screws, using your P0 screwdriver head and screwdriver.

      Frag FixBot

      Kommentar hinzufügen

    3. Bissell Bolt ION 2-in-1 Cordless Battery Replacement: Schritt 3, Bild 1 von 3 Bissell Bolt ION 2-in-1 Cordless Battery Replacement: Schritt 3, Bild 2 von 3 Bissell Bolt ION 2-in-1 Cordless Battery Replacement: Schritt 3, Bild 3 von 3
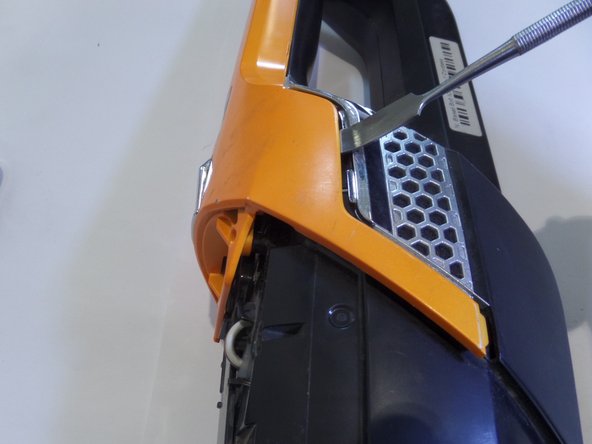
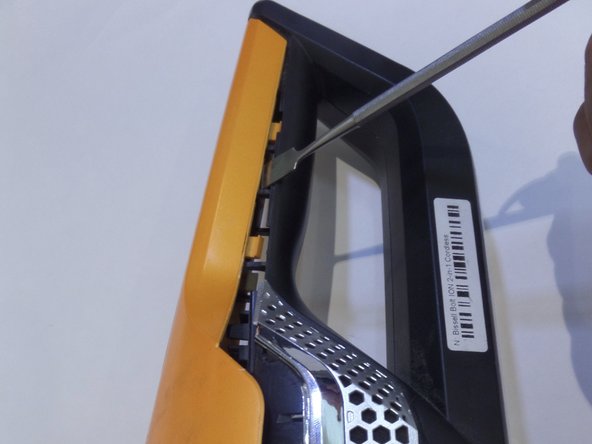
      • Using the metal spudger, insert and lift up to remove the frame from the body.

      • Move along the line and repeat on the other side.

      Frag FixBot

      Kommentar hinzufügen

    4. Bissell Bolt ION 2-in-1 Cordless Battery Replacement: Schritt 4, Bild 1 von 2 Bissell Bolt ION 2-in-1 Cordless Battery Replacement: Schritt 4, Bild 2 von 2
      • Remove the orange frame

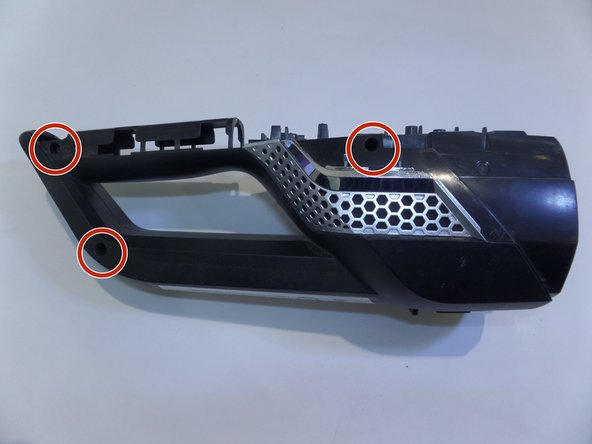
      • Remove the 3 screws on the right side of the vacuum.

      Frag FixBot

      Kommentar hinzufügen

    5. Bissell Bolt ION 2-in-1 Cordless Battery Replacement: Schritt 5, Bild 1 von 3 Bissell Bolt ION 2-in-1 Cordless Battery Replacement: Schritt 5, Bild 2 von 3 Bissell Bolt ION 2-in-1 Cordless Battery Replacement: Schritt 5, Bild 3 von 3
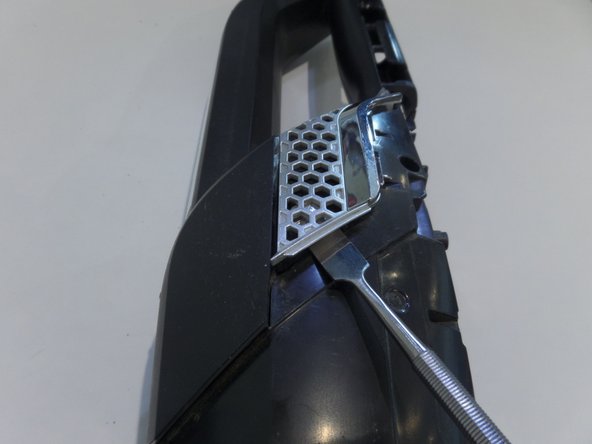
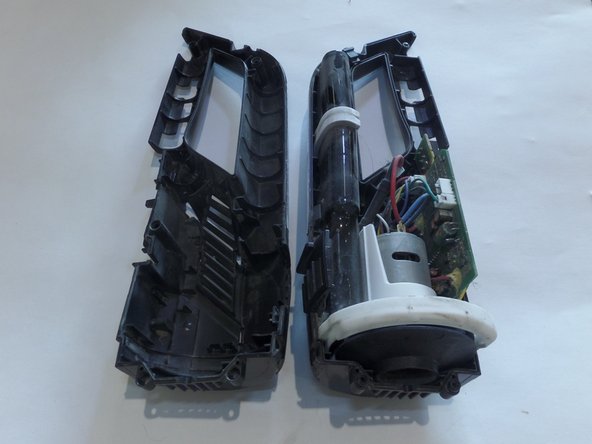
      • With metal spudger remove the metal clip on both sides.

      • Pull device apart using great force

      Frag FixBot

      Kommentar hinzufügen

Abschluss

To reassemble your device, follow these instructions in reverse order.

Rückgängig: Ich habe diese Anleitung nicht absolviert.

13 weitere Personen haben diese Anleitung absolviert.

Team

CSU Fullerton, Team S1-G3, Bruce Fall 2017 Mitglied von CSU Fullerton, Team S1-G3, Bruce Fall 2017

CSUF-BRUCE-F17S1G3

3 Mitglieder

60 Anleitungen geschrieben

24 Kommentare zur Anleitung

Do you have the specs for the replacement battery? Model number? Any suggested sources?

Don Abrams - Antwort Teilen

There is no replacement battery. The vacuum does have a two year warranty. If you call Bissell, they will replace the vacuum.

Marietta Eastham - Antwort Teilen

They will replace it with a refurbished one. In 6 months the same thing will happen and they don't warranty the replacement.

elarvick - Antwort Teilen

So why show how to take it apart if I can't replace the battery??

scott brumback - Antwort Teilen

Dang, nice tutorial for a rather obscure dissection. Thank you.

nhgccc1 - Antwort Teilen

Kommentar hinzufügen

Seitenaufrufe:

Letzte 24 Stunden: 5

Letzte 7 Tage: 21

Letzte 30 Tage: 60

Insgesamt: 19,682