Zum Hauptinhalt wechseln

Bissell OptiClean Cyclonic Vacuum Cord w/ Reel Replacement

Was du brauchst

  1. Bissell OptiClean Cyclonic Vacuum Cord w/ Reel Replacement, Flex Hose with Handle: Schritt 1, Bild 1 von 2 Bissell OptiClean Cyclonic Vacuum Cord w/ Reel Replacement, Flex Hose with Handle: Schritt 1, Bild 2 von 2
    • Grab hold of both the flex hose handle and the extension wand.

    • Pull straight out to detach the handle from the extension wand.

  2. Bissell OptiClean Cyclonic Vacuum Cord w/ Reel Replacement: Schritt 2, Bild 1 von 1
    • Locate the lock clip on the other end of the flex hose.

  3. Bissell OptiClean Cyclonic Vacuum Cord w/ Reel Replacement: Schritt 3, Bild 1 von 2 Bissell OptiClean Cyclonic Vacuum Cord w/ Reel Replacement: Schritt 3, Bild 2 von 2
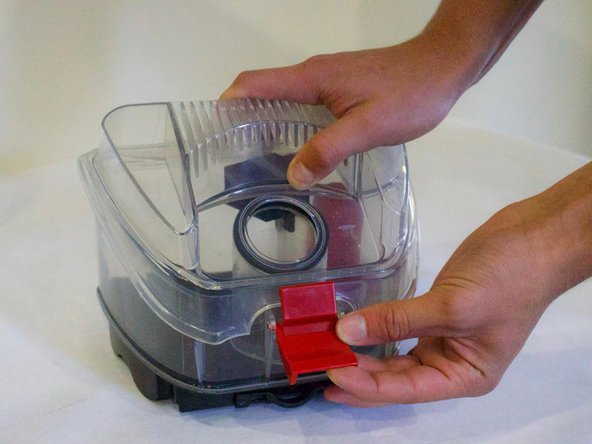
    • Hold down the lock clip to unlock the flex hose from the vacuum.

    • Remove the flex hose from the vacuum.

  4. Bissell OptiClean Cyclonic Vacuum Cord w/ Reel Replacement, Filters: Schritt 4, Bild 1 von 3 Bissell OptiClean Cyclonic Vacuum Cord w/ Reel Replacement, Filters: Schritt 4, Bild 2 von 3 Bissell OptiClean Cyclonic Vacuum Cord w/ Reel Replacement, Filters: Schritt 4, Bild 3 von 3
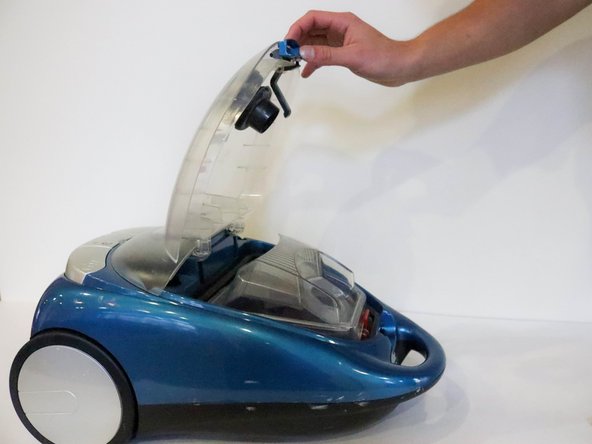
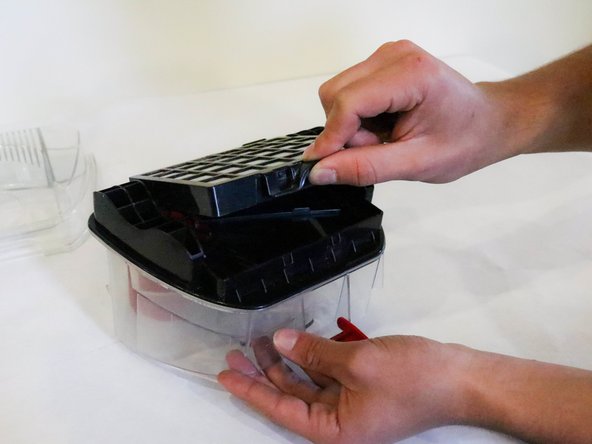
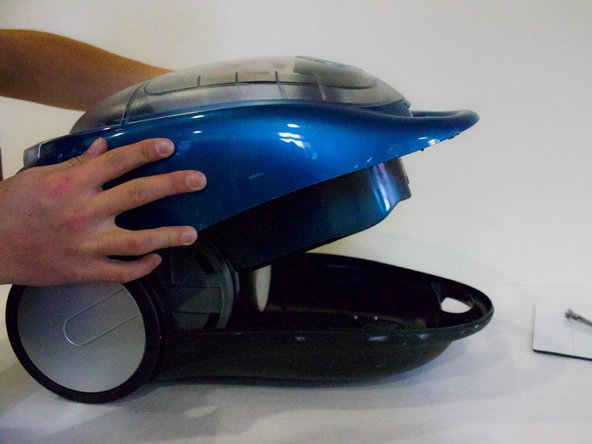
    • After removing hose, place vacuum on back and unclip the top compartment.

    • Open the compartment.

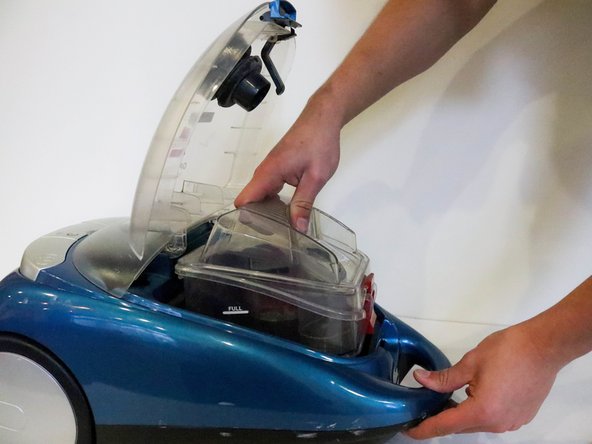
    • Pull the dirt collection box out of the vacuum.

  5. Bissell OptiClean Cyclonic Vacuum Cord w/ Reel Replacement: Schritt 5, Bild 1 von 3 Bissell OptiClean Cyclonic Vacuum Cord w/ Reel Replacement: Schritt 5, Bild 2 von 3 Bissell OptiClean Cyclonic Vacuum Cord w/ Reel Replacement: Schritt 5, Bild 3 von 3
    • Place dirt collection box to the side.

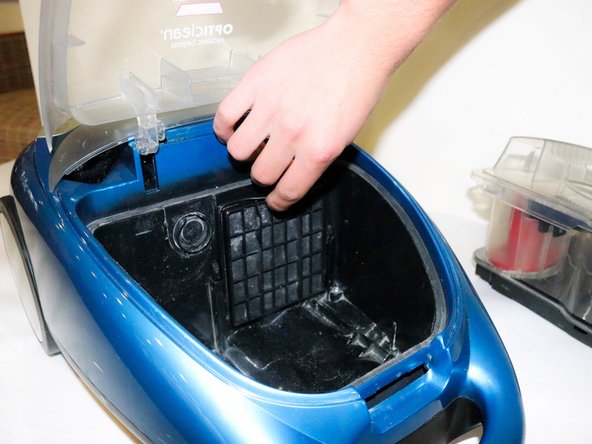
    • Locate the Pre-Motor Filter.

    • Pull the filter out by grabbing the pull tab on top.

  6. Bissell OptiClean Cyclonic Vacuum Cord w/ Reel Replacement: Schritt 6, Bild 1 von 3 Bissell OptiClean Cyclonic Vacuum Cord w/ Reel Replacement: Schritt 6, Bild 2 von 3 Bissell OptiClean Cyclonic Vacuum Cord w/ Reel Replacement: Schritt 6, Bild 3 von 3
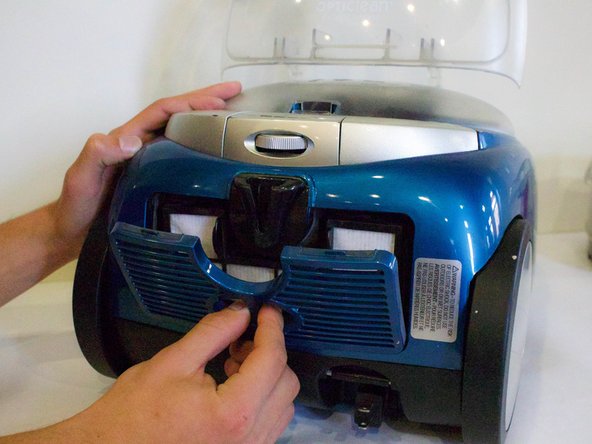
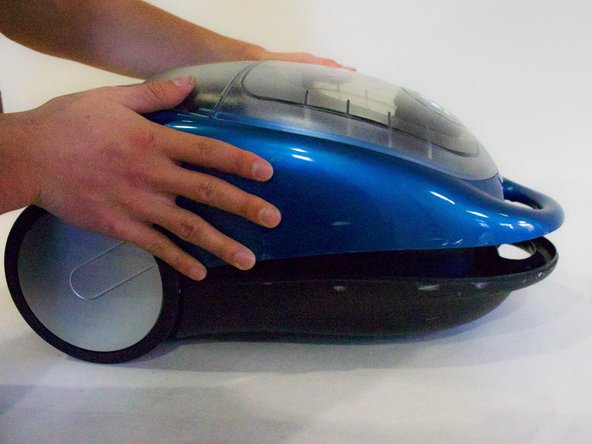
    • Turn vacuum around and locate the filter cover on the bottom.

    • Place fingers in the opening and pull off the filter cover.

    • Place fingers on each tab on the Post-Motor HEPA Media Filter and pull out.

  7. Bissell OptiClean Cyclonic Vacuum Cord w/ Reel Replacement: Schritt 7, Bild 1 von 3 Bissell OptiClean Cyclonic Vacuum Cord w/ Reel Replacement: Schritt 7, Bild 2 von 3 Bissell OptiClean Cyclonic Vacuum Cord w/ Reel Replacement: Schritt 7, Bild 3 von 3
    • Take filter out to clean or replace.

    • To clean Dirt Collection Box, unlatch lid and take off.

  8. Bissell OptiClean Cyclonic Vacuum Cord w/ Reel Replacement: Schritt 8, Bild 1 von 3 Bissell OptiClean Cyclonic Vacuum Cord w/ Reel Replacement: Schritt 8, Bild 2 von 3 Bissell OptiClean Cyclonic Vacuum Cord w/ Reel Replacement: Schritt 8, Bild 3 von 3
    • Flip Dirt Collection Box over and locate the push tab.

    • Push the Dirt Cup HEPA Media Filter up to take it off.

    • Picture 3 Shows all the filters taken out of the vacuum.

  9. Bissell OptiClean Cyclonic Vacuum Cord w/ Reel Replacement, Motor and Circuit Board: Schritt 9, Bild 1 von 2 Bissell OptiClean Cyclonic Vacuum Cord w/ Reel Replacement, Motor and Circuit Board: Schritt 9, Bild 2 von 2
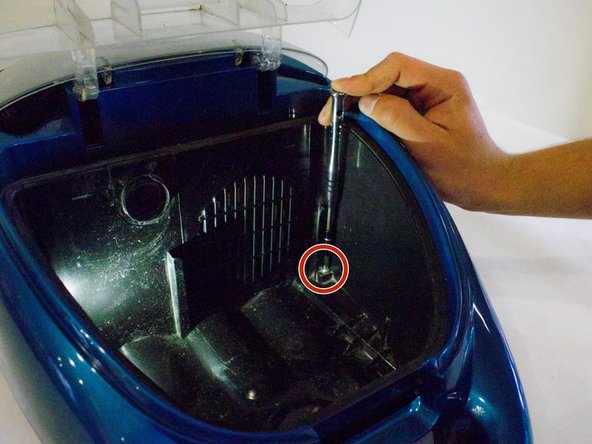
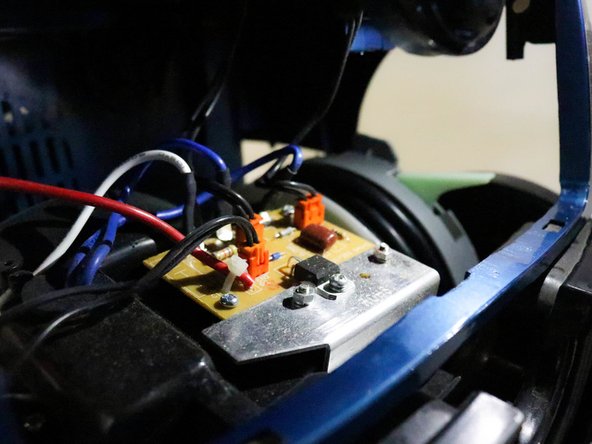
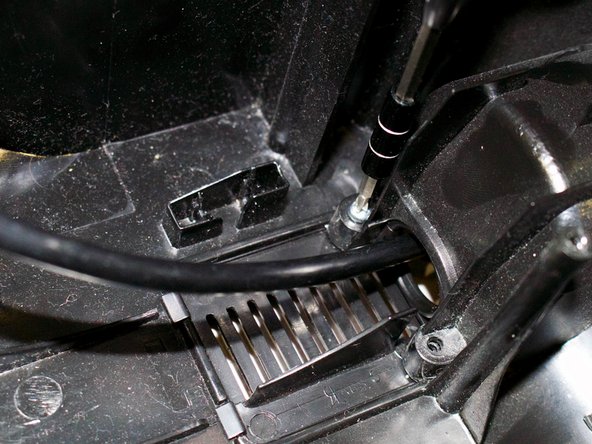
    • Unscrew the two screws underneath the dirt collection box inside the vacuum.

  10. Bissell OptiClean Cyclonic Vacuum Cord w/ Reel Replacement: Schritt 10, Bild 1 von 1
    • Flip over vacuum.

  11. Bissell OptiClean Cyclonic Vacuum Cord w/ Reel Replacement: Schritt 11, Bild 1 von 2 Bissell OptiClean Cyclonic Vacuum Cord w/ Reel Replacement: Schritt 11, Bild 2 von 2
    • Unscrew both screws on the bottom of the handle.

  12. Bissell OptiClean Cyclonic Vacuum Cord w/ Reel Replacement: Schritt 12, Bild 1 von 2 Bissell OptiClean Cyclonic Vacuum Cord w/ Reel Replacement: Schritt 12, Bild 2 von 2
    • Unscrew both screws near the wheels.

  13. Bissell OptiClean Cyclonic Vacuum Cord w/ Reel Replacement: Schritt 13, Bild 1 von 3 Bissell OptiClean Cyclonic Vacuum Cord w/ Reel Replacement: Schritt 13, Bild 2 von 3 Bissell OptiClean Cyclonic Vacuum Cord w/ Reel Replacement: Schritt 13, Bild 3 von 3
    • Flip over vacuum.

    • Gently lift off top.

    • Do not try to take off completely. There are still wires attached to the hull.

  14. Bissell OptiClean Cyclonic Vacuum Cord w/ Reel Replacement: Schritt 14, Bild 1 von 2 Bissell OptiClean Cyclonic Vacuum Cord w/ Reel Replacement: Schritt 14, Bild 2 von 2
    • Locate the circuit board.

  15. Bissell OptiClean Cyclonic Vacuum Cord w/ Reel Replacement: Schritt 15, Bild 1 von 3 Bissell OptiClean Cyclonic Vacuum Cord w/ Reel Replacement: Schritt 15, Bild 2 von 3 Bissell OptiClean Cyclonic Vacuum Cord w/ Reel Replacement: Schritt 15, Bild 3 von 3
    • Unplug each orange plug.

    • Make sure you remember which orange plug goes where!

  16. Bissell OptiClean Cyclonic Vacuum Cord w/ Reel Replacement: Schritt 16, Bild 1 von 2 Bissell OptiClean Cyclonic Vacuum Cord w/ Reel Replacement: Schritt 16, Bild 2 von 2
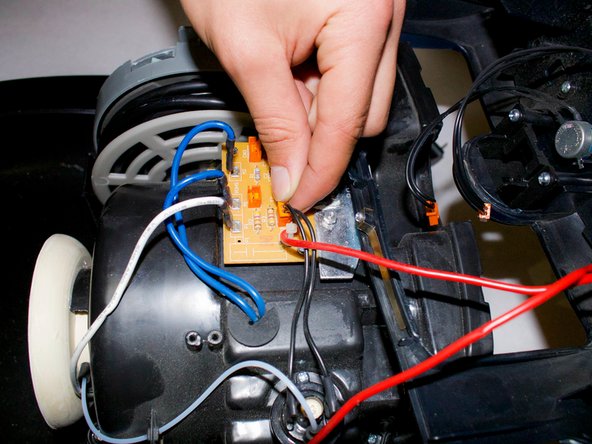
    • Unplug the red wires. The wires may be a little difficult to take off. If they are, you may use a pair of pliers to pull the wires off.

    • Make sure not to wiggle the wires, as that may break the metal holding them.

  17. Bissell OptiClean Cyclonic Vacuum Cord w/ Reel Replacement: Schritt 17, Bild 1 von 1
    • Remove the top.

  18. Bissell OptiClean Cyclonic Vacuum Cord w/ Reel Replacement: Schritt 18, Bild 1 von 2 Bissell OptiClean Cyclonic Vacuum Cord w/ Reel Replacement: Schritt 18, Bild 2 von 2
    • Unscrew the top two screws on the vacuum.

  19. Bissell OptiClean Cyclonic Vacuum Cord w/ Reel Replacement: Schritt 19, Bild 1 von 2 Bissell OptiClean Cyclonic Vacuum Cord w/ Reel Replacement: Schritt 19, Bild 2 von 2
    • Unscrew the back two scews.

  20. Bissell OptiClean Cyclonic Vacuum Cord w/ Reel Replacement: Schritt 20, Bild 1 von 3 Bissell OptiClean Cyclonic Vacuum Cord w/ Reel Replacement: Schritt 20, Bild 2 von 3 Bissell OptiClean Cyclonic Vacuum Cord w/ Reel Replacement: Schritt 20, Bild 3 von 3
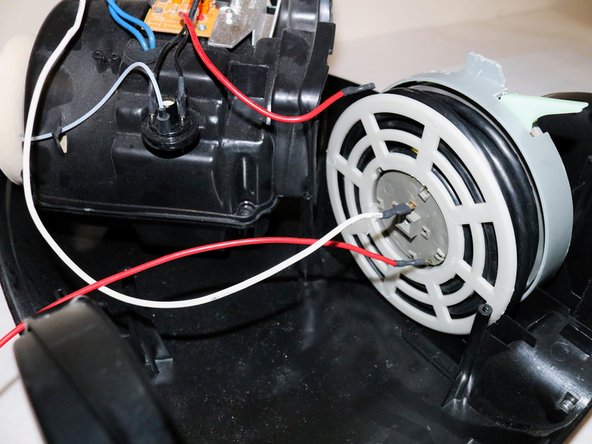
    • Lift motor and move it over the gain access to the spool.

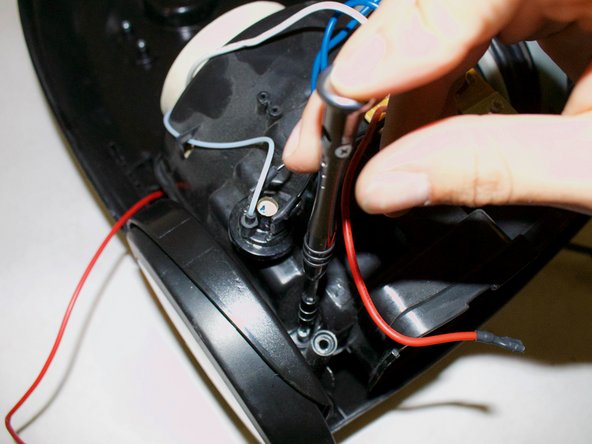
    • Unscrew the screw on the spool.

    • Remove the plastic circle.

  21. Bissell OptiClean Cyclonic Vacuum Cord w/ Reel Replacement: Schritt 21, Bild 1 von 1
    • Remove the motor.

    • And you are done!

  22. Bissell OptiClean Cyclonic Vacuum Cord w/ Reel Replacement, Cord w/ Reel: Schritt 22, Bild 1 von 1
    • Grab hold of the cord reel and cord. Make sure cord is retracted all the way in.

  23. Bissell OptiClean Cyclonic Vacuum Cord w/ Reel Replacement: Schritt 23, Bild 1 von 1
    • Pull on cord reel to remove it. You should hear a click indicating it has detached from the area indicated in the picture.

  24. Bissell OptiClean Cyclonic Vacuum Cord w/ Reel Replacement: Schritt 24, Bild 1 von 2 Bissell OptiClean Cyclonic Vacuum Cord w/ Reel Replacement: Schritt 24, Bild 2 von 2
    • Use screwdriver to remove screws from either side of the cord.

  25. Bissell OptiClean Cyclonic Vacuum Cord w/ Reel Replacement: Schritt 25, Bild 1 von 2 Bissell OptiClean Cyclonic Vacuum Cord w/ Reel Replacement: Schritt 25, Bild 2 von 2
    • Flip over vacuum.

    • Remove grate that holds the power cord as pictured.

  26. Bissell OptiClean Cyclonic Vacuum Cord w/ Reel Replacement: Schritt 26, Bild 1 von 2 Bissell OptiClean Cyclonic Vacuum Cord w/ Reel Replacement: Schritt 26, Bild 2 von 2
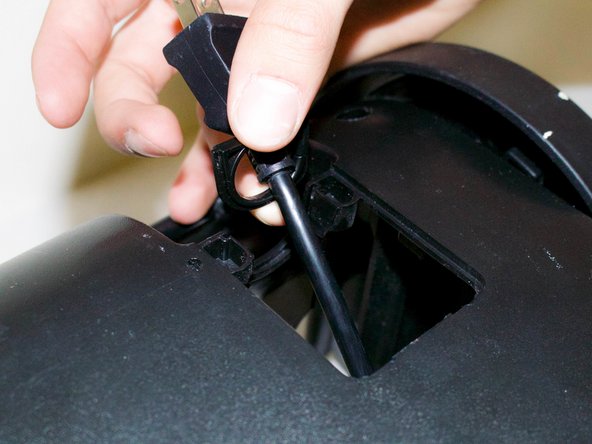
    • Grab hold of head of power cord and pull up.

    • Power cord should disconnect from vacuum body as pictured.

  27. Bissell OptiClean Cyclonic Vacuum Cord w/ Reel Replacement: Schritt 27, Bild 1 von 1
    • Remove the cord reel and cord from the vacuum body.

Abschluss

To reassemble your device, follow these instructions in reverse order.

Eine weitere Person hat diese Anleitung absolviert.

Rianne Paracuelles

Mitglied seit: 01/18/18

163 Reputation

1 Anleitung geschrieben

Team

Cal Poly, Team S12-G1, Banghart Winter 2018 Mitglied von Cal Poly, Team S12-G1, Banghart Winter 2018

CPSU-BANGHART-W18S12G1

5 Mitglieder

5 Anleitungen geschrieben

Ein Kommentar

- very good guide

Austin Marshall - Antwort

Kommentar hinzufügen

Seitenaufrufe:

Letzte 24 Stunden: 0

Letzte 7 Tage: 2

Letzte 30 Tage: 9

Insgesamt: 610