Zum Hauptinhalt wechseln

Bissell OptiClean Cyclonic Vacuum Nozzle Replacement

  1. Bissell OptiClean Cyclonic Vacuum Nozzle Replacement, Nozzle: Schritt 1, Bild 1 von 1
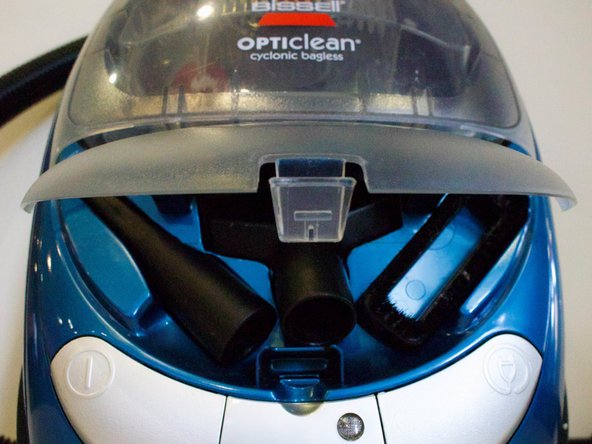
    • Place the vacuum upright and locate the nozzle attachment you want removed.

  2. Bissell OptiClean Cyclonic Vacuum Nozzle Replacement: Schritt 2, Bild 1 von 2 Bissell OptiClean Cyclonic Vacuum Nozzle Replacement: Schritt 2, Bild 2 von 2
    • Slide the attachment off of the end of the wand.

  3. Bissell OptiClean Cyclonic Vacuum Nozzle Replacement: Schritt 3, Bild 1 von 2 Bissell OptiClean Cyclonic Vacuum Nozzle Replacement: Schritt 3, Bild 2 von 2
    • The brush nozzle attachment has two parts, which can be separated and replaced.

    • The front of the vacuum has slots to hold up to two vacuum attachments. To store, simply place the attachment in the framed slots.

Abschluss

To reassemble your device, follow these instructions in reverse order.

Ein:e weitere:r Nutzer:in hat diese Anleitung absolviert.

Team

Cal Poly, Team S12-G1, Banghart Winter 2018 Mitglied von Cal Poly, Team S12-G1, Banghart Winter 2018

CPSU-BANGHART-W18S12G1

5 Mitglieder

5 Anleitungen geschrieben

Ein Kommentar

Kommentar hinzufügen

Seitenaufrufe:

Letzte 24 Stunden: 0

Letzte 7 Tage: 1

Letzte 30 Tage: 3

Insgesamt: 210