Einleitung
The jigsaw blade may become loose or is not fastening correctly when using the blade. This guide will identify the problem and show the user how to fix and interchange the holder.
Was du brauchst
-
-
Use a screwdriver to remove the first screws securing the base to the jigsaw.
-
Remove the second screw.
-
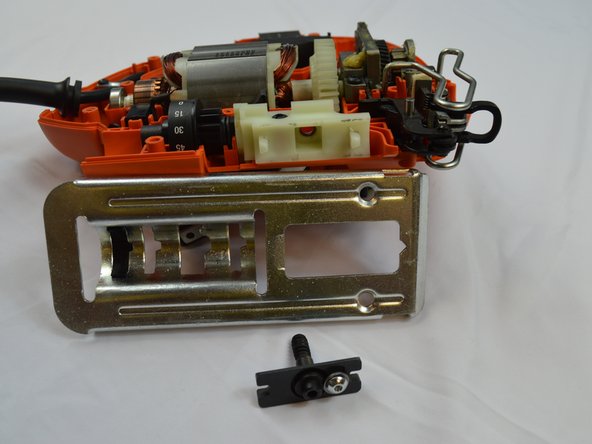
Remove the base of the jigsaw.
-
-
-
-
With the old jigsaw base off, replace it with the new base by following the steps in the reverse order.
-


To reassemble your device, follow these instructions in reverse order.
To reassemble your device, follow these instructions in reverse order.
Rückgängig: Ich habe diese Anleitung nicht absolviert.
Ein:e weitere:r Nutzer:in hat diese Anleitung absolviert.
Team

USF Tampa, Team 6-2, Eyestone Spring 2016 Mitglied von USF Tampa, Team 6-2, Eyestone Spring 2016
USFT-EYESTONE-S16S6G2
4 Mitglieder
4 Anleitungen geschrieben
Ein Kommentar
What a great website… I could never have known how to replace the blade holder… Or that I could get the correct parts…I got the replacement part. Then removed the old one, and replaced the new one. NO problem at all.. Thanks to Andrew and this website… With out it, would have to pay some one at a big price, and wait to have it fixed, as would have to send it off for the repair.. Or….. Just throw it away…
Thanks every one… I will share this site for sure…