Zum Hauptinhalt wechseln

Diese Anleitung enthält neuere Änderungen. Wechsel zur neuesten unüberprüften Version.

Blackberry Curve 8330 LCD Panel Replacement

Was du brauchst

  1. Blackberry Curve 8330 LCD Panel Replacement, Remove Back Cover: Schritt 1, Bild 1 von 1
    • We did not have an actual back cover or battery for the phone we were given. Therefore, the first couple of steps will be without pictures.

    • Hold the phone with the back side facing you.

    • Press down on the silver tab towards the bottom end of the phone.

    • Carefully lift up the back casing to reveal the battery.

  2. Blackberry Curve 8330 LCD Panel Replacement, Remove Battery: Schritt 2, Bild 1 von 1
    • Put your finger on the top left corner of the battery and lift the battery up and out of its housing.

    • The phone should now look like this.

  3. Blackberry Curve 8330 LCD Panel Replacement, Keyboard: Schritt 3, Bild 1 von 1
    • Remove the two top screws using a T5 Torx screwdriver.

  4. Blackberry Curve 8330 LCD Panel Replacement: Schritt 4, Bild 1 von 2 Blackberry Curve 8330 LCD Panel Replacement: Schritt 4, Bild 2 von 2
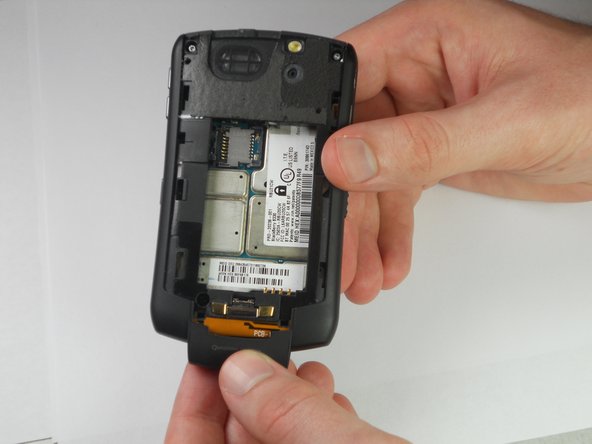
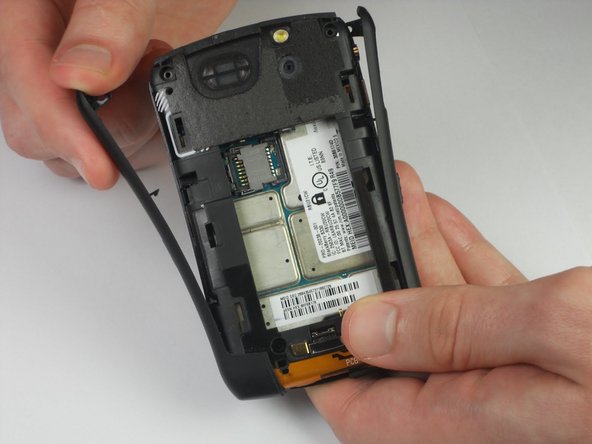
    • Use a plastic opening tool to pry the edges of the bottom cover until it snaps loose.

    • The cover will now pull off easily.

  5. Blackberry Curve 8330 LCD Panel Replacement: Schritt 5, Bild 1 von 2 Blackberry Curve 8330 LCD Panel Replacement: Schritt 5, Bild 2 von 2
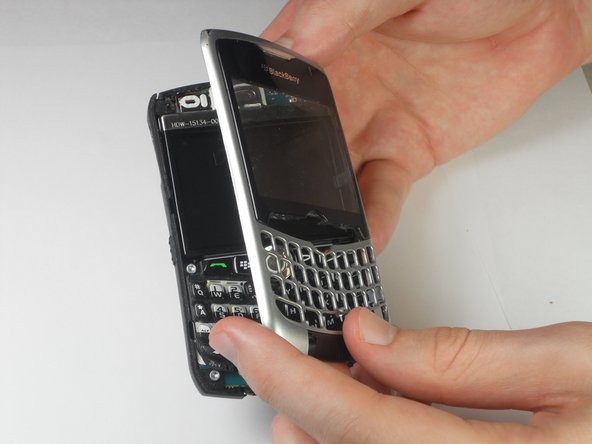
    • Use a plastic opening tool to pry between the front and back cover.

    • Start prying from wherever it is easiest to separate the silver and black plastic of the covers.

    • There are 5 securing clips on the front panel to disconnect.

    • Pry gently to prevent breaking the plastic clips when removing the front panel.

    • Once all the clips have been freed, the front cover will lift away from the phone.

  6. Blackberry Curve 8330 LCD Panel Replacement: Schritt 6, Bild 1 von 1
    • Lift the flexible keypad away from the device. It should come off easily.

  7. Blackberry Curve 8330 LCD Panel Replacement: Schritt 7, Bild 1 von 2 Blackberry Curve 8330 LCD Panel Replacement: Schritt 7, Bild 2 von 2
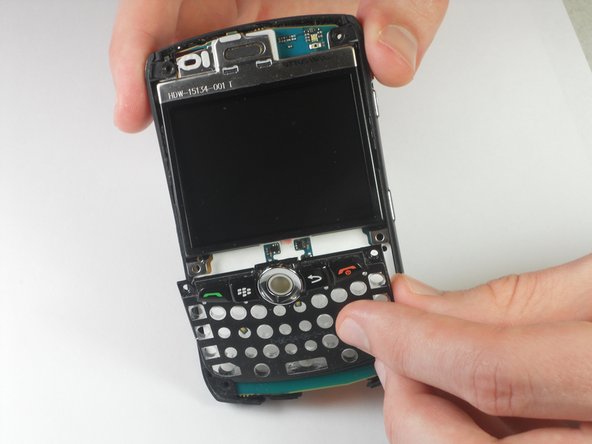
    • Use a T6 Torx Screwdriver to remove the four corner screws on the keyboard's housing.

    • Lift the keyboard frame away from the device.

    • There may be a small amount of adhesive at the bottom of the frame that needs to be pulled away.

  8. Blackberry Curve 8330 LCD Panel Replacement, LCD Panel: Schritt 8, Bild 1 von 2 Blackberry Curve 8330 LCD Panel Replacement, LCD Panel: Schritt 8, Bild 2 von 2
    • Detach each side casing by pulling them off gently from the phone.

  9. Blackberry Curve 8330 LCD Panel Replacement: Schritt 9, Bild 1 von 1
    • Remove the back housing from the mother board.

  10. Blackberry Curve 8330 LCD Panel Replacement: Schritt 10, Bild 1 von 1
    • Unhook the screen frame from the small tab at the top of the motherboard.

  11. Blackberry Curve 8330 LCD Panel Replacement: Schritt 11, Bild 1 von 2 Blackberry Curve 8330 LCD Panel Replacement: Schritt 11, Bild 2 von 2
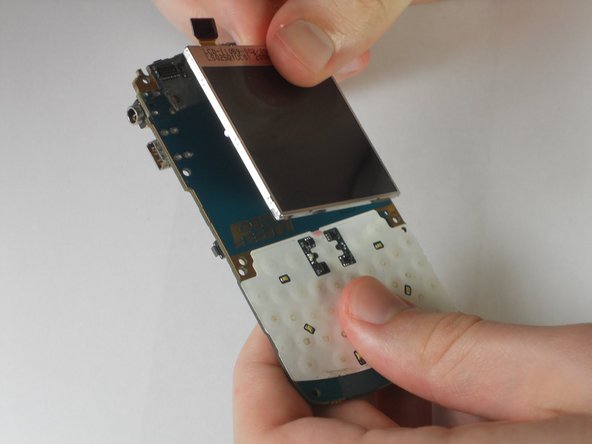
    • Using a plastic opening tool, detach the connector on the LCD screen from the motherboard.

    • There may be some adhesive behind the LCD screen. If needed, pry the LCD screen away from the motherboard using the plastic opening tool.

    • Remove the LCD screen from the motherboard

Abschluss

To reassemble your device, follow these instructions in reverse order.

Joshua Ramos

Mitglied seit: 04/04/12

65 Reputation

2 Anleitungen geschrieben

Team

Cal Poly, Team 14-11, Forte Spring 2012 Mitglied von Cal Poly, Team 14-11, Forte Spring 2012

CPSU-FORTE-S12S14G11

5 Mitglieder

5 Anleitungen geschrieben

0 Kommentare

Kommentar hinzufügen

Seitenaufrufe:

Letzte 24 Stunden: 0

Letzte 7 Tage: 0

Letzte 30 Tage: 0

Insgesamt: 1,554