Diese Version enthält möglicherweise inkorrekte Änderungen. Wechsle zur letzten geprüften Version.
Was du brauchst
-
Dieser Schritt ist noch nicht übersetzt. Hilf mit, ihn zu übersetzen!
-
Tools needed: Plastic pry tool, Philips screw driver
-
Issue description: When in auto zoom mode, the flash continue to show a flashing "50mm" (as appropriate for bounced lighting) even if the head is facing straight. It is caused by a broken wire that connects to a switch meant to inform the flash's electronics that the head is now locked in the "straight" position.
-
-
Dieser Schritt ist noch nicht übersetzt. Hilf mit, ihn zu übersetzen!
-
Start by removing the batteries from the flash
-
Pry off the plastic caps at the hinge for the vertical adjustment. They are attached with double sided adhesive tape only.
-
-
-
Dieser Schritt ist noch nicht übersetzt. Hilf mit, ihn zu übersetzen!
-
This reveals four screws on either side of the flash. Remove the upper two on either side.
-
You may find it helpful to remove the lower two as well to access the wire in the next step, but for now it is easier to keep them in place. This way you have fewer loose parts to handle.
-
-
Dieser Schritt ist noch nicht übersetzt. Hilf mit, ihn zu übersetzen!
-
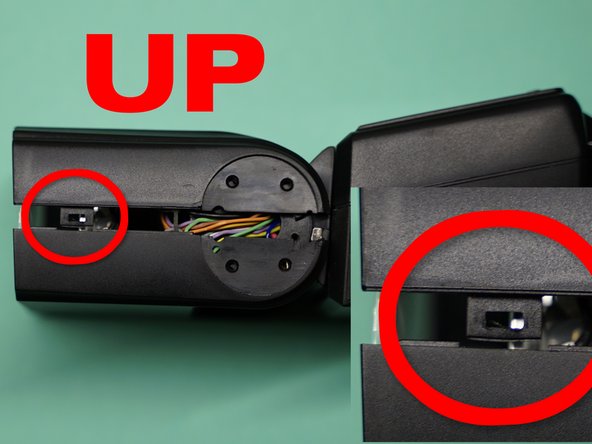
Pry the upper and the lower part of the upper housing apart using a plastic pry tool. Do so in a motion that pushes the upper half inwards (towards the electronics), so as to unlatch the little plastic latches (see next photo) before pulling the halves apart.
-
There is one latch towards the front (lens side) of the flash on either side. After loosening both the upper part of the housing can be removed.
-
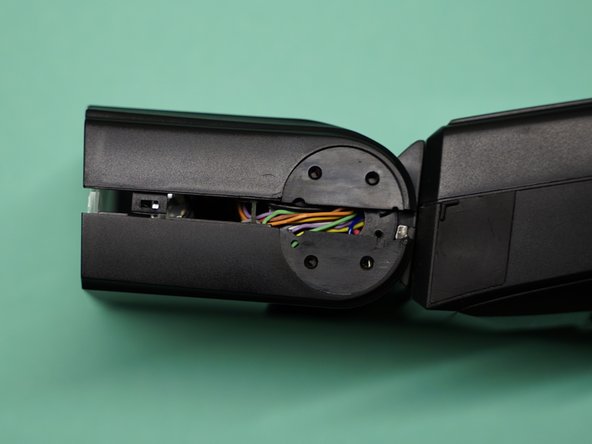
Remove the upper half of the cover completely.
-
-
Dieser Schritt ist noch nicht übersetzt. Hilf mit, ihn zu übersetzen!
-
Now remove the lower two screws as well. Pull away the lower half of the cover just enough to reveal the two contacts (1) and (2)
-
When the flash head is pointed straight, these two make contact and enable auto zoom.
-
In my case, the blue wire attached to the little gold spring at contact (1) was broken. Resoldering the wire to the rear end of the golden spring fixed the issue.
-
-
Dieser Schritt ist noch nicht übersetzt. Hilf mit, ihn zu übersetzen!
-
To reassemble proceed in opposite order. When positioning the plastic caps at the very end, note that they are not just flat discs, but need to be glued on in a specific rotational position.
-
Carefully move the head up and down a couple of times after reassembly to move the wires into their correct positions under the plastic cover. If you encounter significant resistance, you may have to disassemble again and check for the correct positioning of the wires.
-
Good luck!
-


Rückgängig: Ich habe diese Anleitung nicht absolviert.
Ein:e weitere:r Nutzer:in hat diese Anleitung absolviert.
