Zum Hauptinhalt wechseln

Boosted Board 1st Generation Pulley Bearings Replacement

Was du brauchst

  1. Boosted Board 1st Generation Pulley Bearings Replacement, Rear Wheels: Schritt 1, Bild 1 von 2 Boosted Board 1st Generation Pulley Bearings Replacement, Rear Wheels: Schritt 1, Bild 2 von 2
    • Loosen the two 16.74 mm motor mount hex nut screws with a 9/64" Allen wrench.

    • Do Not Remove the Screws.

  2. Boosted Board 1st Generation Pulley Bearings Replacement: Schritt 2, Bild 1 von 1
    • Compress the motor mount back towards the wheel.

    • While keeping the motor mount compressed, tighten one of the hex nuts that you loosened in the previous step.

    • The motor mounts are spring tensioned so it is necessary compress them to loosen the belts.

  3. Boosted Board 1st Generation Pulley Bearings Replacement: Schritt 3, Bild 1 von 2 Boosted Board 1st Generation Pulley Bearings Replacement: Schritt 3, Bild 2 von 2
    • Remove the axel nut with a 1/2" socket wrench

  4. Boosted Board 1st Generation Pulley Bearings Replacement: Schritt 4, Bild 1 von 3 Boosted Board 1st Generation Pulley Bearings Replacement: Schritt 4, Bild 2 von 3 Boosted Board 1st Generation Pulley Bearings Replacement: Schritt 4, Bild 3 von 3
    • Rotate and pull counterclockwise until the wheel comes off the axle completely.

    • The front washer will come off with the wheel.

    • Remove the back washer from the axle.

    • Replacing the wheel requires the bearings to be switched into the new wheel.

  5. Boosted Board 1st Generation Pulley Bearings Replacement, Pulley Bearings: Schritt 5, Bild 1 von 2 Boosted Board 1st Generation Pulley Bearings Replacement, Pulley Bearings: Schritt 5, Bild 2 von 2
    • Use one finger to pull out the pulley bearing.

    • A good technique is to go around in a circle and lift from underneath the bearing in a carving motion.

  6. Boosted Board 1st Generation Pulley Bearings Replacement: Schritt 6, Bild 1 von 3 Boosted Board 1st Generation Pulley Bearings Replacement: Schritt 6, Bild 2 von 3 Boosted Board 1st Generation Pulley Bearings Replacement: Schritt 6, Bild 3 von 3
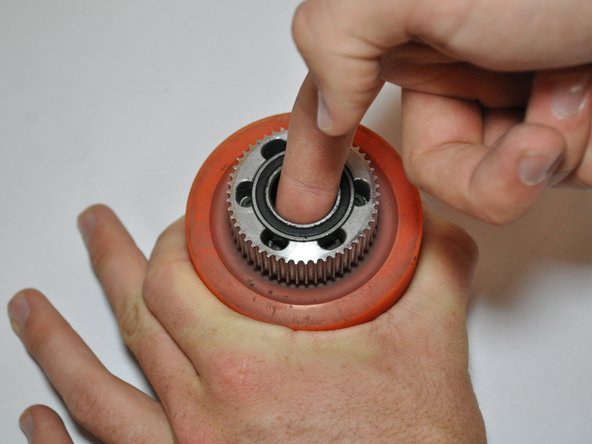
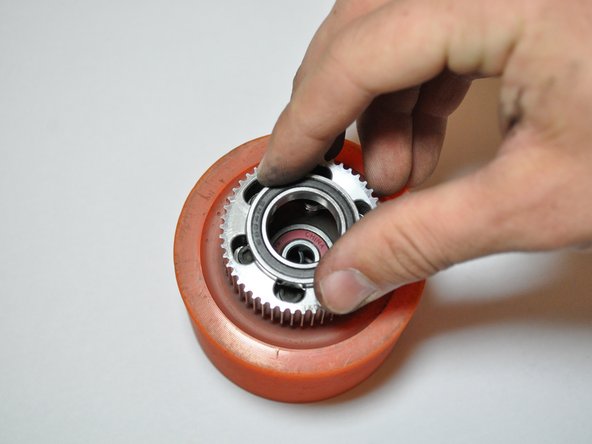
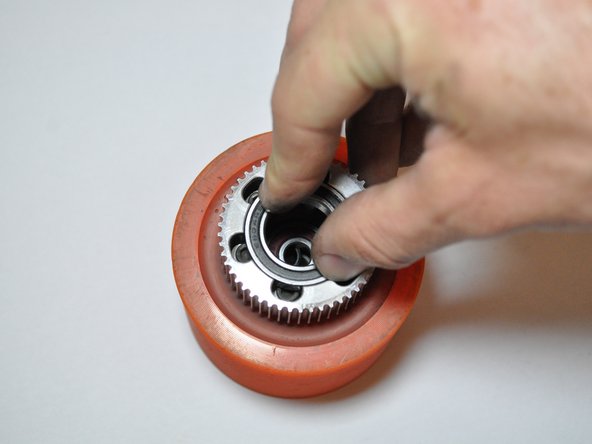
    • Place the new pulley bearing inside the gear hole and use two fingers to push down evenly until it slides into place.

    • The bearing should be flush with the gear

Abschluss

To reassemble your device, follow these instructions in reverse order.

Emily Imfeld

Mitglied seit: 10/06/16

532 Reputation

4 Anleitungen geschrieben

Team

Cal Poly, Team 15-7, Livingston Fall 2016 Mitglied von Cal Poly, Team 15-7, Livingston Fall 2016

CPSU-LIVINGSTON-F16S15G7

4 Mitglieder

6 Anleitungen geschrieben

Ein Kommentar

you mentioned cleaning bearings how do you go about that? (if rep[lacing not an option at moment) Also I noticed a single Large Bearing in my replacement kit, what is that and where do I replace it as I don’t see where it could be (I have a first Gen)

Rick Gram - Antwort

Kommentar hinzufügen

Seitenaufrufe:

Letzte 24 Stunden: 0

Letzte 7 Tage: 1

Letzte 30 Tage: 2

Insgesamt: 1,573