Diese Version enthält möglicherweise inkorrekte Änderungen. Wechsle zur letzten geprüften Version.
Was du brauchst
-
Dieser Schritt ist noch nicht übersetzt. Hilf mit, ihn zu übersetzen!
-
Using your thumbnail or a coin, push in the slotted knob on the battery and turn it counterclockwise to unlock the battery.
-
-
Dieser Schritt ist noch nicht übersetzt. Hilf mit, ihn zu übersetzen!
-
Carefully pull the battery away from the back of the system.
-
-
-
Dieser Schritt ist noch nicht übersetzt. Hilf mit, ihn zu übersetzen!
-
On the new battery, make sure the slot in the knob on the battery is in a horizontal position.
-
Insert the battery into the multi-pin connector.
-
-
Dieser Schritt ist noch nicht übersetzt. Hilf mit, ihn zu übersetzen!
-
Push in the slotted knob and turn it clockwise until the slot is vertical. This locks the battery in place.
-
-
Dieser Schritt ist noch nicht übersetzt. Hilf mit, ihn zu übersetzen!
-
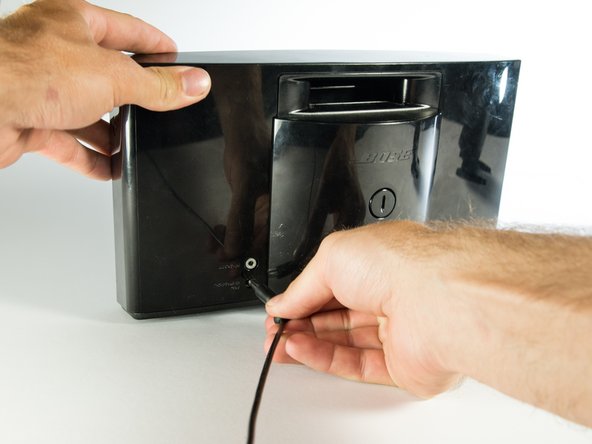
Connect the power supply and charge the battery.
-


Rückgängig: Ich habe diese Anleitung nicht absolviert.
4 weitere Nutzer:innen haben diese Anleitung absolviert.
Team

Cal Poly, Team 4-1, Maness Spring 2015 Mitglied von Cal Poly, Team 4-1, Maness Spring 2015
CPSU-MANESS-S15S4G1
4 Mitglieder
5 Anleitungen geschrieben
8 Kommentare
I think it would be cool to show a Teardown of the Bose SoundDock Portable v2 Battery.
I agree. These batteries seem prone to failure and I’d like to replace the cells or whatever it is that is the failure point.
Thanks for your easy and concise help.
Battery is repairable.
There are 4 screws under plastic plugs under sticker. They are one way heads :( use force or a drill.
Locking thingy removal - push the cross pin through - pliers or vise grips to grab and pull out completely. Keep an eye on where spring went.
There may be a bit of glue or tape holding cover too.
4 x 18650 Li-ion cells in 2 banks at each side of the charging board which is held down by 5 screws. Some adhesive was used to hold the cells to the back.
Use meter to check. Mine had one cell at 0V so that was the culprit.
Remove any bad cells by cutting the glue about the temp sensors to carefully get them out of the way. Then cut the cell tags - careful not to short anything as there is charge about. I found it faster to cut tags but you could unglue all cells and lift the board and do that way. My replacement cell came from a Dell laptop pack. Glue the new battery in place (I used automotive trim tape as it was handy) and solder the new cell. Reglue temp sensors.
Reassemble with some new screws.
Hi. How do you push the cross pin through? I can’t