Zum Hauptinhalt wechseln

Bose SoundDock Portable v2 Docking System Board Replacement

Was du brauchst

  1. Bose SoundDock Portable v2 Docking System Board Replacement, Docking System Board: Schritt 1, Bild 1 von 1
    • Lay the speaker flat on its back, balancing on the battery.

    • Remove the four rubber disks that cover the screws on the bottom of the speaker.

    • Follow the battery replacement guide to remove the battery

  2. Bose SoundDock Portable v2 Docking System Board Replacement: Schritt 2, Bild 1 von 1
    • Now, remove the four 16mm #2 screws on the bottom of the speaker. This will allow the bottom plate to be removed.

    • It may be easier to the remove the battery so that the speaker will lay flat on the table.

  3. Bose SoundDock Portable v2 Docking System Board Replacement: Schritt 3, Bild 1 von 1
    • Carefully remove the bottom panel of the speaker.

    • You may have to rock the panel back and forth to get it to slide off the plastic pegs.

  4. Bose SoundDock Portable v2 Docking System Board Replacement: Schritt 4, Bild 1 von 1
    • Once the panel is removed you will see a ribbon connecting the dock to the speaker. Be careful to orient the speaker so that you can work on the dock connector without pulling on the ribbon!

  5. Bose SoundDock Portable v2 Docking System Board Replacement: Schritt 5, Bild 1 von 2 Bose SoundDock Portable v2 Docking System Board Replacement: Schritt 5, Bild 2 von 2
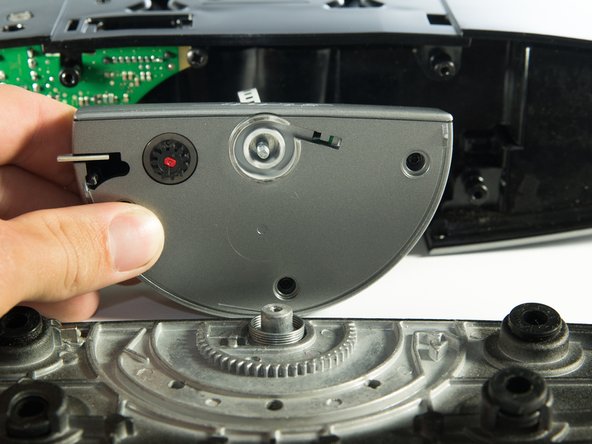
    • Use a T15 Torx screwdriver to remove the dock from the base. Be careful not to damage the ribbon during this step.

    • There is a torsion spring under the dock. When removed, this spring has a tendency to fly out. To avoid this, loosen the dock until it is able to move freely. Rotate it so that there is no tension in the spring. Then, you are free to undo the screw completely.

  6. Bose SoundDock Portable v2 Docking System Board Replacement: Schritt 6, Bild 1 von 2 Bose SoundDock Portable v2 Docking System Board Replacement: Schritt 6, Bild 2 von 2
    • Remove the three 6mm T8 torques screws that hold the dock connector together and pull the top and bottom pieces apart.

    • There are some small parts that may fall out when the plastic pieces are separated. To minimize this, lay the piece with the dock connector facing down.

  7. Bose SoundDock Portable v2 Docking System Board Replacement: Schritt 7, Bild 1 von 2 Bose SoundDock Portable v2 Docking System Board Replacement: Schritt 7, Bild 2 von 2
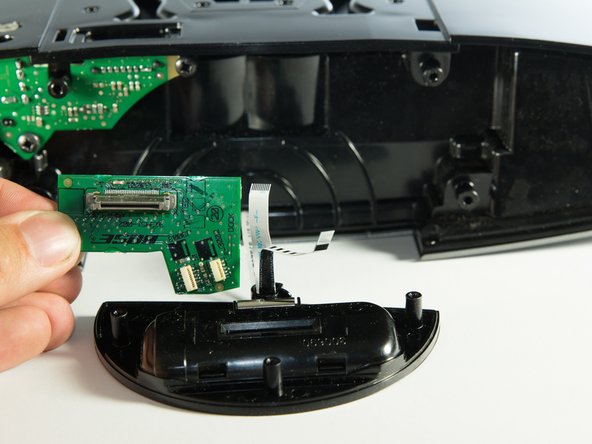
    • Once the pieces are separated, the dock connector can be lifted out of the slot.

    • Using tweezers or your fingers, unplug the two ribbon connectors from the board.

Abschluss

To reassemble your device, follow these instructions in reverse order.

6 weitere Nutzer:innen haben diese Anleitung absolviert.

Evan Low

Mitglied seit: 04/14/15

551 Reputation

4 Anleitungen geschrieben

Team

Cal Poly, Team 4-1, Maness Spring 2015 Mitglied von Cal Poly, Team 4-1, Maness Spring 2015

CPSU-MANESS-S15S4G1

4 Mitglieder

5 Anleitungen geschrieben

Ein Kommentar

How can I tell if it is my IPOD or the Bose system that needs to be repaired?

Ron Adams - Antwort

Kommentar hinzufügen

Seitenaufrufe:

Letzte 24 Stunden: 1

Letzte 7 Tage: 8

Letzte 30 Tage: 58

Insgesamt: 21,277