Diese Übersetzung wurde maschinell erstellt und noch nicht von einem Menschen überprüft. Sprichst du diese Sprache? Schau es dir an.

Boston Elektrischen Bleistiftspitzer-Schneider ersetzen

Randy Yonce und 3 weitere Mitwirkende
Zuletzt aktualisiert am 17. Aug 2026
Aufrufe: 10.485
Statistik anzeigen:
- Letzte 24 Stunden:
- 6
- Letzte 7 Tage:
- 41
- Letzte 30 Tage:
- 193
- Insgesamt:
- 10.485
Kommentare: 6
6 Kommentare zur Anleitung.
Zu den KommentarenAbgeschlossen: 1 2
1 Person hat diese Anleitung bereits erfolgreich absolviert. Du auch?
2 Personen haben diese Anleitung schon erfolgreich absolviert, unter anderem du. Gut gemacht!
Favoriten: 0 1
Diese Anleitung hat noch niemand unter Favoriten gespeichert (und abonniert). Mach du den Anfang!
1 Person hat diese Anleitung als Favorit gespeichert (und abonniert) – du!
Einleitung
Zu Schritt 1 der Anleitung ↓Wenn dein Bleistiftspitzer den Bleistift nicht mehr richtig oder ungleichmäßig spitzt, ist es möglicherweise an der Zeit, den Schneider auszutauschen. Ersatzschneider findest du hier.
Was du brauchst
Ersatzteile
Werkzeuge

-
-
-
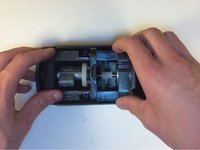
Entnimm das Auffangfach an der Vorderseite des Anspitzers und leere die Bleistiftspäne aus.
 Frag FixBot
-
-
-
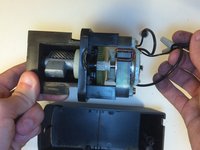
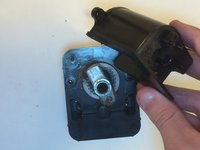
Hebe den Motor und das Schneidewerkzeug aus dem Gehäuseoberteil des Schärfers.
-
Bewege die Drähte vorsichtig, damit das Gehäuse vollständig abgenommen werden kann.
-
-
-
Drehe die beiden Schrauben auf der Vorderseite des Schärfers heraus, um das Schutzgehäuse um den Schneider zu entfernen.
-
-
-
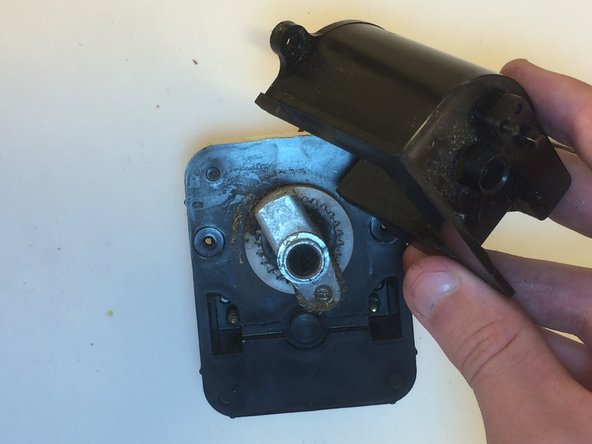
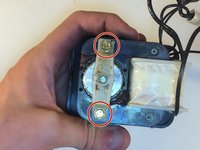
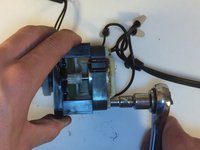
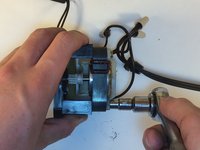
Entferne die beiden Bolzen an der Rückseite des Schärfers mit dem Steckschlüssel.
-
-
-
Trenne vorsichtig den Motor und das Gehäuse um den Motor vom Schneider.
-
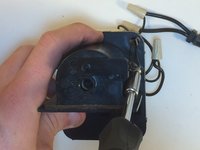
Führe die Kabel durch die Öffnungen im Gehäuse, um sie vom Schneideteil des Schärfers zu lösen.
-
-
-
-
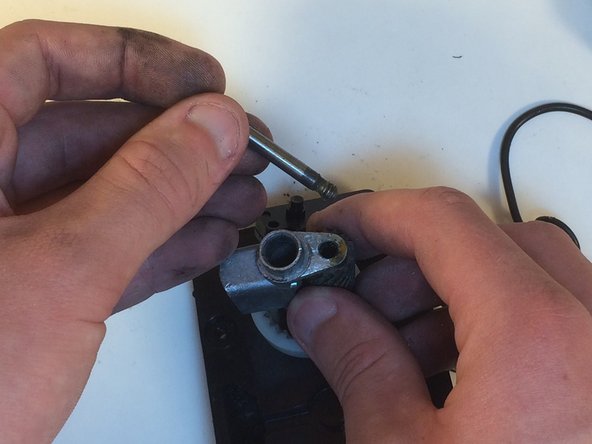
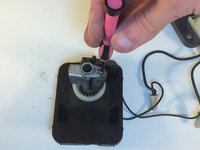
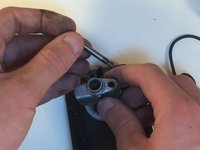
Drehe den Spitzer mit einem kleinen Schlitzschraubendreher heraus und entferne die lange Schraube, um den Schneider zu lösen.
-
-








Um dein Gerät wieder zusammenzubauen, folge den Schritten dieser Anleitung in umgekehrter Reihenfolge.
Rückgängig: Ich habe diese Anleitung nicht absolviert.
Eine weitere Person hat diese Anleitung absolviert.

Team

Cal Poly, Team 10-1, Green Fall 2015 Mitglied von Cal Poly, Team 10-1, Green Fall 2015
CPSU-GREEN-F15S10G1
4 Mitglieder
60 Anleitungen geschrieben
6 Kommentare zur Anleitung
Great instructions on replacing the sharpener. My father took the model 18 apart but failed to document with pictures on the step by step breakdown. I'm left with out a crucial part of the re- installment. The question is in step 7, the piece right behind and below the screw driver is a plastic piece with two wires comming out of it. where does this piece fit? any help or redirection to a site that might have this info. direct reply at
thopper1@satx.rr.com
tah33 - that part is the switch that senses the pencil to turn on power. There is a plastic piece that goes over the top of the cutting mechanism to help guide all the shavings down into the shavings tray. The switch goes onto the front of that piece. If you look at step 4 it shows the switch mounted to the piece I am talking about, Randy (the author) calls it the protective case.
The link to purchase a new cutting blade brings you to Amazon, and it's not available. Any other place that FOR sure the part is available?
