Was du brauchst
-
-
Flip the mouse over and peel off the stickers on the perimeter of the bottom of the mouse.
-
-
-
Use the Phillips #1 screwdriver to remove four 5 mm screws from the bottom of the mouse.
-
Use the Phillips #1 screwdriver to remove the two 9 mm screws from the bottom of the mouse.
-
-
-
Touch your capacitor discharge tool to the capacitor leads on the board to release the stored energy. If leads are inaccessible, wait until you've removed the board from the mouse body.
-
-
-
-
Use a spudger to pry underneath the white plug and pop it out to disconnect the upper board from the lower board.
-
-
-
Locate the 5 mm silver flat head mounting screws (2) to the left and right of the scroll wheel and remove with the Phillips #1 screwdriver.
-
-
-
Locate the snaps on the bottom corners of the mouse side panels and pop the indicated snaps out, using a spudger or your fingernail.
-
-
-
Repeat Step 6 for the opposite side panel in order to detach both sides from the base of the mouse.
-
-
-
Grab the sides of the mouse and lift them up to detach from the base of the mouse.
-
-
-
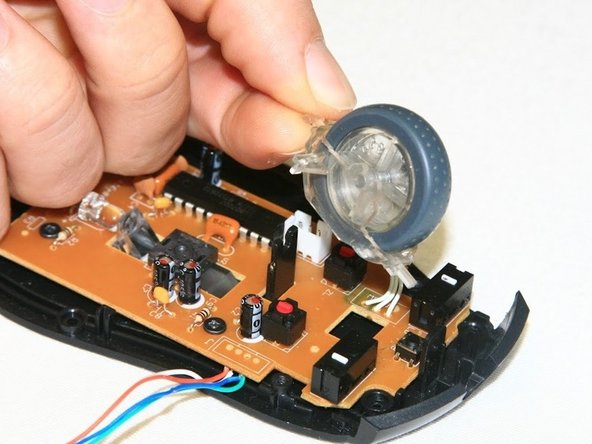
Pop the scroll wheel out of the snap holding it in place. You can use your finger or a spudger to do so.
-
-
-
Locate the four 5 mm black flat head screws on the corners of the bottom board.
-
Unscrew these four black screws.
-
-
-
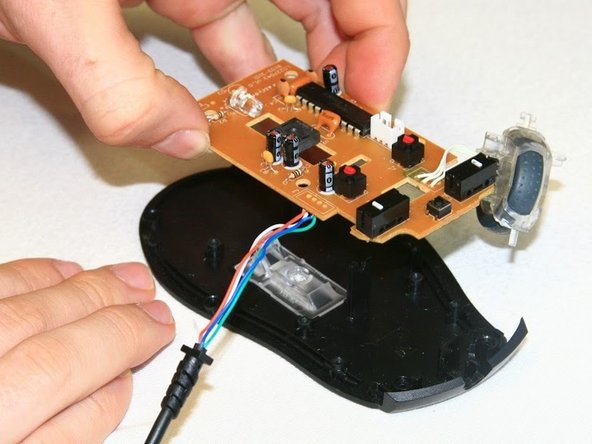
Lift the bottom board up to remove from its mounting posts. This will separate it completely from the bottom panel of the mouse.
-


To reassemble your device, follow these instructions in reverse order.
To reassemble your device, follow these instructions in reverse order.
Rückgängig: Ich habe diese Anleitung nicht absolviert.
2 weitere Nutzer:innen haben diese Anleitung absolviert.
Team

Cal Poly, Team 18-36, Regan Winter 2013 Mitglied von Cal Poly, Team 18-36, Regan Winter 2013
CPSU-REGAN-W13S18G36
3 Mitglieder
30 Anleitungen geschrieben