Einleitung
A friend donated his P5s whose left channel had died (like mine). I was able to use his working right driver on the left side.
Was du brauchst
-
-
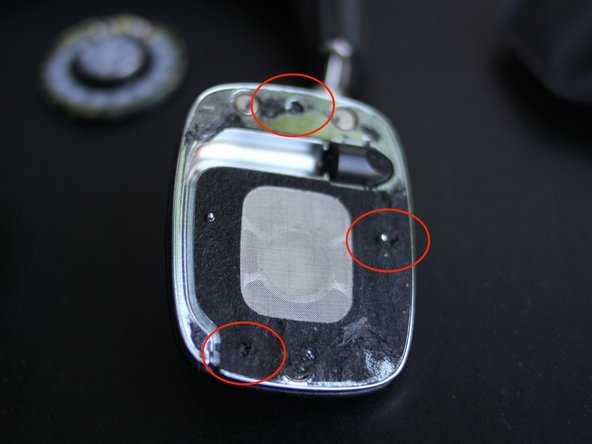
Each side uses three Phillips screws, which are covered in fabric. You can either gently scrape away the fabric in the areas indicated, or insert your driver directly. I did the former but it can bunch up the fabric.
-
This is the right side.
-
-
-
-
Each side uses three Phillips screws, which are covered in fabric. You can either gently scrape away the fabric in the areas indicated, or insert your driver directly. I did the former but it can bunch up the fabric.
-
This is the left side.
-
-
-
Gently flip each driver area to the side - it will still be connected to the headband with two soldered wires.
-
De-solder each wire to fully separate the driver area. (Already completed and driver removed in this step.)
-
-
-
The drivers are inconveniently glued in place, but can be relatively easily removed with some elbow grease.
-
I used an iOpener to soften the glue, along with a Jimmy and metal spudger to score the glue around the circumference.
-
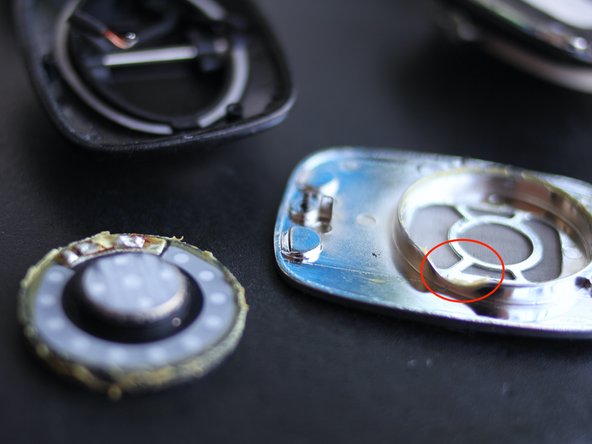
Each driver area has a cutout section, as indicated, which will assist you with prying out the driver.
-
Try to work the driver out only by its sides. I pushed my metal spudger underneath and pried upward and damaged the driver grille.
-
-
-
Swap the working driver from one set to the other set and solder it in place.
-
Voila!
-
To reassemble your device, follow these instructions in reverse order and solder the new driver back in place.
To reassemble your device, follow these instructions in reverse order and solder the new driver back in place.
Rückgängig: Ich habe diese Anleitung nicht absolviert.
Eine weitere Person hat diese Anleitung absolviert.


