Einleitung
This is a step-by-step guide demonstrates how to remove the battery.
WARNING: This is a lithium battery which should be handled with care.
TIPS:
- Be sure to check the screwdriver heads before performing this task; otherwise, screws may become damaged.
- Use an ice cube tray or egg carton, place each screw in its own cup to organize the screws.
Was du brauchst
-
-
Flip the Braven BRV-X upside down so you are facing the bottom side.
-
With the H1.5 Head Screwdriver, unscrew the four screws.
-
Using the #0 Phillips screwdriver, unscrew the four screws on the four corners of the bottom side.
-
Gently remove the outer casing, which should reveal the inner shell.
-
-
-
With a Jimmy, cut the two warranty seals on either side.
-
Next, remove the 18 screws with a #00 Phillips screwdriver.
-
-
-
-
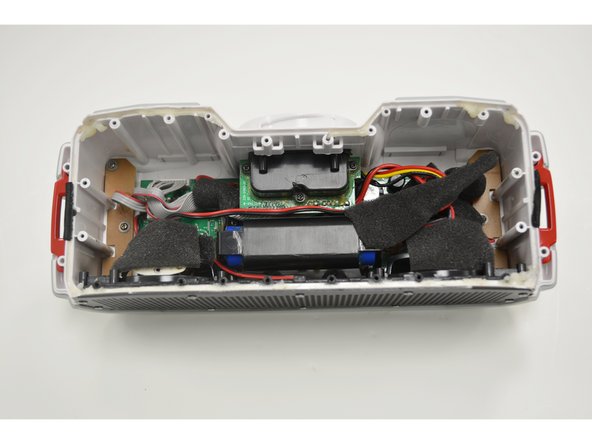
Remove the black foam squares from the red, yellow, and black wire on the top right side of the device.
-
-
-
Now that the three wires are exposed, follow the wires to the white base that is plugged into the motherboard.
-
Using the tech knife, carefully remove the glue that keeps the plug in place.
-
Using the tweezers, carefully disconnect the plug from the motherboard.
-
-
-
The battery's black shell is connected to the motherboard with four screws. Use the #00 Phillips screwdriver to remove the four screws.
-
-
-
Slide the blue battery out from the black container. Your battery is now removed from the device and is ready for replacement.
-


To reassemble your device, follow these instructions in reverse order.
To reassemble your device, follow these instructions in reverse order.
Rückgängig: Ich habe diese Anleitung nicht absolviert.
5 weitere Nutzer:innen haben diese Anleitung absolviert.
Team

Texas Tech, Team 19-4, Rauch Fall 2015 Mitglied von Texas Tech, Team 19-4, Rauch Fall 2015
TTU-RAUCH-F15S19G4
4 Mitglieder
2 Anleitungen geschrieben
10 Kommentare
Thank you for the replacement steps - do you know where I could buy a replacement battery?
Anyone ever figure out what battery they needed?
I also would love to know what battery is actually needed for this.
Parallel or series connection?
What is the MAh on the required batteries for this device?
The best batteries are the panasonic 18650 batteries. Do a google search for them. You can usually find them for $8-10 (and higher) each with a little work. The Panasonic brand is definitely more expensive but of superior quality to all the chinese knock off batteries. Will hold a charge better and last much longer on a charge. You will have to connect the batteries and do a little soldering before fitting them back in the container. Two 2600 mAh batteries would equal the OEM rating on this device of 5200 mAh.
The batteries are in Parallel to give 3.7v, and 6800mah (or whatever amp ratting batteries you buy)
18650”s are too big
Good lord this was a chore. Thanks for the writeup!
I have the Braven XXL that is just over 12 Months old. The Battery no longer charges and Zagg (bought out Braven) is offering me a $30 gift card since I’m out of warranty, no thanks. Do you know how I can replace the battery for this unit.
Thanks
Greg Beckler - Antwort