Diese Version enthält möglicherweise inkorrekte Änderungen. Wechsle zur letzten geprüften Version.
Was du brauchst
-
Dieser Schritt ist noch nicht übersetzt. Hilf mit, ihn zu übersetzen!
-
There is a plastic tab located on the back of the label maker near the top. The tab has ridges on it to help you identify where to press. Push on this tab to release the back of the label maker.
-
Gently pull the label maker apart - it will split in half.
-
-
Dieser Schritt ist noch nicht übersetzt. Hilf mit, ihn zu übersetzen!
-
Remove the AAA batteries before you proceed on to replacing the tape cassette.
-
-
Dieser Schritt ist noch nicht übersetzt. Hilf mit, ihn zu übersetzen!
-
Align and insert a new tape cassette. Make sure the center of the cassette snaps into place. The tape must feed between the tape guides.
-
-
Dieser Schritt ist noch nicht übersetzt. Hilf mit, ihn zu übersetzen!
-
Place the batteries back inside, then close the cover.
-
-
Dieser Schritt ist noch nicht übersetzt. Hilf mit, ihn zu übersetzen!
-
To test the new cassette, make a new label. Press "Shift" and "Print" to feed the tape, then use the cutting lever on the upper-right corner of the machine.
-
-
Dieser Schritt ist noch nicht übersetzt. Hilf mit, ihn zu übersetzen!
-
Turn the device to it's side toward the bottom of the keyboard. Then pop open the case and remove the batteries.
-
-
Dieser Schritt ist noch nicht übersetzt. Hilf mit, ihn zu übersetzen!
-
Remove back of device and set aside.
-
-
Dieser Schritt ist noch nicht übersetzt. Hilf mit, ihn zu übersetzen!
-
Remove all 1/4 inch screws(6 total) with a (+PH00) screwdriver. Open slowly not to damage the display data cable.
-
-
Dieser Schritt ist noch nicht übersetzt. Hilf mit, ihn zu übersetzen!
-
Use a plastic opening tool to remove the flat-panel membrane keyboard. Lift up and set aside.
-
-
Dieser Schritt ist noch nicht übersetzt. Hilf mit, ihn zu übersetzen!
-
Use a spudger to aid in removing the keyboard.
-
Gently lift out while removing the LCD screen that is connected to the data cable and finishing removing.
-
-
Dieser Schritt ist noch nicht übersetzt. Hilf mit, ihn zu übersetzen!
-
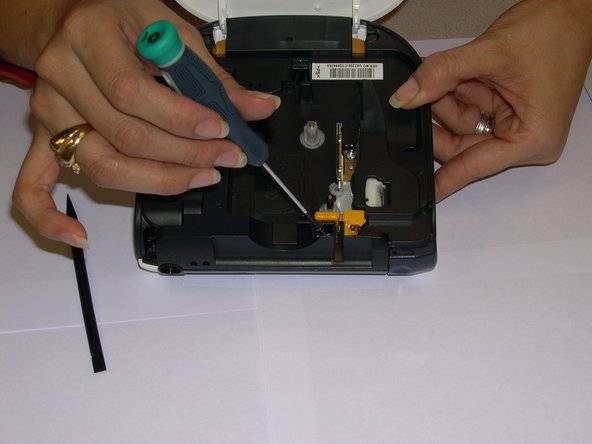
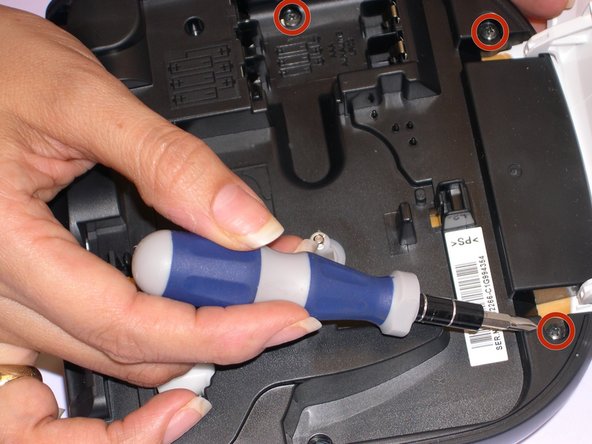
Once you get to that part, then is time to utilize some "tools." A couple of Phillips screwdrivers will be needed to remove the 5 screws that secure the plate and gain access to the LCD screen.
-
-
Dieser Schritt ist noch nicht übersetzt. Hilf mit, ihn zu übersetzen!
-
Once you start working to remove the screws, you'll find one that has a very narrow access, which is where you will need a thinner screwdriver (PH00).
-
-
Dieser Schritt ist noch nicht übersetzt. Hilf mit, ihn zu übersetzen!
-
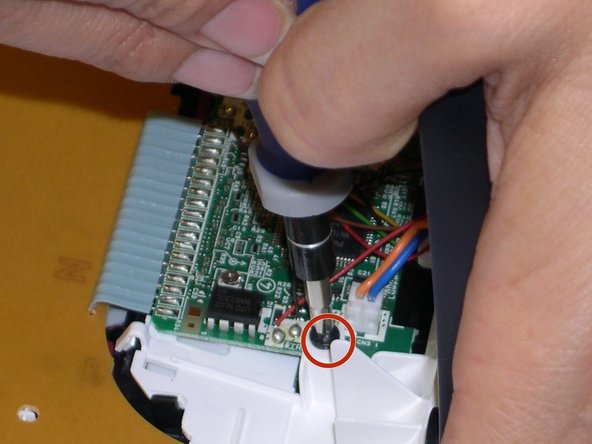
Three more screws need to be removed to be able to lift the keyboard.
-
Also, you will have to remove the small metal plate on top of the black connector with the red and black cables.
-
-
Dieser Schritt ist noch nicht übersetzt. Hilf mit, ihn zu übersetzen!
-
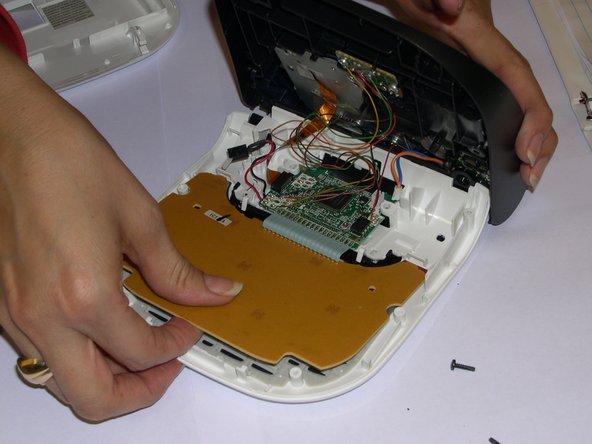
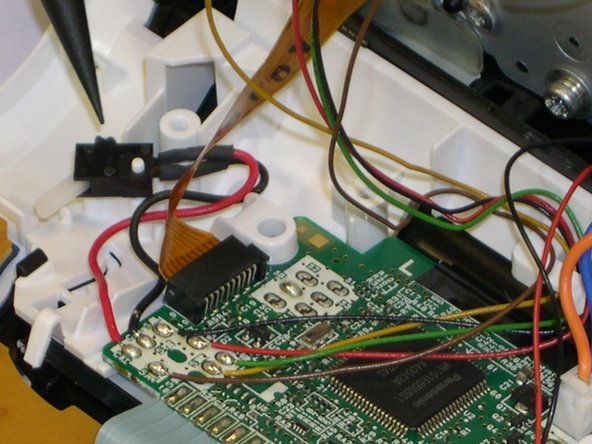
Unhook the connector with the orange and blue wire
-
There is also a hook that holds the yellow, red, orange and green cables, the spudger will be all you need to slide them out to unhook them.
-
The black connector with the red and black cables, has to be removed as well. Step 3 was to remove he screw that holds the metal plate that holds it in place, so at this point, just slide upwards.
-
-
Dieser Schritt ist noch nicht übersetzt. Hilf mit, ihn zu übersetzen!
-
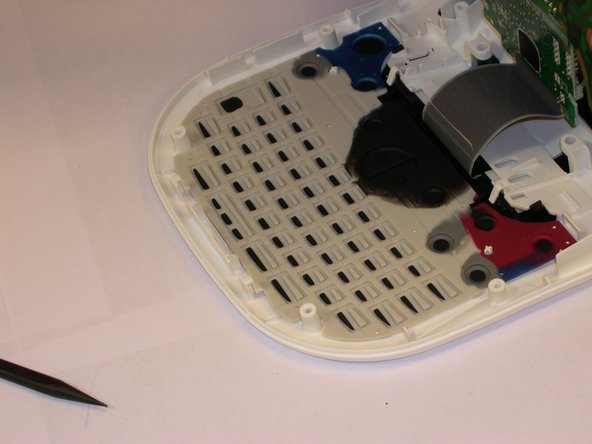
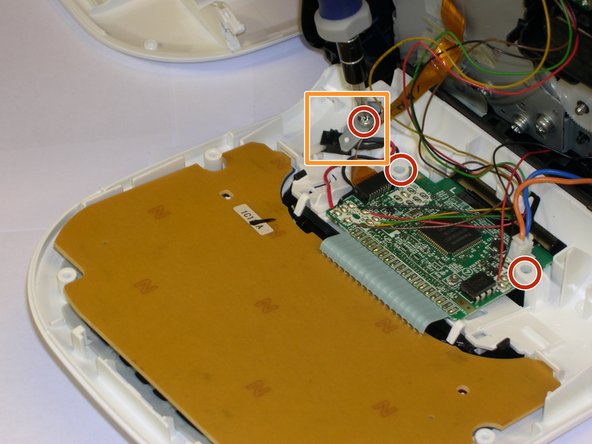
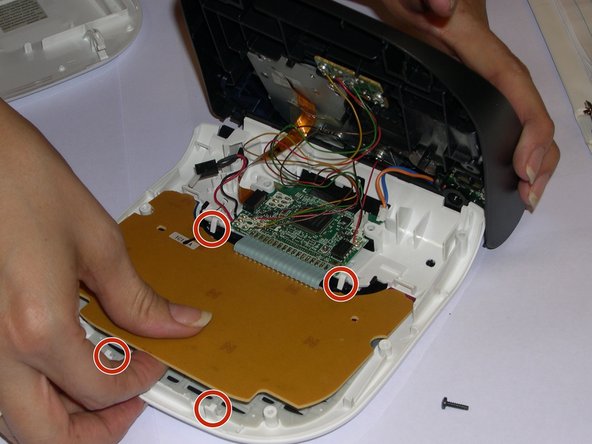
After removing the last three Philips screws, the keyboard has to be removed. To do so, you'll have to hold it making sure the four hooks with red circles are properly loose to avoid breaking them.
-
Pull it out, gently bur firmly
-
Make sure once it becomes loose, you can proceed to remove the LCD which is being held by two more hooks marked with orange circles. You will need the Spudger to hold them back while pulling the screen with your other hand.
-
-
Dieser Schritt ist noch nicht übersetzt. Hilf mit, ihn zu übersetzen!
-
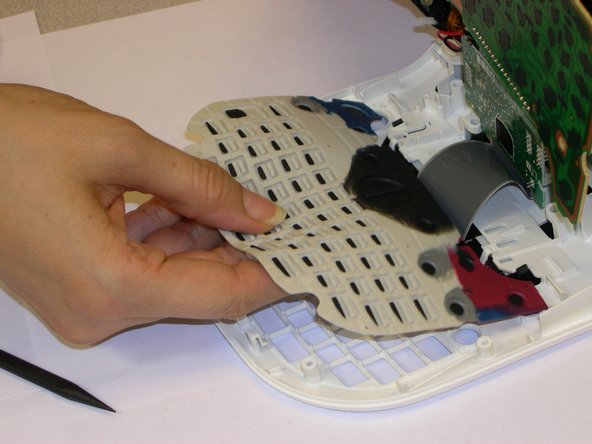
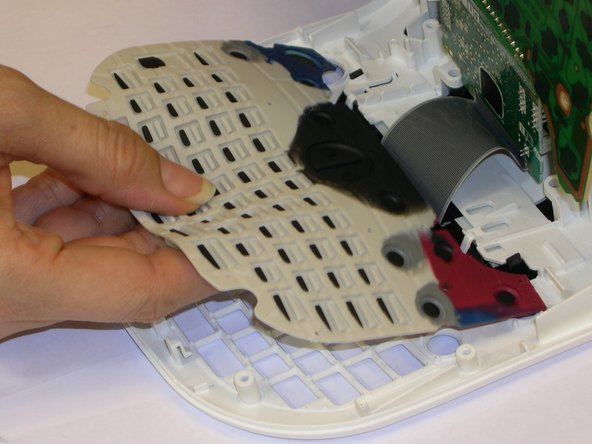
Keyboard was successfully removed, now, holding the front (keyboard)plate, you'll be removing the face plate.
-
If the face plate doesn't get removed, it will be close to impossible to remove the LCD or you'll find yourself breaking some of the hooks that are holding it on place.
-
Remove and replace the LCD screen making sure the display data cable doesn't get damaged in the process.
-
Follow the steps backwards in the order they were removed, to be able to put the parts together and remain your printing job.
-


Rückgängig: Ich habe diese Anleitung nicht absolviert.
Ein:e weitere:r Nutzer:in hat diese Anleitung absolviert.
Team

Gateway, Team 1-4, Johnson Fall 2014 Mitglied von Gateway, Team 1-4, Johnson Fall 2014
GCC-JOHNSON-F14S1G4
3 Mitglieder
6 Anleitungen geschrieben