Diese Version enthält möglicherweise inkorrekte Änderungen. Wechsle zur letzten geprüften Version.
Was du brauchst
-
Dieser Schritt ist noch nicht übersetzt. Hilf mit, ihn zu übersetzen!
-
Gently pull out the ribbon cable from the circuit board.
-
-
Dieser Schritt ist noch nicht übersetzt. Hilf mit, ihn zu übersetzen!
-
Remove two-pin plastic connector from the circuit board.
-
-
-
Dieser Schritt ist noch nicht übersetzt. Hilf mit, ihn zu übersetzen!
-
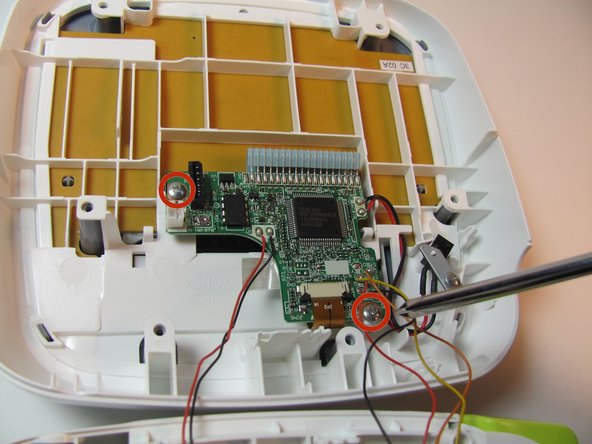
Remove the two 3/16" screws from the circuit board using the Helping Hand 1/4" screwdriver.
-
-
Dieser Schritt ist noch nicht übersetzt. Hilf mit, ihn zu übersetzen!
-
Release the two black clips that hold the LCD cable ribbon in place. To release, pull the clips towards the ribbon.
-
-
Dieser Schritt ist noch nicht übersetzt. Hilf mit, ihn zu übersetzen!
-
Disconnect the LCD ribbon cable from the circuit board.
-


Team

Cal Poly, Team 13-16, Regan Winter 2014 Mitglied von Cal Poly, Team 13-16, Regan Winter 2014
CPSU-REGAN-W14S13G16
3 Mitglieder
6 Anleitungen geschrieben