Diese Version enthält möglicherweise inkorrekte Änderungen. Wechsle zur letzten geprüften Version.
Was du brauchst
-
Dieser Schritt ist noch nicht übersetzt. Hilf mit, ihn zu übersetzen!
-
Slide the outer eyepiece upward to remove it.
-
-
Dieser Schritt ist noch nicht übersetzt. Hilf mit, ihn zu übersetzen!
-
Remove the two 4.75 mm black screws located on the top of the camera.
-
-
-
Dieser Schritt ist noch nicht übersetzt. Hilf mit, ihn zu übersetzen!
-
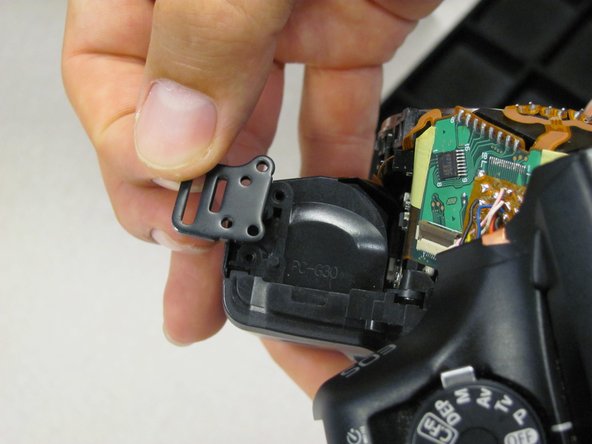
Remove the four 4.3 mm black screws near the bottom corners of the eyepiece at the back of the camera.
-
-
Dieser Schritt ist noch nicht übersetzt. Hilf mit, ihn zu übersetzen!
-
Slowly separate the top panel from the camera by pushing it upward.
-
-
Dieser Schritt ist noch nicht übersetzt. Hilf mit, ihn zu übersetzen!
-
Remove two 5.9 mm silver screws on top of camera to detach left strap loop (opposite grip).
-
-
Dieser Schritt ist noch nicht übersetzt. Hilf mit, ihn zu übersetzen!
-
Remove one 8.5 mm silver screw (front) and one 5.45 mm silver screw (back) to remove strap loop near LCD screen.
-


Rückgängig: Ich habe diese Anleitung nicht absolviert.
2 weitere Nutzer:innen haben diese Anleitung absolviert.
Team

Cal Poly, Team 8-8, Regan Spring 2011 Mitglied von Cal Poly, Team 8-8, Regan Spring 2011
CPSU-REGAN-S11S8G8
5 Mitglieder
22 Anleitungen geschrieben