Diese Version enthält möglicherweise inkorrekte Änderungen. Wechsle zur letzten geprüften Version.
Was du brauchst
-
-
Entferne die Batterien aus der Kamera, indem du sie in deine Hand rutschen lässt.
-
-
Dieser Schritt ist noch nicht übersetzt. Hilf mit, ihn zu übersetzen!
-
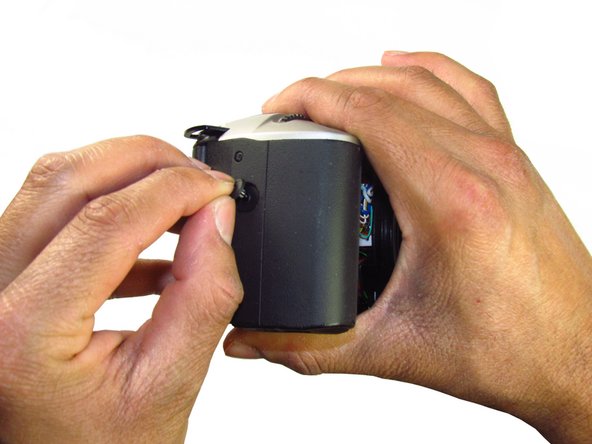
Release the side latch to open the back panel.
-
-
Dieser Schritt ist noch nicht übersetzt. Hilf mit, ihn zu übersetzen!
-
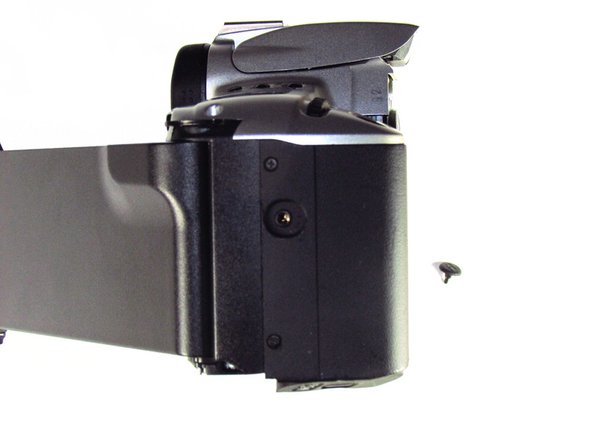
Remove the two black 4.5mm screws above and below the latch.
-
-
Dieser Schritt ist noch nicht übersetzt. Hilf mit, ihn zu übersetzen!
-
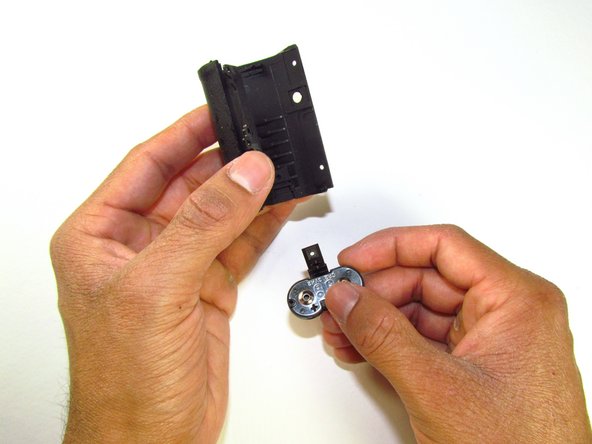
Using your finger, carefully pry open the side panel from the top of camera.
-
Pull panel downwards to remove.
-
-
-
Dieser Schritt ist noch nicht übersetzt. Hilf mit, ihn zu übersetzen!
-
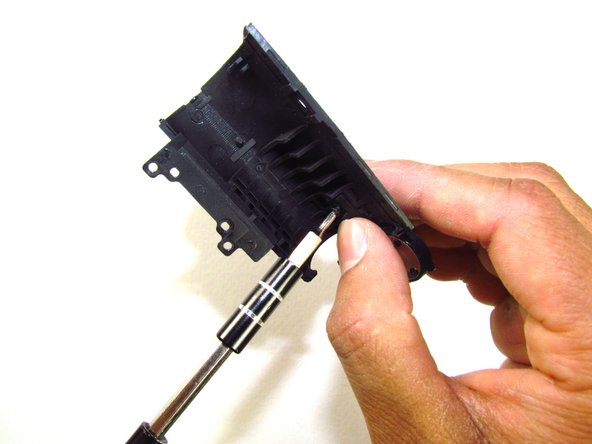
Remove the two silver 6mm Phillips #1 screws.
-
-
Dieser Schritt ist noch nicht übersetzt. Hilf mit, ihn zu übersetzen!
-
Flip camera over to the bottom.
-
Remove the one 5mm Phillips #1 silver screw.
-
-
Dieser Schritt ist noch nicht übersetzt. Hilf mit, ihn zu übersetzen!
-
Remove the front panel by pulling away from the side with the lever.
-
-
Dieser Schritt ist noch nicht übersetzt. Hilf mit, ihn zu übersetzen!
-
Remove three black 7.3mm Phillips #1 screws located on the corners of the camera.
-
Remove five black 4.8mm Phillips #1 screws.
-
-
Dieser Schritt ist noch nicht übersetzt. Hilf mit, ihn zu übersetzen!
-
Simply remove the bottom panel by prying it off with your finger.
-
Be wary of a loose piece of foam attached to the bottom panel.
-
-
Dieser Schritt ist noch nicht übersetzt. Hilf mit, ihn zu übersetzen!
-
Remove the remote control socket cover.
-
-
Dieser Schritt ist noch nicht übersetzt. Hilf mit, ihn zu übersetzen!
-
Remove two black 4.5mm Phillips #1 screws.
-
-
Dieser Schritt ist noch nicht übersetzt. Hilf mit, ihn zu übersetzen!
-
Remove two black 4.8mm Phillips #1 screws on the front of the camera.
-
-
Dieser Schritt ist noch nicht übersetzt. Hilf mit, ihn zu übersetzen!
-
Pry open the side grip using a spudger.
-
-
Dieser Schritt ist noch nicht übersetzt. Hilf mit, ihn zu übersetzen!
-
Remove one black 5mm Phillips #1 screw.
-


Rückgängig: Ich habe diese Anleitung nicht absolviert.
3 weitere Nutzer:innen haben diese Anleitung absolviert.
Team

Cal Poly, Team 6-20, Maness Winter 2014 Mitglied von Cal Poly, Team 6-20, Maness Winter 2014
CPSU-MANESS-W14S6G20
4 Mitglieder
32 Anleitungen geschrieben