Diese Version enthält möglicherweise inkorrekte Änderungen. Wechsle zur letzten geprüften Version.
Was du brauchst
-
Dieser Schritt ist noch nicht übersetzt. Hilf mit, ihn zu übersetzen!
-
Peel back the rubber cover above the in/out ports to reveal two screw heads.
-
-
Dieser Schritt ist noch nicht übersetzt. Hilf mit, ihn zu übersetzen!
-
Remove both 5.4 mm screws using a Phillips #0.
-
-
Dieser Schritt ist noch nicht übersetzt. Hilf mit, ihn zu übersetzen!
-
Lift the in/out port plastic covering from the bottom where the backup battery used to be.
-
-
Dieser Schritt ist noch nicht übersetzt. Hilf mit, ihn zu übersetzen!
-
Remove each 6.3 mm screw on either side of the viewfinder using a Phillips #0 screwdriver.
-
-
-
Dieser Schritt ist noch nicht übersetzt. Hilf mit, ihn zu übersetzen!
-
Remove the three 4.8 mm screws on the bottom of the back plate using a Phillips #0.
-
-
Dieser Schritt ist noch nicht übersetzt. Hilf mit, ihn zu übersetzen!
-
Peel back the rubber covering next to the menu dial to access the screw.
-
Remove the single 3.4 mm screw using a Phillips #0.
-
-
Dieser Schritt ist noch nicht übersetzt. Hilf mit, ihn zu übersetzen!
-
The back panel can now fall off easily by turning the device upside down. Be sure to catch it so the data ribbons do not tear or tug.
-
-
Dieser Schritt ist noch nicht übersetzt. Hilf mit, ihn zu übersetzen!
-
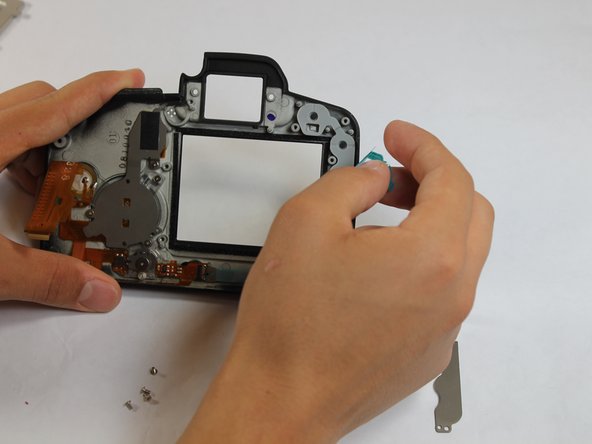
Remove each data ribbon cable from the motherboard by applying pressure down towards the motherboard and gently sliding your thumb upwards on the slot where the cable meets the motherboard. This will raise a very small clip that locks the cable in place.
-
The back panel is now free from the rest of the device.
-
-
Dieser Schritt ist noch nicht übersetzt. Hilf mit, ihn zu übersetzen!
-
Remove each of the four 4.8 mm screws holding the protective plate over the button contact ribbon cable.
-
-
Dieser Schritt ist noch nicht übersetzt. Hilf mit, ihn zu übersetzen!
-
Free the blue data ribbon cable by firmly pressing your thumb over the black clasp at the end of the cable and sliding your thumb to the left. This will raise the clasp and free the cable.
-
-
Dieser Schritt ist noch nicht übersetzt. Hilf mit, ihn zu übersetzen!
-
Pull back the rubber backing found underneath the blue ribbon cable.
-
-
Dieser Schritt ist noch nicht übersetzt. Hilf mit, ihn zu übersetzen!
-
You can now use a brush to clean any built up residue beneath the buttons.
-


Rückgängig: Ich habe diese Anleitung nicht absolviert.
4 weitere Nutzer:innen haben diese Anleitung absolviert.
Team

USF Tampa, Team 1-6, Hickman Fall 2014 Mitglied von USF Tampa, Team 1-6, Hickman Fall 2014
USFT-HICKMAN-F14S1G6
3 Mitglieder
16 Anleitungen geschrieben
2 Kommentare
My 5D Mark II buttons work fine in auto mode, but don’t function in other modes. IE Manual, AV, TV ETC. Do you think this is a button residue issue? My camera may have taken on some water during my last shoot. What fix would you suggest?