Einleitung
The Canon EOS T6i was a camera produced and sold by Canon in 2015. The functionality of the LCD screen is to produce high resolution images of the photos taken by the camera and to adjust any settings within the camera. In any case where your Canon EOS T6i LCD screen is: cracked,damaged,fading or not functional; this guide will show you how to safely disassembly and remove the screen from the camera for replacement.
Was du brauchst
-
-
Remove the battery and use an anti-static wrist strap to ground yourself to prevent damage to device.
-
-
-
4 screws are located on the opposite/interior side of screen case. Use the J000 gauge screw driver head to remove these 4 screws. Furthermore, these screws are a larger gauge then the other 2. Please sort these accordingly.
-
4 small screws on back 1.58 mm
-
-
-
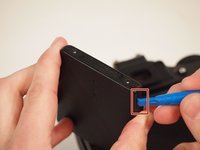
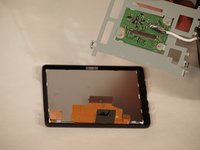
Following the removal of the 6 screws, Locate the joint of the casing. Place a flat lever inside this crevice and apply pressure. The case should simply pop open into the 2 casing pieces and the screen mechanism. Warning. No Dot try to remove bottom casing until next step.
-
-
-
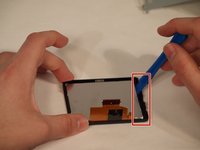
In diesem Schritt verwendetes Werkzeug:Tweezers$4.99
-
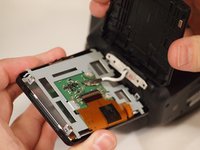
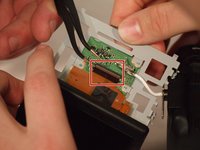
There are several components inside the casing. A board, a power cable, the screen and a ribbon cable. First, using tweezers lift the metallic clamp connecting the ribbon to the board.
-
-
-
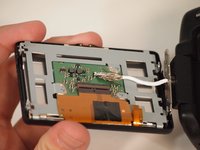
Now that the ribbon is disconnected, remove the board carefully and place it aside. This piece still works so leave it attached to camera.
-
-
-
The screen is glued into the casing. Remove the screen by carefulyl lifting along the edges of the case until the screen pops out. Place new screen into the existing casing. A small about of glue or adhesive may be necessary if their isn't sufficient adhesive remaining in the case. Repeat steps in reverse to reapply screen.
-
-
-
If screen doesn't power on after replacing the battery, Go back and check connections of the ribbon.
-


To reassemble your device, follow these instructions in reverse order.
To reassemble your device, follow these instructions in reverse order.
Rückgängig: Ich habe diese Anleitung nicht absolviert.
Eine weitere Person hat diese Anleitung absolviert.
Team

University of Memphis, Team S2-G1, Kim Spring 2018 Mitglied von University of Memphis, Team S2-G1, Kim Spring 2018
UM-KIM-S18S2G1
3 Mitglieder
11 Anleitungen geschrieben
3 Kommentare zur Anleitung
Very simple and great guide for. See the Canon T6i Bundle
Thanks for this awesome guide its really useful for me. see the Canon 80D Bundle
y las refacciones donde?