Zum Hauptinhalt wechseln

Canon EOS Rebel XS Strap Loops Replacement

Was du brauchst

  1. Canon EOS Rebel XS Strap Loops Replacement, Latch Side Cover: Schritt 1, Bild 1 von 1
    • Remove the two 3mm (1/8") black screws from the side cover using a #00 Phillips screwdriver.

  2. Canon EOS Rebel XS Strap Loops Replacement: Schritt 2, Bild 1 von 1
    • On the bottom, remove the 6mm (13/64") screw with the #00 Phillips Screwdriver.

    • Pry up the panel; starting from the front/bottom corner, as indicated.

    • There's a concealed lip, under the opposite edge.

  3. Canon EOS Rebel XS Strap Loops Replacement, Disassembling Canon EOS Rebel XS Front Cover: Schritt 3, Bild 1 von 1
    • Remove three medium length screws from the bottom of the camera

  4. Canon EOS Rebel XS Strap Loops Replacement: Schritt 4, Bild 1 von 1
    • Remove the two medium length screws on the front panel of the camera above the lens mount.

    • Once you done, you may use the Spudger to panel from non-grip side.

    • If you start on the grip side, it will be more challenging to loosen the panel.

  5. Canon EOS Rebel XS Strap Loops Replacement, Back Cover: Schritt 5, Bild 1 von 1
    • Remove the three long black screws from the bottom using a #00 Phillips screwdriver.

    • Use tweezers to lift the panel.

  6. Canon EOS Rebel XS Strap Loops Replacement: Schritt 6, Bild 1 von 1
    • Once you have detached the back cover, use a pair of tweezers to lightly pull on strap found connecting the back cover to the camera.

  7. Canon EOS Rebel XS Strap Loops Replacement, Grip: Schritt 7, Bild 1 von 1
    • Remove the two 4.5mm (.18in) long black screws from the camera grip using a #00 Phillips screwdriver.

  8. Canon EOS Rebel XS Strap Loops Replacement: Schritt 8, Bild 1 von 1
    • Use your fingertip to pry off the external shutter port cover.

  9. Canon EOS Rebel XS Strap Loops Replacement: Schritt 9, Bild 1 von 1
    • Remove the two 5mm (.20in) long silver screws securing the grip to the camera using a #00 Phillips screwdriver.

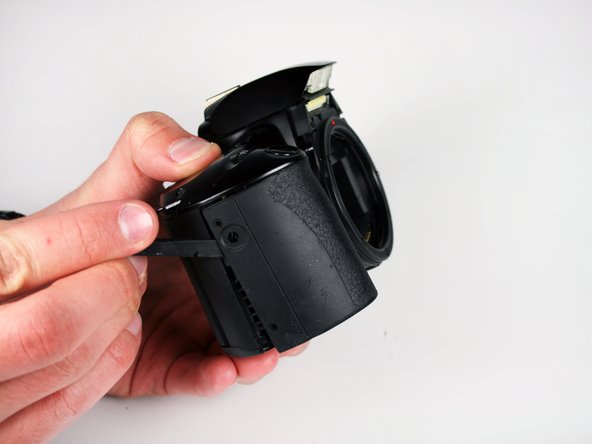
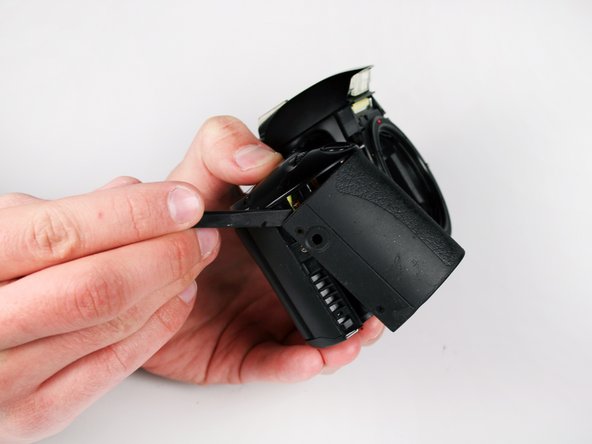
  10. Canon EOS Rebel XS Strap Loops Replacement: Schritt 10, Bild 1 von 3 Canon EOS Rebel XS Strap Loops Replacement: Schritt 10, Bild 2 von 3 Canon EOS Rebel XS Strap Loops Replacement: Schritt 10, Bild 3 von 3
    • Use the spudger tool to carefully pry the grip from the rest of the camera.

  11. Canon EOS Rebel XS Strap Loops Replacement: Schritt 11, Bild 1 von 1
    • Once the grip is loose, use your fingers to remove it from the camera.

  12. Canon EOS Rebel XS Strap Loops Replacement, Eyepiece: Schritt 12, Bild 1 von 2 Canon EOS Rebel XS Strap Loops Replacement, Eyepiece: Schritt 12, Bild 2 von 2
    • Grasp the eyepiece with your fingers and slide upwards to remove it.

  13. Canon EOS Rebel XS Strap Loops Replacement, Top Panel: Schritt 13, Bild 1 von 1
    • Remove the following ribbons with the tweezers by gently pulling on them.

    • Remove the three black screws, near the eye piece, using the Phillips Screwdriver.

  14. Canon EOS Rebel XS Strap Loops Replacement: Schritt 14, Bild 1 von 1
    • Remove the cable heads attached on the front side of the camera next to the lens mount.

    • Be gentle when puling wires lose, use the tweezers to remove the wires.

  15. Canon EOS Rebel XS Strap Loops Replacement: Schritt 15, Bild 1 von 1
    • You can use your fingers to pull the top panel of the camera.

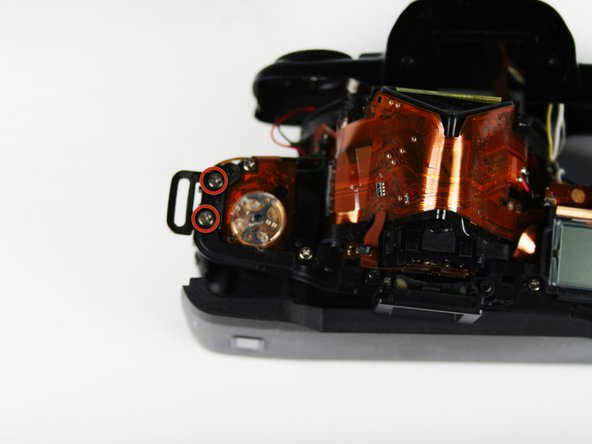
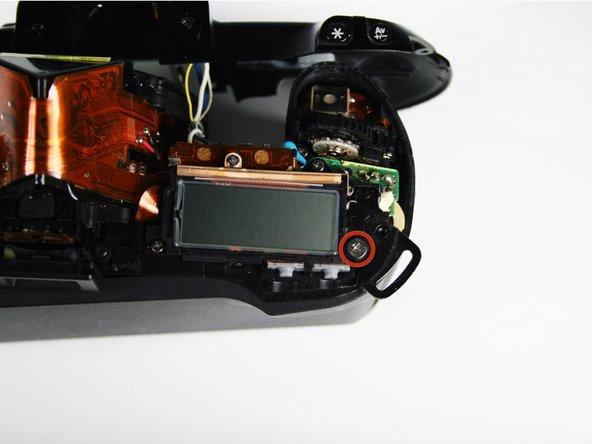
  16. Canon EOS Rebel XS Strap Loops Replacement, Strap Loops: Schritt 16, Bild 1 von 3 Canon EOS Rebel XS Strap Loops Replacement, Strap Loops: Schritt 16, Bild 2 von 3 Canon EOS Rebel XS Strap Loops Replacement, Strap Loops: Schritt 16, Bild 3 von 3
    • Remove the two 5.0mm (.20in) silver screws from the first loop hole using a #00 Phillips screwdriver (Picture Two).

    • Remove the 6.8mm (.27in) wide head silver screw from the second loop hole using a #00 Phillips screwdriver (Picture Three).

  17. Canon EOS Rebel XS Strap Loops Replacement: Schritt 17, Bild 1 von 2 Canon EOS Rebel XS Strap Loops Replacement: Schritt 17, Bild 2 von 2
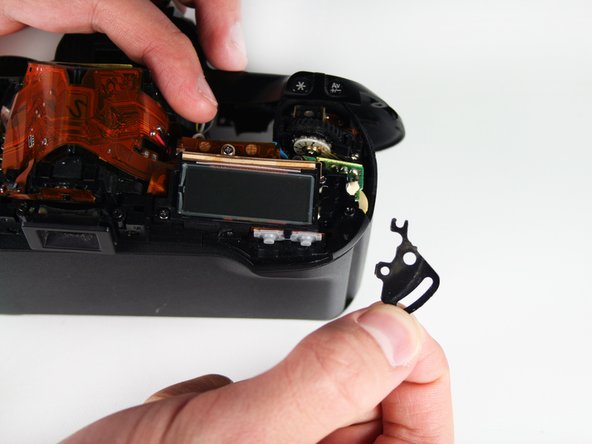
    • Use your fingers to remove the loop holes.

Abschluss

To reassemble your device, follow these instructions in reverse order.

Daniel Bussone

Mitglied seit: 01/28/11

1.251 Reputation

11 Anleitungen geschrieben

Team

Cal Poly, Team 3-41, Regan Winter 2011 Mitglied von Cal Poly, Team 3-41, Regan Winter 2011

CPSU-REGAN-W11S3G41

2 Mitglieder

21 Anleitungen geschrieben

0 Kommentare

Kommentar hinzufügen

Seitenaufrufe:

Letzte 24 Stunden: 0

Letzte 7 Tage: 0

Letzte 30 Tage: 1

Insgesamt: 875