Zum Hauptinhalt wechseln

Canon ImageCLASS MF4350d Remove Front Paneling

Grundständige Anleitung
Dies ist eine grundständige Anleitung, die nur als Teil einer anderen Anleitung verwendet werden sollte.

Was du brauchst

  1. Canon ImageCLASS MF4350d Remove Front Paneling, Canon ImageCLASS MF4350d Remove Front Paneling: Schritt 1, Bild 1 von 1
    • Lift the printer lid up as shown in the photo.

  2. Canon ImageCLASS MF4350d Remove Front Paneling: Schritt 2, Bild 1 von 2 Canon ImageCLASS MF4350d Remove Front Paneling: Schritt 2, Bild 2 von 2
    • Locate and remove the two 10mm side screws. There is one on each side.

  3. Canon ImageCLASS MF4350d Remove Front Paneling: Schritt 3, Bild 1 von 2 Canon ImageCLASS MF4350d Remove Front Paneling: Schritt 3, Bild 2 von 2
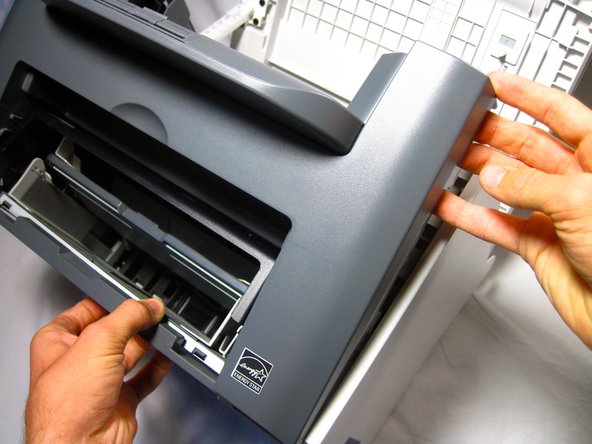
    • Unhook the plastic panel from the printer starting from the top.

    • You may need to wiggle the panel a bit to loosen it.

    • To remove the bottom part of the paneling gently lay the printer on its back.

    • The scanner lid needs to be supported when moving the printer

Abschluss

To reassemble your device, follow these instructions in reverse order.

Helena Yanez

Mitglied seit: 09/29/13

455 Reputation

4 Anleitungen geschrieben

Team

Cal Poly, Team 13-1, Forte Fall 2013 Mitglied von Cal Poly, Team 13-1, Forte Fall 2013

CPSU-FORTE-F13S13G1

5 Mitglieder

16 Anleitungen geschrieben

0 Kommentare

Kommentar hinzufügen

Seitenaufrufe:

Letzte 24 Stunden: 0

Letzte 7 Tage: 3

Letzte 30 Tage: 3

Insgesamt: 70