Einleitung
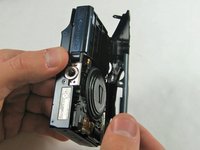
This guide is important since it will allow you to access the internal components of the camera. It will also allow you to replace the plastic case if the case has been damaged or warped in any fashion.
Was du brauchst
-
-
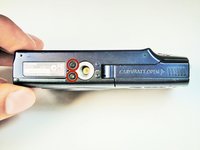
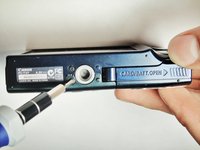
Place thumb on area right next to where it says open and slide to the right to open.
-
-
-
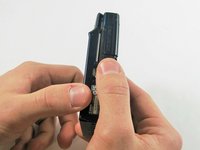
Remove the battery by pushing the orange object outwards; the battery will spring up and out.
-
-
-
Remove the two 5.00 mm screws in the bottom of the casing with a Philips #000 screwdriver
-
-
-
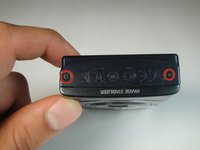
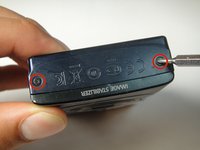
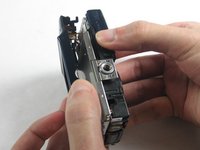
Place the camera on to the side that has the image stabilizer label.
-
Remove the 5.00 mm screws that are on this side using the screwdriver.
-
-
-
-
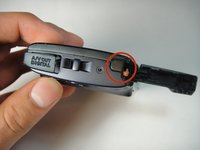
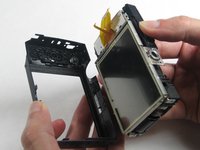
Place camera on to the side with the A/V Out Digital Cover facing up.
-
Remove this visible 5.00 mm screw.
-
Pull the A/V Out Digital cover back to uncover the next step.
-
-
-
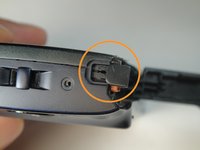
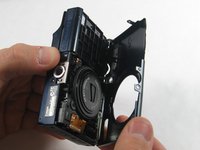
Turn the camera onto the side with the A/V out Digital cover.
-
Use your finger to pull this tab to the right.
-


To reassemble your device, follow these instructions in reverse order.
To reassemble your device, follow these instructions in reverse order.
Rückgängig: Ich habe diese Anleitung nicht absolviert.
Eine weitere Person hat diese Anleitung absolviert.
Team

USF Tampa, Team 1-1, Sullivan Winter 2015 Mitglied von USF Tampa, Team 1-1, Sullivan Winter 2015
USFT-SULLIVAN-W15S1G1
3 Mitglieder
8 Anleitungen geschrieben