Einleitung
This guide will give clear instruction that allows you to replace your camera's LCD screen if it has become cracked or damaged.
Was du brauchst
-
-
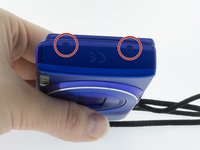
Locate the ON/Off button on the top of the camera and hold it down until the screen and all lights on the camera go dark.
-
-
-
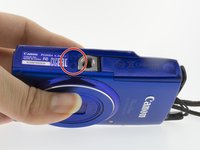
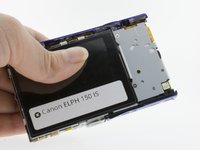
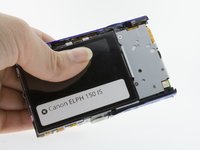
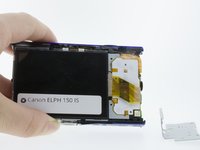
Locate the back plate of the camera (contains the LCD screen and menu buttons).
-
-
-
To remove the back plate you will need to unscrew the 6 support screws securing it to the camera.
-
Use a Phillips #00 screwdriver to remove the first 2 screws on the bottom of the camera.
-
-
-
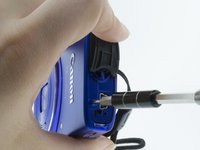
Remove the next 2 screws located behind the AV port using the same Phillips #00 screwdriver.
-
-
-
-
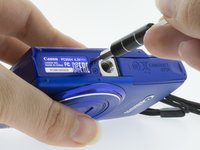
Use a Phillips #00 screwdriver to remove the final 2 screws from the blue side panel.
-
-
-
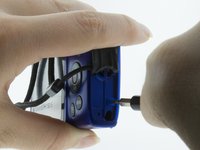
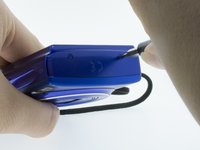
Use your hands or a spudger to gently pry the front and back case apart along the seams on the bottom of the camera.
-
Completely remove the back plate.
-
-
-
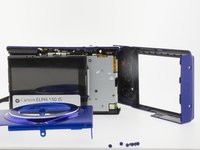
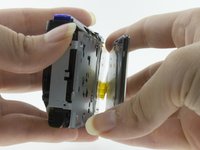
Once the back plate and face plate have been removed, you can begin to remove the LCD screen.
-
-
-
Turn the camera so that the LCD screen is facing you.
-
Remove the 2 screws on the silver plate to the right of the screen using the PH00 screw driver head.
-
-
-
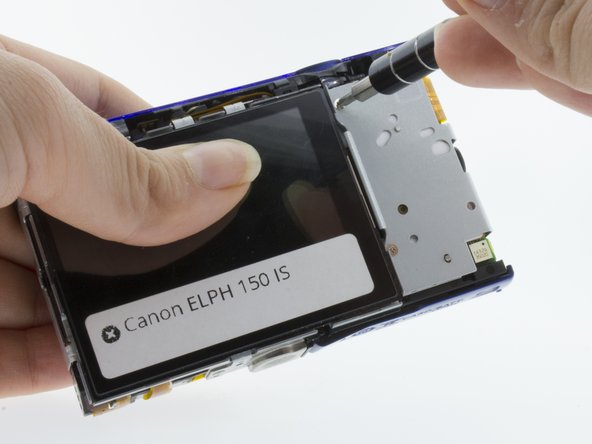
Gently remove the silver plate by pulling it back towards you as you hold the camera firmly in the other hand.
-
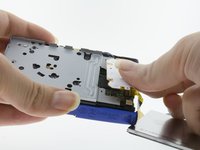
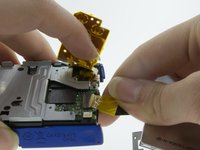
With the plate removed you will be able to locate the electrical ribbon that connect the LCD screen to the device.
-
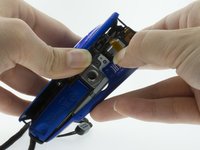
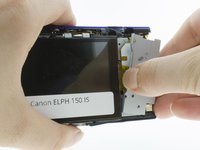
You will also be able to lift the LCD screen away from the motherboard cover as picture in image 3. It will still be attached via electrical ribbon but can be moved to the side so you can access the clip underneath.
-
-
-
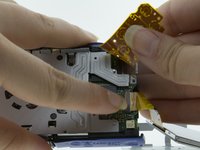
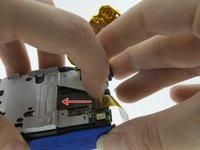
With the screen off to the side, and the horizontal electrical ribbon attached to it out of the way, gently lift the vertical electrical transducer ribbon to expose the salmon colored clip holding the horizontal ribbon in place.
-
-
-
Pull the clip away from the horizontal electrical ribbon to unlock it.
-
Gently pull the horizontal electrical ribbon out of the clip to remove the LCD screen completely. Go slowly so you do no rip the ribbon or damage the clip or exposed motherboard beneath it.
-


To reassemble your device, follow these instructions in reverse order.
To reassemble your device, follow these instructions in reverse order.
Team

UMass Dartmouth, Team S6-G3, Isaacson Spring 2017 Mitglied von UMass Dartmouth, Team S6-G3, Isaacson Spring 2017
UMASSD-ISAACSON-S17S6G3
3 Mitglieder
5 Anleitungen geschrieben
1 Kommentar zur Anleitung
Great tutorial! Where can I buy the screen? I contacted Canon and they said they don't sell these parts; they just replace the cameras that are sent in with broken screens.