Zum Hauptinhalt wechseln

Diese Anleitung enthält neuere Änderungen. Wechsel zur neuesten unüberprüften Version.

Canon PowerShot SD850 IS LCD Screen Replacement

Archivierte Anleitung
Diese Anleitung wurde ausschließlich für historische Zwecke erhalten. Verwende die aktualisierte Version dieser Anleitung, um deine Reparatur durchzuführen.

Was du brauchst

  1. Canon PowerShot SD850 IS LCD Screen Replacement, Battery: Schritt 1, Bild 1 von 3 Canon PowerShot SD850 IS LCD Screen Replacement, Battery: Schritt 1, Bild 2 von 3 Canon PowerShot SD850 IS LCD Screen Replacement, Battery: Schritt 1, Bild 3 von 3
    • Slide the light grey tab toward the edge of the camera using your fingernail.

    • Pull the light grey tab up to open the door.

    • These photos do not show the camera’s memory card or battery, which should be visible inside.

  2. Canon PowerShot SD850 IS LCD Screen Replacement: Schritt 2, Bild 1 von 2 Canon PowerShot SD850 IS LCD Screen Replacement: Schritt 2, Bild 2 von 2
    • Slide the small brown tab toward the edge of the camera using your fingernail.

    • Let go of the brown tab when the battery pops up.

    • Grab battery and pull straight up to remove from holder.

    • When inserting the battery, orient it so that the terminals connect.

  3. Canon PowerShot SD850 IS LCD Screen Replacement, Case: Schritt 3, Bild 1 von 2 Canon PowerShot SD850 IS LCD Screen Replacement, Case: Schritt 3, Bild 2 von 2
    • Remove the following 4 screws:

    • Two 2.8 mm Phillips #00 at the bottom of the camera.

    • Two 2.75 mm Phillips #00 on the opposite side of the wrist strap.

  4. Canon PowerShot SD850 IS LCD Screen Replacement: Schritt 4, Bild 1 von 3 Canon PowerShot SD850 IS LCD Screen Replacement: Schritt 4, Bild 2 von 3 Canon PowerShot SD850 IS LCD Screen Replacement: Schritt 4, Bild 3 von 3
    • Open the A/V OUT DIGITAL flap on the side of the wrist strap.

    • Remove the 2.75 mm Phillips #00 under the A/V OUT DIGITAL flap on the side of the wrist strap.

  5. Canon PowerShot SD850 IS LCD Screen Replacement: Schritt 5, Bild 1 von 2 Canon PowerShot SD850 IS LCD Screen Replacement: Schritt 5, Bild 2 von 2
    • On the bottom of the camera, use your fingernail to slide the light gray tab towards the edge of the camera.

    • Slide light gray door and pull up to open the door.

    • Remove the 8.35 mm Phillips #00 next to the brown tab that holds the battery.

  6. Canon PowerShot SD850 IS LCD Screen Replacement: Schritt 6, Bild 1 von 2 Canon PowerShot SD850 IS LCD Screen Replacement: Schritt 6, Bild 2 von 2
    • Gently pull the front cover straight out from the camera. This will expose the wiring on the front of the camera.

  7. Canon PowerShot SD850 IS LCD Screen Replacement: Schritt 7, Bild 1 von 1
    • Remove the 2.75 mm Phillips #00 next to A/V OUT DIGITAL.

  8. Canon PowerShot SD850 IS LCD Screen Replacement: Schritt 8, Bild 1 von 1
    • Slide the back casing (with the screen protector) off to reveal the LCD and back wiring.

  9. Canon PowerShot SD850 IS LCD Screen Replacement, LCD Screen: Schritt 9, Bild 1 von 2 Canon PowerShot SD850 IS LCD Screen Replacement, LCD Screen: Schritt 9, Bild 2 von 2
    • Remove the three screws attached to the bottom of the LCD brackets

  10. Canon PowerShot SD850 IS LCD Screen Replacement: Schritt 10, Bild 1 von 2 Canon PowerShot SD850 IS LCD Screen Replacement: Schritt 10, Bild 2 von 2
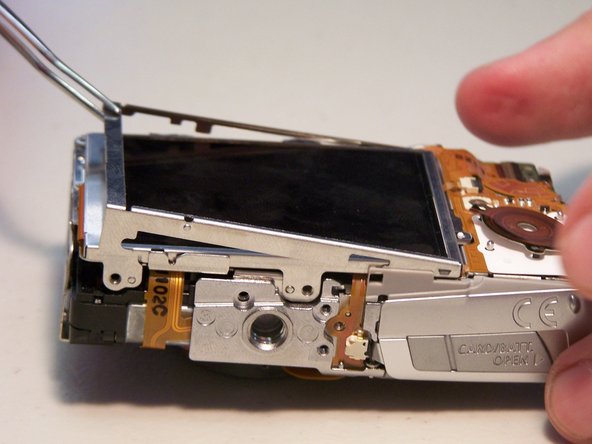
    • Remove the one quarter bracket around the LCD screen

    • Remove the three quarter bracket around the LCD screen.

  11. Canon PowerShot SD850 IS LCD Screen Replacement: Schritt 11, Bild 1 von 3 Canon PowerShot SD850 IS LCD Screen Replacement: Schritt 11, Bild 2 von 3 Canon PowerShot SD850 IS LCD Screen Replacement: Schritt 11, Bild 3 von 3
    • Please Note: There are two areas of interest before removing the final bracket.

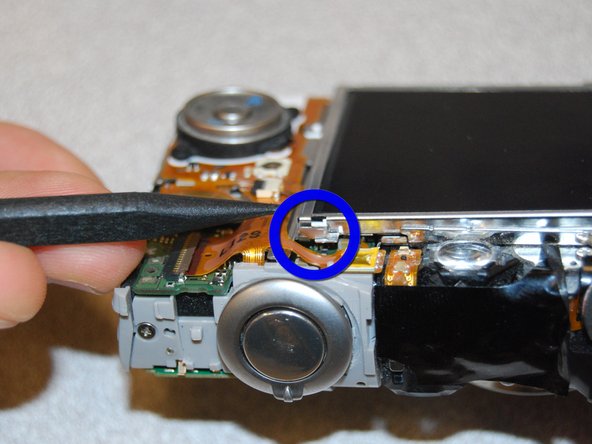
    • First, use a spudger to pry the the two tabs from the small guide pins.

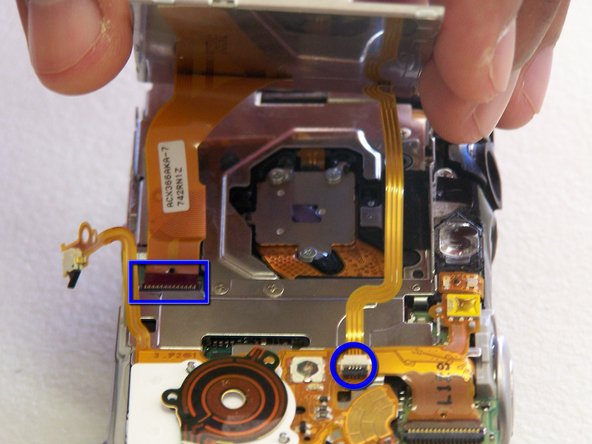
    • Second, slide the bracket to the right as indicated in the second picture while lifting up. A small tab is holding the final bracket in place.

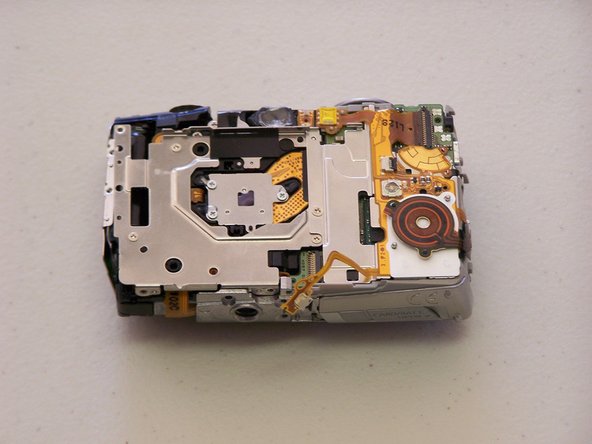
    • Remove the square metal bracket.

  12. Canon PowerShot SD850 IS LCD Screen Replacement: Schritt 12, Bild 1 von 1
    • At this point the screen should be easy to lift from the camera body.

  13. Canon PowerShot SD850 IS LCD Screen Replacement: Schritt 13, Bild 1 von 3 Canon PowerShot SD850 IS LCD Screen Replacement: Schritt 13, Bild 2 von 3 Canon PowerShot SD850 IS LCD Screen Replacement: Schritt 13, Bild 3 von 3
    • Lift the LCD screen and remove the two ribbon cables.

Abschluss

To reassemble your device, follow these instructions in reverse order.

iDeleted

Mitglied seit: 07/07/10

2.101 Reputation

39 Anleitungen geschrieben

0 Kommentare

Kommentar hinzufügen

Seitenaufrufe:

Letzte 24 Stunden: 0

Letzte 7 Tage: 0

Letzte 30 Tage: 0

Insgesamt: 2,528