Einleitung
In this guide, the process of partially breaking down the Canon Powershot S110 and replacing the option dial will be explained in detail.
Was du brauchst
-
-
Remove the battery by sliding open the battery cover on the bottom of the camera.
-
-
-
Remove the six screws by using a small Phillips head screwdriver.
-
Remove the two screws on the side of the camera on either side of the HDMI input panel.
-
Remove the two screws on the opposite side of the camera.
-
Remove the two screws on the bottom of the camera located on either side of the tripod mounting hole.
-
-
-
Using an opening tool, carefully remove the outermost cover of the camera from its holders around the edges.
-
-
-
-
Remove the two screws holding the top plastic bracket in place by using a Phillips head screwdriver.
-
Remove the screw holding down the lens cover.
-
Remove the screw located near the option dial next to the USB connections.
-
-
-
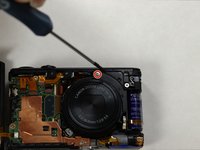
Remove the screw at the center of the option dial by using a Phillips head screwdriver.
-
-
-
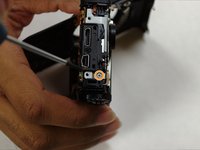
Remove the underlying component that was attached to the now-removed screw by using a prying tool.
-
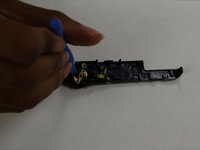
Remove the dial on the opposite side of the part using a prying tool.
-


To reassemble your device, follow these instructions in reverse order.
To reassemble your device, follow these instructions in reverse order.
Rückgängig: Ich habe diese Anleitung nicht absolviert.
2 weitere Personen haben diese Anleitung absolviert.
Team

UW Tacoma, Team 1-2, Liner SU 2015 Mitglied von UW Tacoma, Team 1-2, Liner SU 2015
UWT-LINER-SU15S1G2
4 Mitglieder
5 Anleitungen geschrieben