Diese Version enthält möglicherweise inkorrekte Änderungen. Wechsle zur letzten geprüften Version.
Was du brauchst
-
Dieser Schritt ist noch nicht übersetzt. Hilf mit, ihn zu übersetzen!
-
Remove the battery and SD card from the camera.
-
-
Dieser Schritt ist noch nicht übersetzt. Hilf mit, ihn zu übersetzen!
-
Remove the three 3.8 mm screws from the underside of the camera.
-
-
Dieser Schritt ist noch nicht übersetzt. Hilf mit, ihn zu übersetzen!
-
Remove the 3.2 mm screw from the right side of the camera.
-
Remove the 2.2 mm screw from the right side of the camera.
-
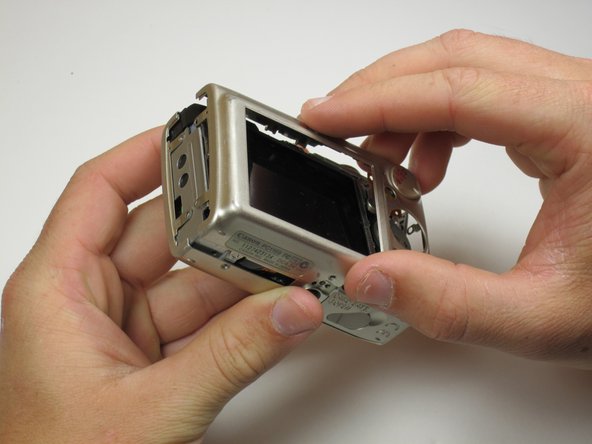
Lift the side panel off.
-
Remove the 1.8 mm screw from underneath the side panel.
-
-
Dieser Schritt ist noch nicht übersetzt. Hilf mit, ihn zu übersetzen!
-
Remove the two 2.2 mm screws from the left side of the camera.
-
Lift the plate from the camera.
-
-
Dieser Schritt ist noch nicht übersetzt. Hilf mit, ihn zu übersetzen!
-
Gently lift the rear of the case to remove it from the camera.
-
-
Dieser Schritt ist noch nicht übersetzt. Hilf mit, ihn zu übersetzen!
-
Remove the front of the camera body.
-
-
Dieser Schritt ist noch nicht übersetzt. Hilf mit, ihn zu übersetzen!
-
Peel the navigation buttons from the button panel and set them aside.
-
To free the LCD display, remove the 2.9 mm screw in the top left corner.
-
Rotate the screen clockwise until it lifts away from the camera.
-
-
-
Dieser Schritt ist noch nicht übersetzt. Hilf mit, ihn zu übersetzen!
-
To unplug the ribbon cables, pull them straight out of their plugs. Do this gently to avoid damaging the connections.
-
After disconnecting both cables, pull the screen away from the camera to remove it.
-
-
Dieser Schritt ist noch nicht übersetzt. Hilf mit, ihn zu übersetzen!
-
Now the photo sensor is exposed. In order to remove the ribbon cable from its port, first flip up the blue locking mechanism.
-
After the cable is unlocked, it easily pulls free.
-
-
Dieser Schritt ist noch nicht übersetzt. Hilf mit, ihn zu übersetzen!
-
In order to remove the photo sensor, you will have to cut through glue and remove screws.
-
Use a knife to carefully slice through the glue at the tree points indicated. Try not to cut through anything but the glue to avoid damage.
-
Now remove the three .15 inch screws holding the photo sensor to the camera frame.
-
-
Dieser Schritt ist noch nicht übersetzt. Hilf mit, ihn zu übersetzen!
-
Now you can carefully lift up the image sensor and remove it from the camera.
-
Be careful not to lose the three small springs or the rubber grommet that lie beneath the sensor.
-
-
Dieser Schritt ist noch nicht übersetzt. Hilf mit, ihn zu übersetzen!
-
You have now successfully removed the image sensor.
-
-
Dieser Schritt ist noch nicht übersetzt. Hilf mit, ihn zu übersetzen!
-
Once the image sensor is removed, turn the camera over and find the screw in the bottom right corner.
-
Remove this .01 inch screw to free the ribbon cables.
-
-
Dieser Schritt ist noch nicht übersetzt. Hilf mit, ihn zu übersetzen!
-
One by one, detach the three ribbon cables from their ports.
-
-
Dieser Schritt ist noch nicht übersetzt. Hilf mit, ihn zu übersetzen!
-
Flip the camera over again so that the rear is showing and remove the two .065 inch screws holding the flash unit in place. They should be on the left side.
-
-
Dieser Schritt ist noch nicht übersetzt. Hilf mit, ihn zu übersetzen!
-
Now you should be able to remove the flash unit from the camera.
-
-
Dieser Schritt ist noch nicht übersetzt. Hilf mit, ihn zu übersetzen!
-
You have now successfully removed the flash unit.
-
-
Dieser Schritt ist noch nicht übersetzt. Hilf mit, ihn zu übersetzen!
-
Next, remove the three .12 inch screws that hold the lens assembly to the camera.
-
-
Dieser Schritt ist noch nicht übersetzt. Hilf mit, ihn zu übersetzen!
-
Finally, pull the lens assembly away from the camera frame. Make sure that none of the ribbon cables are tangled up.
-
-
Dieser Schritt ist noch nicht übersetzt. Hilf mit, ihn zu übersetzen!
-
You have now successfully removed the Canon PowerShot SD550 Lens Assembly.
-


Rückgängig: Ich habe diese Anleitung nicht absolviert.
2 weitere Nutzer:innen haben diese Anleitung absolviert.
Team

Cal Poly, Team 18-23, Garner Spring 2011 Mitglied von Cal Poly, Team 18-23, Garner Spring 2011
CPSU-GARNER-S11S18G23
5 Mitglieder
7 Anleitungen geschrieben