Einleitung
If the tripod screw mount in the adapter for a tripod becomes overused, it can split or become stripped. This guide will explain how to remove and replace the tripod screw mount from the Canon PowerShot SX10 IS .
Was du brauchst
-
-
Open the door. Release the catch by sliding it towards the side of the camera.
-
Then slide the door towards the front of the camera.
-
-
-
Remove AA batteries.
-
Using a fingernail or iFixit opening tools to pry up the battery cradle.
-
Remove CR1220 battery from the cradle.
-
-
-
-
Use the iFixit opening tool to free the back casing from the rest of the camera body.
-
Gently lift up on the black latch holding the ribbon cable in place and slide the ribbon out.
-
-
-
Remove three screws on the left side of the camera.
-
Slide the left side casing up and off of the camera body.
-
-
-
Remove two cables connected to the motherboard.
-
Use thin tweezers to push down on the clear piece and slide it out. At this point half of the clear piece should be free.
-
Remove one screw that is holding down the middle of the clear piece to the body of the camera. The whole structure with wires will swing out.
-
-
-
Using the iFixit opening tool, gently pry along the top edge of the front casing.
-
Move to the right side of the camera and gently pry at the top and bottom areas of this part of the casing. The front casing will come free once it has been pried here.
-
The front casing will be able to slide away from the body of the camera.
-
-
-
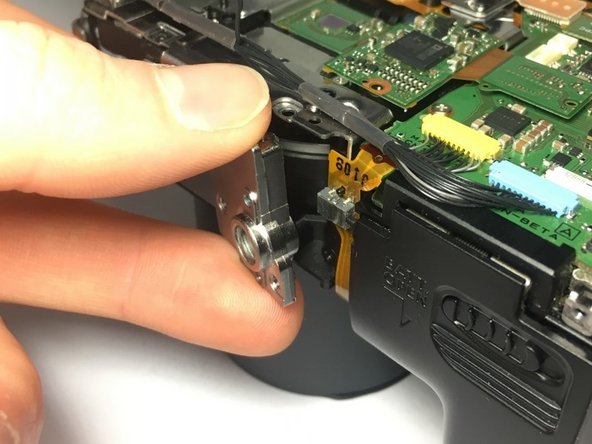
Remove one screw that holds both a black cable and part of the tripod mount.
-
The silver bracket and black cable will pop right off.
-
-
-
Remove the four screws remaining that hold the tripod screw mount into the body of the camera.
-
Using your fingers, remove the tripod screw mount from the body of the camera.
-


To reassemble your device, follow these instructions in reverse order.
To reassemble your device, follow these instructions in reverse order.
Team

Oregon Institute of Technology, Team S2-G6, Lancaster Spring 2019 Mitglied von Oregon Institute of Technology, Team S2-G6, Lancaster Spring 2019
OIT-LANCASTER-S19S2G6
3 Mitglieder
5 Anleitungen geschrieben