Zum Hauptinhalt wechseln

Canon Powershot SX500 IS Control Dial Replacement

Was du brauchst

  1. Canon Powershot SX500 IS Control Dial Replacement, Battery: Schritt 1, Bild 1 von 1
    • Rotate the camera to expose the underside of the camera.

  2. Canon Powershot SX500 IS Control Dial Replacement: Schritt 2, Bild 1 von 1
    • Slide the rounded rectangle tab to the left to release the battery cover.

  3. Canon Powershot SX500 IS Control Dial Replacement: Schritt 3, Bild 1 von 1
    • Push the small orange tab forward to release the battery (Battery is ready for removal).

  4. Canon Powershot SX500 IS Control Dial Replacement, Back Cover: Schritt 4, Bild 1 von 3 Canon Powershot SX500 IS Control Dial Replacement, Back Cover: Schritt 4, Bild 2 von 3 Canon Powershot SX500 IS Control Dial Replacement, Back Cover: Schritt 4, Bild 3 von 3
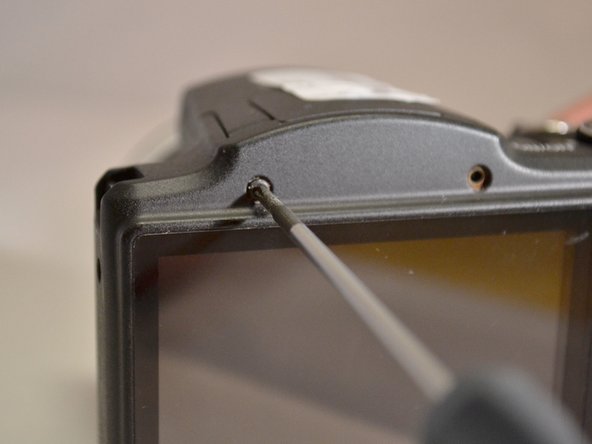
    • Using the Phillips 00 screwdriver, remove the two 4mm top screws above the LCD screen.

  5. Canon Powershot SX500 IS Control Dial Replacement: Schritt 5, Bild 1 von 1
    • Using the Phillips 00 screwdriver, remove the two 4mm side screws to the left of the LCD screen.

  6. Canon Powershot SX500 IS Control Dial Replacement: Schritt 6, Bild 1 von 1
    • Using the Phillips 00 screwdriver, remove the two 4mm side screws to the left of the LCD screen.

  7. Canon Powershot SX500 IS Control Dial Replacement: Schritt 7, Bild 1 von 1
    • Using the Phillips 00 screwdriver, remove the three 4mm screws from the underside of the camera.

  8. Canon Powershot SX500 IS Control Dial Replacement: Schritt 8, Bild 1 von 2 Canon Powershot SX500 IS Control Dial Replacement: Schritt 8, Bild 2 von 2
    • Using the plastic pry tool, remove the back cover from camera.

  9. Canon Powershot SX500 IS Control Dial Replacement, Control Dial: Schritt 9, Bild 1 von 1
    • Using the Phillips 00 screwdriver, remove the two 3mm screws closest to the right of the LCD screen.

  10. Canon Powershot SX500 IS Control Dial Replacement: Schritt 10, Bild 1 von 1
    • Using the Phiillips 00 screwdriver, remove the 4mm screw to the right of the control dial.

  11. Canon Powershot SX500 IS Control Dial Replacement: Schritt 11, Bild 1 von 1
    • Using the spudger, lift the control dial to the right of the LCD screen.

  12. Canon Powershot SX500 IS Control Dial Replacement: Schritt 12, Bild 1 von 1
    • Using the spudger, lift the connection tab and remove the control dial's orange ribbon from motherboard.

Abschluss

To reassemble your device, follow these instructions in reverse order.

Ein:e weitere:r Nutzer:in hat diese Anleitung absolviert.

Ein Kommentar

Gracias gracias gracias

edgarlugo20111917 - Antwort

Kommentar hinzufügen

Seitenaufrufe:

Letzte 24 Stunden: 2

Letzte 7 Tage: 3

Letzte 30 Tage: 13

Insgesamt: 453