Einleitung
This guide shows how to replace the cooling fan on the Selphy CP720. This is done to fix overheating problems caused by a faulty fan.
Was du brauchst
-
-
Remove the four 8mm Phillips #1 screws from the bottom of the printer.
-
-
-
-
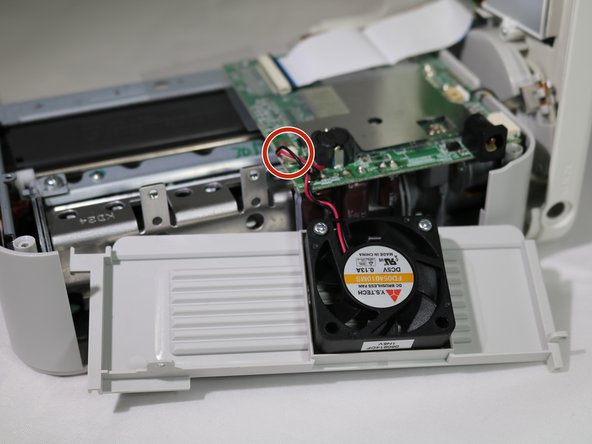
Unplug the fan from the circuit board by gently pulling on the wire connector at the base of the port.
-
-
-
Unscrew the two 8mm Phillips #1 screws from the fan.
-
Remove the fan from the panel.
-


To reassemble your device, follow these instructions in reverse order.
To reassemble your device, follow these instructions in reverse order.
Team

Eastern Washington University, Team S1-G1, Carnegie Fall 2018 Mitglied von Eastern Washington University, Team S1-G1, Carnegie Fall 2018
EWU-CARNEGIE-F18S1G1
4 Mitglieder
10 Anleitungen geschrieben