Einleitung
The left panel is structurally significant to the ventilator but is not fixed to any other components. Therefore it is necessary to remove the left panel for a vast majority of service to be done on internal components of the ventilator. You will need a Phillips screwdriver to complete this guide. This part is strictly structural, however it needs to be removed to access many of the parts inside.
Was du brauchst
-
Schritt 1 Cardinal Health Vela Ventilator Power Cable Removal
Achtung: Die Schritte 1-2 stammen von einer Anleitung, die derzeit bearbeitet wird.
-
Use a screwdriver to remove the two Phillips pan-head screws at the top of the plug guard.
-
-
-
Remove the four Phillips #0 screws on the back side of the ventilator.
-
-
-
Remove all six small side panel screws along the bottom of each side of the top cover with the same screwdriver.
-
-
Schritt 6 Cardinal Health Vela Ventilator Battery Tray Removal
Achtung: Die Schritte 6-8 stammen von einer Anleitung, die derzeit bearbeitet wird.
-
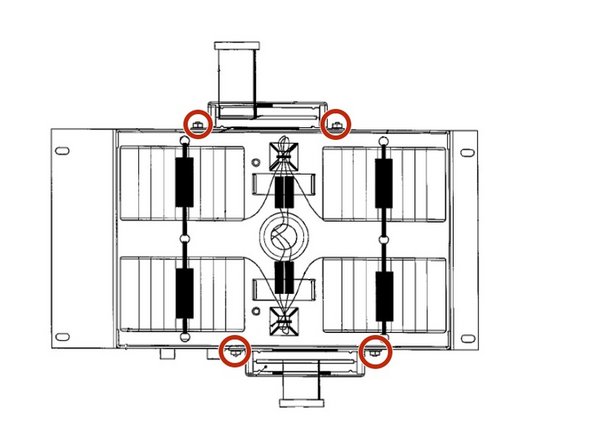
Use your Phillips screwdriver to unscrew the 4 Phillips pan head screws positioned on each side of the battery tray.
-
-
-
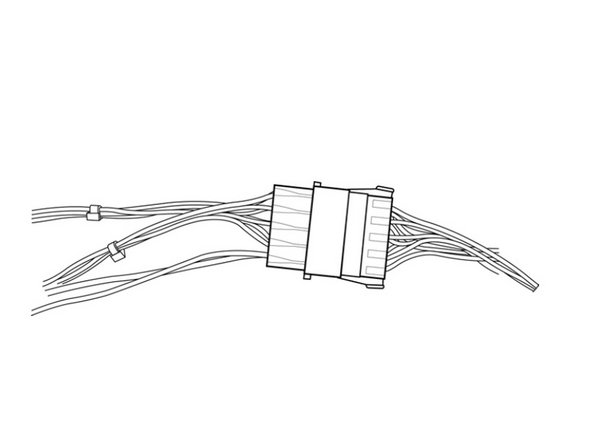
Disconnect the batteries from the ventilator by pulling apart the Battery Connector.
-


To reassemble your device, follow these instructions in reverse order.
To reassemble your device, follow these instructions in reverse order.
Team

Cal Poly, Team S7-G22, Paton Spring 2020 Mitglied von Cal Poly, Team S7-G22, Paton Spring 2020
CPSU-PATON-S20S7G22
1 Mitglied
3 Anleitungen geschrieben