Zum Hauptinhalt wechseln

Cleaning the Ulco Integrus PSV

Medizinische Ausrüstung
Weder iFixit noch diese Reparaturanleitung werden vom Hersteller medizinischer Geräte unterstützt oder sind mit diesem verbunden.
  1. Cleaning the Ulco Integrus PSV, Cleaning the Ulco Integrus PSV: Schritt 1, Bild 1 von 2 Cleaning the Ulco Integrus PSV, Cleaning the Ulco Integrus PSV: Schritt 1, Bild 2 von 2
    • Absorber

    • Loosen the knurled screws and remove the clear lid.

  2. Cleaning the Ulco Integrus PSV: Schritt 2, Bild 1 von 1
    • Remove the silicone shutters by gently lifting from the base, NOT from the flaps.

  3. Cleaning the Ulco Integrus PSV: Schritt 3, Bild 1 von 1
    • To release and remove the canister(s), undo the handle latch by turning sideways.

  4. Cleaning the Ulco Integrus PSV: Schritt 4, Bild 1 von 1
    • Push the release handle down to vertical until canisters are free.

  5. Cleaning the Ulco Integrus PSV: Schritt 5, Bild 1 von 1
    • Push canister(s) down then out of the cradle. Then dispose of the used soda lime (see suppliers recommended procedure for disposal of soda lime).

    • Wash all the absorber components. Do NOT use caustic cleaning fluids.

    • The Canister(s) and silicone shutters can be autoclaved.

    • The Absorber head can be put through a washer at 80 deg.C

    • Dry thoroughly before assembly, low pressure warm air should be passed through the head by attaching a hose to the expiratory port of the absorber.

  6. Cleaning the Ulco Integrus PSV: Schritt 6, Bild 1 von 2 Cleaning the Ulco Integrus PSV: Schritt 6, Bild 2 von 2
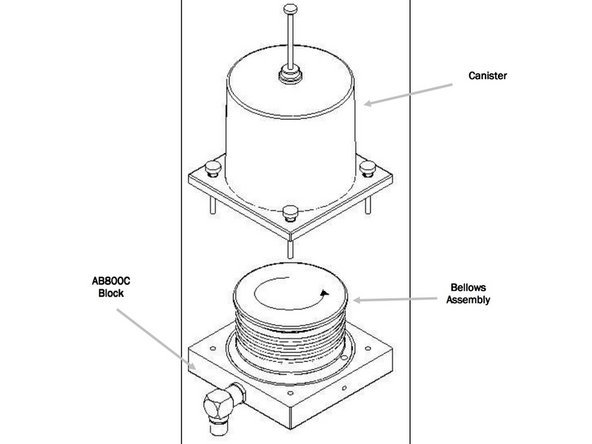
    • Bellows Assembly

    • Loosen the four knurled screws (1) and remove the bellows canister.

  7. Cleaning the Ulco Integrus PSV: Schritt 7, Bild 1 von 1
    • Remove the bellows assembly by rotating counter-clockwise. The bellows canister may be washed or autoclaved.

  8. Cleaning the Ulco Integrus PSV: Schritt 8, Bild 1 von 1
    • The base disk (mushroom) should be removed from the bellows assembly before washing. Pull the latex-free rubber bag from the delrin base disk. The bellows may be washed or autoclaved. The base component (mushroom) should not be autoclaved but can be put through a washer at 80°C.

    • Dry all components thoroughly before re-assembly.

    • Low pressure warm air should be passed through the absorber head by attaching a hose to the scavenge port

Abschluss

To reassemble your device, follow these instructions in reverse order.

Ein:e weitere:r Nutzer:in hat diese Anleitung absolviert.

Team

Cal Poly, Team S7-G13, Paton Spring 2020 Mitglied von Cal Poly, Team S7-G13, Paton Spring 2020

CPSU-PATON-S20S7G13

3 Mitglieder

8 Anleitungen geschrieben

0 Kommentare

Kommentar hinzufügen

Seitenaufrufe:

Letzte 24 Stunden: 0

Letzte 7 Tage: 1

Letzte 30 Tage: 2

Insgesamt: 76