Zum Hauptinhalt wechseln

Cobra SPX 5300 Audio Dial Replacement

Was du brauchst

  1. Cobra SPX 5300 Audio Dial Replacement, Windshield Bracket Mount: Schritt 1, Bild 1 von 2 Cobra SPX 5300 Audio Dial Replacement, Windshield Bracket Mount: Schritt 1, Bild 2 von 2
    • Remove the four 9.5 mm Phillips #0 screws from the back of the device.

  2. Cobra SPX 5300 Audio Dial Replacement: Schritt 2, Bild 1 von 2 Cobra SPX 5300 Audio Dial Replacement: Schritt 2, Bild 2 von 2
    • Pull the black plastic back case off of the device.

  3. Cobra SPX 5300 Audio Dial Replacement: Schritt 3, Bild 1 von 1
    • Lift up the motherboard and lay it flat next to the device.

    • Be careful not to sever the wires. The buttonboard is connected to the motherboard by the wires.

  4. Cobra SPX 5300 Audio Dial Replacement: Schritt 4, Bild 1 von 1
    • Remove the windshield bracket mount.

  5. Cobra SPX 5300 Audio Dial Replacement, Audio Dial: Schritt 5, Bild 1 von 1
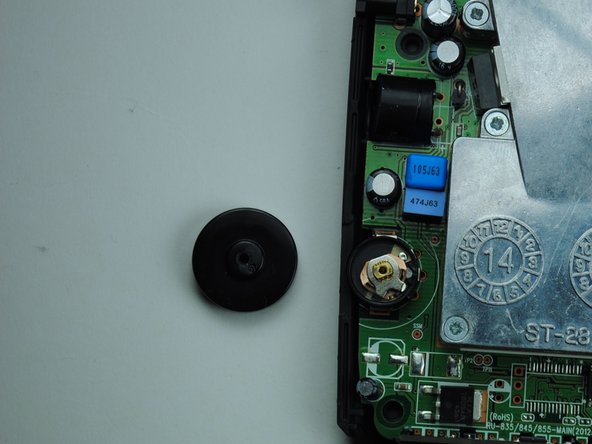
    • Remove the one 4.8 mm Phillips #00 screw from the center of the audio dial.

  6. Cobra SPX 5300 Audio Dial Replacement: Schritt 6, Bild 1 von 2 Cobra SPX 5300 Audio Dial Replacement: Schritt 6, Bild 2 von 2
    • Remove audio dial.

Abschluss

To reassemble your device, follow these instructions in reverse order.

Ein:e weitere:r Nutzer:in hat diese Anleitung absolviert.

Team

University of Tampa, Team 1-2, Whiteside Fall 2015 Mitglied von University of Tampa, Team 1-2, Whiteside Fall 2015

UT-WHITESIDE-F15S1G2

4 Mitglieder

5 Anleitungen geschrieben

0 Kommentare

Kommentar hinzufügen

Seitenaufrufe:

Letzte 24 Stunden: 0

Letzte 7 Tage: 3

Letzte 30 Tage: 9

Insgesamt: 638