Zum Hauptinhalt wechseln

Contour Roam2 Mounting Piece Replacement

Was du brauchst

  1. Contour Roam2 Mounting Piece Replacement, Record Slider: Schritt 1, Bild 1 von 1
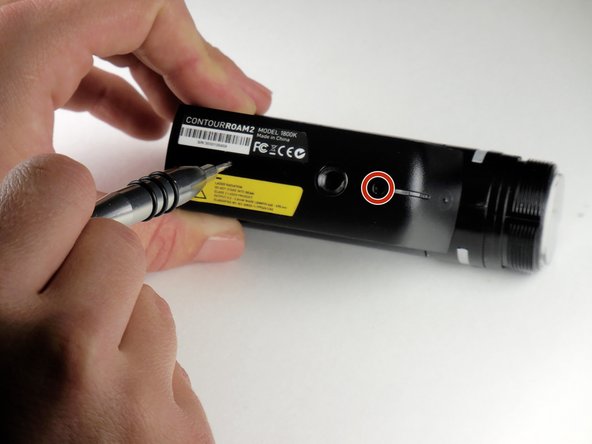
    • Using the phillips head screwdriver (PH000) locate and remove the 4.45mm (.175in) screw by the 180 degree graphic on the metal ring.

    • The screws in the camera are very small and can strip very easily. Apply consistent pressure when removing screws.

  2. Contour Roam2 Mounting Piece Replacement: Schritt 2, Bild 1 von 2 Contour Roam2 Mounting Piece Replacement: Schritt 2, Bild 2 von 2
    • Rotate the metal ring counterclockwise until completely removed.

  3. Contour Roam2 Mounting Piece Replacement: Schritt 3, Bild 1 von 2 Contour Roam2 Mounting Piece Replacement: Schritt 3, Bild 2 von 2
    • Using the phillips head screwdriver (PH000) remove the two 4.46mm (.175in) screws on each side near the back of the camera.

  4. Contour Roam2 Mounting Piece Replacement: Schritt 4, Bild 1 von 3 Contour Roam2 Mounting Piece Replacement: Schritt 4, Bild 2 von 3 Contour Roam2 Mounting Piece Replacement: Schritt 4, Bild 3 von 3
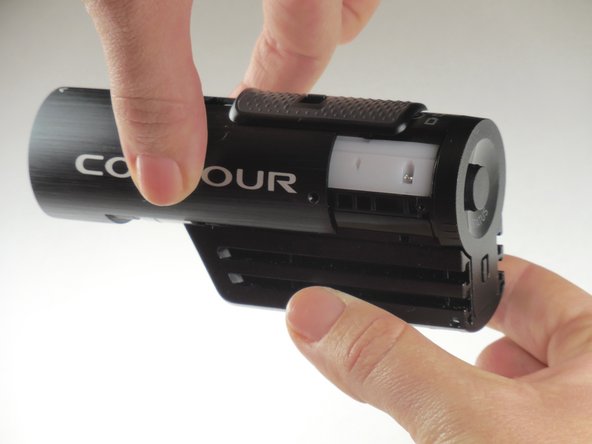
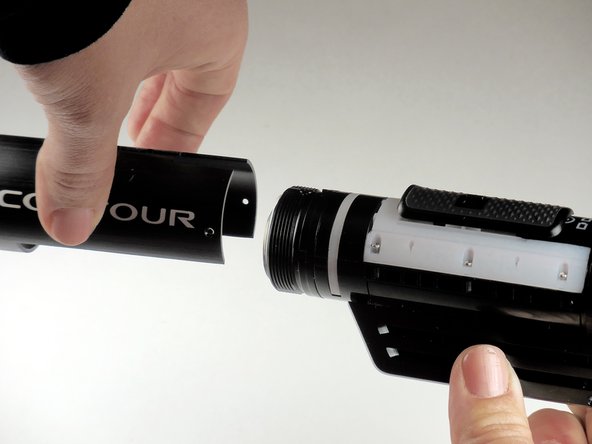
    • Grab the camera on both sides and slide the outer shell forward until completely removed.

  5. Contour Roam2 Mounting Piece Replacement: Schritt 5, Bild 1 von 1
    • Lift the record slider out.

    • The record slider should come out easily no matter the position (forward or backward).

  6. Contour Roam2 Mounting Piece Replacement, Mounting Piece: Schritt 6, Bild 1 von 2 Contour Roam2 Mounting Piece Replacement, Mounting Piece: Schritt 6, Bild 2 von 2
    • Using the phillips head screwdriver (PH000) remove the two 3.82mm (0.150in) screws on the bottom of mounting piece near the tripod screw-in.

    • The screws in the camera are very small and can strip very easily. Apply consistent pressure when removing screws.

  7. Contour Roam2 Mounting Piece Replacement: Schritt 7, Bild 1 von 2 Contour Roam2 Mounting Piece Replacement: Schritt 7, Bild 2 von 2
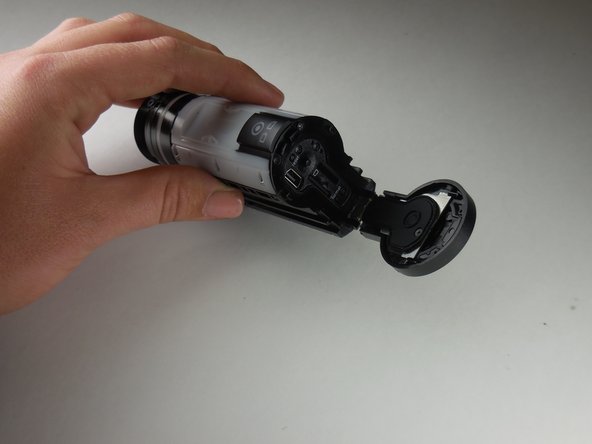
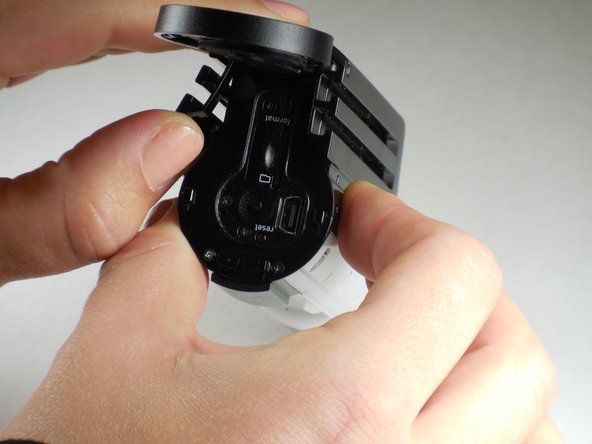
    • Open the back door by your thumb and index finger on sides of back door and pull upward.

  8. Contour Roam2 Mounting Piece Replacement: Schritt 8, Bild 1 von 1
    • Using your thumb, pry sides outward on back of mount piece.

    • This will loosen mount piece for removal in proceeding step.

    • Side can be hard to pry outward. Using a flat tool such as a metal spudger, may help if your thumb is insufficient.

  9. Contour Roam2 Mounting Piece Replacement: Schritt 9, Bild 1 von 2 Contour Roam2 Mounting Piece Replacement: Schritt 9, Bild 2 von 2
    • Remove and replace mount piece.

Abschluss

To reassemble your device, follow these instructions in reverse order.

3 weitere Nutzer:innen haben diese Anleitung absolviert.

Team

Colorado Springs, Team 4-5, Panko Spring 2015 Mitglied von Colorado Springs, Team 4-5, Panko Spring 2015

UCCS-PANKO-S15S4G5

3 Mitglieder

10 Anleitungen geschrieben

Ein Kommentar

Hi i need this part...

julmarte - Antwort

Kommentar hinzufügen

Seitenaufrufe:

Letzte 24 Stunden: 0

Letzte 7 Tage: 1

Letzte 30 Tage: 7

Insgesamt: 1,379