Einleitung
Replacing the Carburetor O-Ring is a slightly messy but short process. First, you will have to remove the air filter and the casing and then behind that, the carburetor will be exposed so you can replace the O-Ring.
Before starting this replacement make sure your engine has been turned off and cooled down prior to touching the machine.
This is one of the most common issues that can be easily fixed. This problem usually occurs when grass, twigs, and other debris slowly makes their way up to the engine when it is chopped up by the blade, and after some time the debris gets all stuck up inside of the carburetor and causes the O-Ring to wear out. This causes clogging in the fuel and air filter and makes the mower’s engine less efficient. This guide can be followed by anyone and be completed at home with a few easy steps and will make your lawnmower run like new!
Was du brauchst
-
-
Put gloves on, so you don’t get any oil or gasoline on your skin.
-
-
-
Use a flathead screwdriver and remove the 40 mm screw that secures the air filter and the case to the lawn mower.
-
-
-
Slowly remove the air filter case from the hinges by tilting it slightly and pulling it out.
-
-
-
-
Use the socket wrench and put the 5/16” inch hex bit on to remove the three 20 mm bolts located behind the air filter.
-
-
-
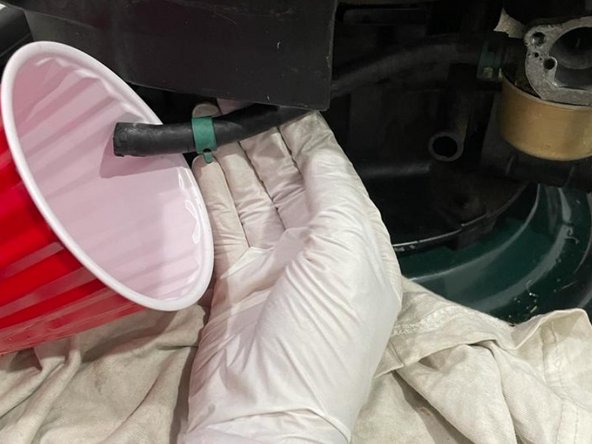
Use utility pliers to pull out the fuel line slowly by wiggling it up and down.
-
-
-
Use the socket wrench with a ½” inch hex bit to remove the 11 mm screw on the bottom of the tank.
-
-
-
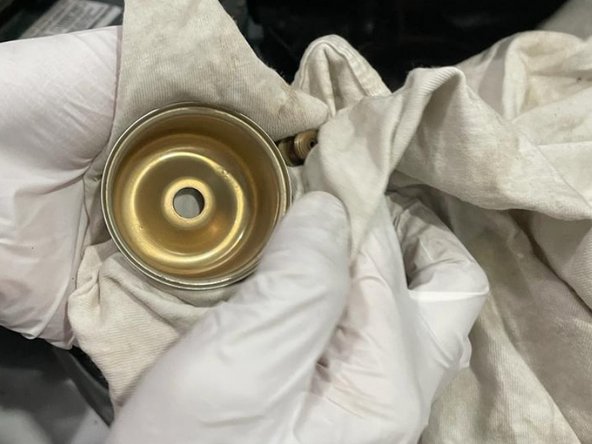
Pull the carburetor tank down slowly.
-
Empty any extra gasoline and use a rag to clean it out.
-
-
-
Remove the O-Ring from the carburetor tank and replace it with a new one. You are ready to reassemble your lawnmower!
-


To reassemble your device, follow these instructions in reverse order.
To reassemble your device, follow these instructions in reverse order.

Team

York University, Team R-16, Melo-Thaiss Winter 2022 Mitglied von York University, Team R-16, Melo-Thaiss Winter 2022
YORK-MELO-THAISS-W22SRG16
1 Mitglied
1 Anleitung geschrieben