Zum Hauptinhalt wechseln

Creality Ender 3 Extruder Motor Assembly Replacement

Archivierte Anleitung
Diese Anleitung wurde ausschließlich für historische Zwecke erhalten. Verwende die aktualisierte Version dieser Anleitung, um deine Reparatur durchzuführen.

Was du brauchst

  1. Creality Ender 3 Extruder Motor Assembly Replacement, extruder motor assembly: Schritt 1, Bild 1 von 1
    • To start, unplug the cable from the power supply box.

  2. Creality Ender 3 Extruder Motor Assembly Replacement: Schritt 2, Bild 1 von 2 Creality Ender 3 Extruder Motor Assembly Replacement: Schritt 2, Bild 2 von 2
    • Remove the screw holding the spring in place.

    • Also, before going any further, remove the PFTE tubing from the assembly.

  3. Creality Ender 3 Extruder Motor Assembly Replacement: Schritt 3, Bild 1 von 2 Creality Ender 3 Extruder Motor Assembly Replacement: Schritt 3, Bild 2 von 2
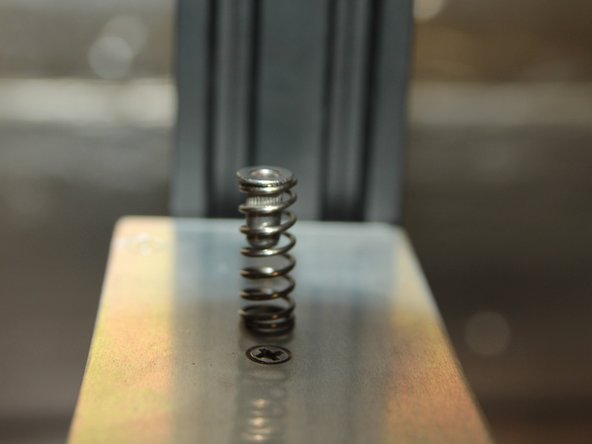
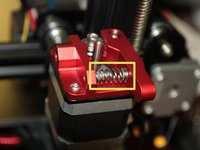
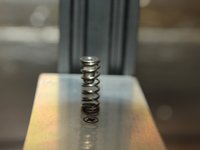
    • Once the screw is removed, take out the spring and the small metal bracket inside.

    • Once you are done, recall how the spring and bracket are put together.

  4. Creality Ender 3 Extruder Motor Assembly Replacement: Schritt 4, Bild 1 von 1
    • Now, remove the small brass gear by loosening the small screws.

    • Do not loosen the screws all the way.

Abschluss

This is a fairly easy repair, but if you need help, leave a comment on the guide.

Ein:e weitere:r Nutzer:in hat diese Anleitung absolviert.

Cameron Smith

Mitglied seit: 03/17/22

400 Reputation

2 Anleitungen geschrieben

Team

Colorado Fixers Mitglied von Colorado Fixers

Community

1 Mitglied

2 Anleitungen geschrieben

0 Kommentare

Kommentar hinzufügen

Seitenaufrufe:

Letzte 24 Stunden: 1

Letzte 7 Tage: 2

Letzte 30 Tage: 4

Insgesamt: 478