Zum Hauptinhalt wechseln

Crosley CR42 Bushings Replacement

Was du brauchst

  1. Crosley CR42 Bushings Replacement, Bushings: Schritt 1, Bild 1 von 2 Crosley CR42 Bushings Replacement, Bushings: Schritt 1, Bild 2 von 2
    • Turn the device around so the line out port faces you.

    • Remove the ten 12 mm screws with the Phillips screwdriver.

  2. Crosley CR42 Bushings Replacement: Schritt 2, Bild 1 von 3 Crosley CR42 Bushings Replacement: Schritt 2, Bild 2 von 3 Crosley CR42 Bushings Replacement: Schritt 2, Bild 3 von 3
    • Pull the line out port toward you so you can view the inside of the Crosley.

    • Locate the wires that connect the line out port to the inside of the device.

  3. Crosley CR42 Bushings Replacement: Schritt 3, Bild 1 von 3 Crosley CR42 Bushings Replacement: Schritt 3, Bild 2 von 3 Crosley CR42 Bushings Replacement: Schritt 3, Bild 3 von 3
    • Pull on the two connections to remove them from the back of the line out port.

    • Remove the antenna wire from the line out port, then remove the line out port and set it aside.

  4. Crosley CR42 Bushings Replacement: Schritt 4, Bild 1 von 2 Crosley CR42 Bushings Replacement: Schritt 4, Bild 2 von 2
    • Remove the red and black connection underneath the turntable.

  5. Crosley CR42 Bushings Replacement: Schritt 5, Bild 1 von 1
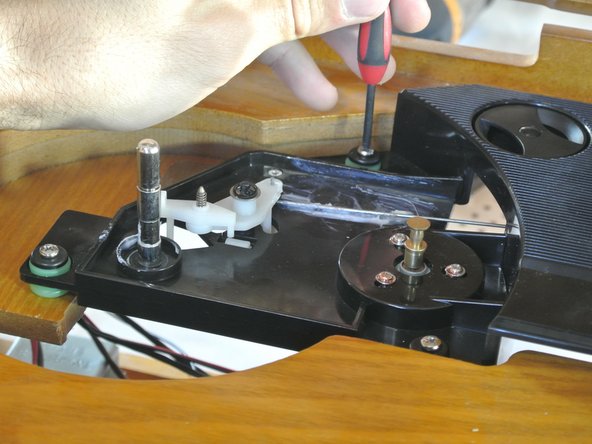
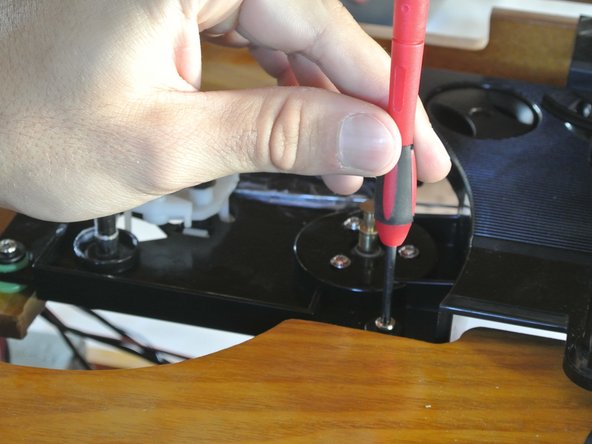
    • Position yourself in front of the turntable to unscrew the three bushing bolts.

  6. Crosley CR42 Bushings Replacement: Schritt 6, Bild 1 von 3 Crosley CR42 Bushings Replacement: Schritt 6, Bild 2 von 3 Crosley CR42 Bushings Replacement: Schritt 6, Bild 3 von 3
    • Unscrew the three bushing bolts with the Phillips screw driver.

  7. Crosley CR42 Bushings Replacement: Schritt 7, Bild 1 von 2 Crosley CR42 Bushings Replacement: Schritt 7, Bild 2 von 2
    • Pull the turntable out from the casing.

    • Remove the three bushing bolts.

  8. Crosley CR42 Bushings Replacement: Schritt 8, Bild 1 von 3 Crosley CR42 Bushings Replacement: Schritt 8, Bild 2 von 3 Crosley CR42 Bushings Replacement: Schritt 8, Bild 3 von 3
    • Pinch the rubber bushing at the bottom, then pull downwards to remove it.

    • Repeat the previous step for the other two bushings.

Abschluss

To reassemble your device, follow these instructions in reverse order.

Eine weitere Person hat diese Anleitung absolviert.

Roberto Rosila

Mitglied seit: 01/26/14

319 Reputation

3 Anleitungen geschrieben

Team

Cal Poly, Team 1-38, Maness Winter 2014 Mitglied von Cal Poly, Team 1-38, Maness Winter 2014

CPSU-MANESS-W14S1G38

4 Mitglieder

5 Anleitungen geschrieben

0 Kommentare

Kommentar hinzufügen

Seitenaufrufe:

Letzte 24 Stunden: 0

Letzte 7 Tage: 0

Letzte 30 Tage: 14

Insgesamt: 3,084