Zum Hauptinhalt wechseln

CrystalView NB4-35788 Auxiliary Speakers Replacement

Was du brauchst

  1. CrystalView NB4-35788 Auxiliary Speakers Replacement, Auxiliary Speakers: Schritt 1, Bild 1 von 1
    • Power off the device before beginning disassembly.

    • Using a Phillips #00 Screwdriver, take out the following screws:

    • Two 6 mm screws

    • Three 4 mm screws

    • Four 3 mm screws

    • These screws can be taken out in any order.

  2. CrystalView NB4-35788 Auxiliary Speakers Replacement: Schritt 2, Bild 1 von 1
    • Using a Phillips #00 Screwdriver, remove the screws located under the top two standoffs.

  3. CrystalView NB4-35788 Auxiliary Speakers Replacement: Schritt 3, Bild 1 von 1
    • Remove the cover off the back of the device.

  4. CrystalView NB4-35788 Auxiliary Speakers Replacement: Schritt 4, Bild 1 von 1
    • Two speakers can be found on the device, one in the lower-right corner and one in the lower left-corner.

  5. CrystalView NB4-35788 Auxiliary Speakers Replacement: Schritt 5, Bild 1 von 1
    • Gently pull up on the speaker to remove it. Repeat this for the other speaker.

  6. CrystalView NB4-35788 Auxiliary Speakers Replacement: Schritt 6, Bild 1 von 2 CrystalView NB4-35788 Auxiliary Speakers Replacement: Schritt 6, Bild 2 von 2
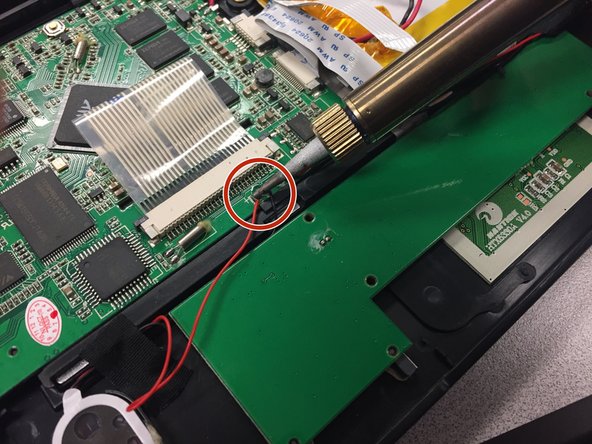
    • De-solder the red and black wires to disconnect the old speaker.

    • Be careful while using a soldering iron as it is extremely hot.

    • Follow the How To Solder and Desolder Connections guide for help.

Abschluss

To reassemble your device, follow these instructions in reverse order.

Alex Stokes

Mitglied seit: 01/12/17

101 Reputation

1 Anleitung geschrieben

Team

Oakland University, Team 2-6, Ruskiewicz Winter 2017 Mitglied von Oakland University, Team 2-6, Ruskiewicz Winter 2017

OAK-RUSKIEWICZ-W17S2G6

3 Mitglieder

6 Anleitungen geschrieben

0 Kommentare

Kommentar hinzufügen

Seitenaufrufe:

Letzte 24 Stunden: 0

Letzte 7 Tage: 0

Letzte 30 Tage: 0

Insgesamt: 135