Zum Hauptinhalt wechseln

Cuisinart DLC-10S Pro Classic 7-Cup Food Processor Internal Wiring Replacement

Was du brauchst

  1. Cuisinart DLC-10S Pro Classic 7-Cup Food Processor Internal Wiring Replacement, Internal Wiring: Schritt 1, Bild 1 von 1
    • Remove the four screws from the bottom of the processor with a Philips Screwdriver.

  2. Cuisinart DLC-10S Pro Classic 7-Cup Food Processor Internal Wiring Replacement: Schritt 2, Bild 1 von 1
    • Remove the bottom casing of the processor.

  3. Cuisinart DLC-10S Pro Classic 7-Cup Food Processor Internal Wiring Replacement: Schritt 3, Bild 1 von 1
    • If any wires are frayed, cut them off where they are connected by wire nuts.

  4. Cuisinart DLC-10S Pro Classic 7-Cup Food Processor Internal Wiring Replacement: Schritt 4, Bild 1 von 1
    • Detach the wire nut from the other connected wires.

  5. Cuisinart DLC-10S Pro Classic 7-Cup Food Processor Internal Wiring Replacement: Schritt 5, Bild 1 von 1
    • Replace the bad wire with a new one of the same gauge.

  6. Cuisinart DLC-10S Pro Classic 7-Cup Food Processor Internal Wiring Replacement: Schritt 6, Bild 1 von 1
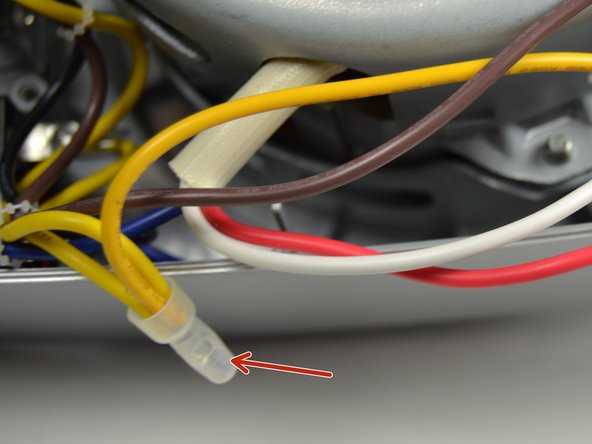
    • Strip the new wire to the same length as the other wires and connect them to a wire nut.

Abschluss

To reassemble your device, follow these instructions in reverse order.

Ein:e weitere:r Nutzer:in hat diese Anleitung absolviert.

Riley Carns

Mitglied seit: 04/02/15

279 Reputation

2 Anleitungen geschrieben

Team

Cal Poly, Team 24-1, Lancaster Winter 2015 Mitglied von Cal Poly, Team 24-1, Lancaster Winter 2015

CPSU-LANCASTER-W15S24G1

1 Mitglied

2 Anleitungen geschrieben

0 Kommentare

Kommentar hinzufügen

Seitenaufrufe:

Letzte 24 Stunden: 0

Letzte 7 Tage: 1

Letzte 30 Tage: 10

Insgesamt: 965