Einleitung
This guide will instruct you on how to properly disassemble your Cuisinart-140BK toaster. It will also help your properly replace the knobs on your toaster, while further preventing any damage to the device.
Was du brauchst
-
Schritt 1 Circuit Board
Achtung: Die Schritte 1-6 stammen von einer Anleitung, die derzeit bearbeitet wird.
-
-
Turn the toaster upside down.
-
Unscrew all 4mm screws using Phillips #2 screwdriver.
-
-
-
Turn the toaster right side up.
-
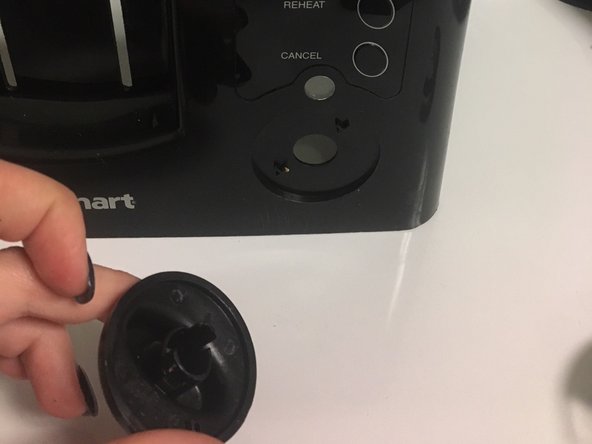
Pull out the toaster lever knobs by pulling it away from the toaster before removing the top cover.
-
-
-
-
Detach the cable that connects the toaster to the circuit board, in both control panels.
-
-
-
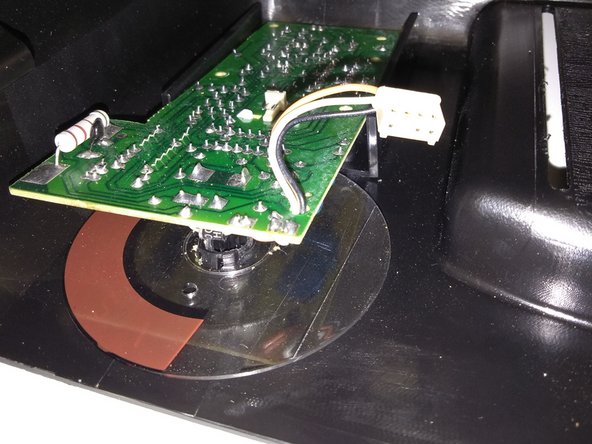
Unscrew total of six 4mm screws that attach each circuit board to the top cover, using Phillips #2 screwdriver.
-
Remove and replace the circuit board.
-
-
-
This is how the device should look without the knob.
-
Repeat the process on the opposite side of the toaster to remove the second knob.
-


To reassemble your device, follow these instructions in reverse order.
To reassemble your device, follow these instructions in reverse order.
Team

University of North Texas, Team S7-G3, Thomas Fall 2017 Mitglied von University of North Texas, Team S7-G3, Thomas Fall 2017
UNT-THOMAS-F17S7G3
3 Mitglieder
3 Anleitungen geschrieben