Was du brauchst
-
-
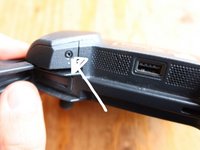
It's easy to put the micro USB in the wrong way around (turned 180 degrees) this will break your pins and makes the controller not able to charge anymore. Check if the inside of your port is all good
-
-
-
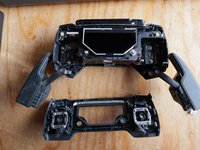
get the replacement part for your controller where the Micro Usb is connected to
-
-
-
First remove the joystick. You can just pull this out. In my case I already lost it 2 years ago. Easy!
-
-
-
-
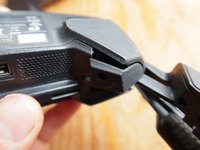
This was the most complex step. Once you remove the 2 screws from the previous step you can open up the bottom. This is a tough piece of plastic clicked into the sides. It required some fiddling and squeezing. It looks like you will break the plastic. But you won't. Plastic is precious you know
-
-
-
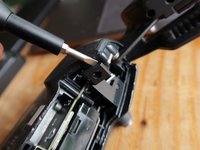
First remove the 2 phillips screws on at the top corners. There are 2 places where the front panels locks on the controller. (those big round things) Just pull it of there and you can open up the controller and remove the panel
-
-
-
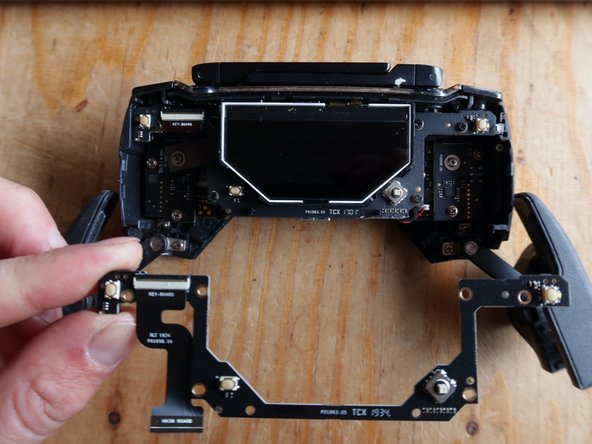
Now the controller is open, you can see the part you need to replace, just a few steps away
-
-
-
open up the tiny lever and you can remove the data cable of the keyboard
-
-
-
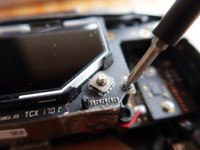
There are.2 screws that connect the part you want to replace. Unscrew and you can remove it
-
-
-
You can now replace the part, but before we put everything back together make sure it works (charges! :)
-
-
-
My part broke because I put the cable in wrong way around, apparently this is a common problem from this controller. Makes me wonder why it usually does not go wrong. Anyway, to prevent this in the future i've marked how the Micro USB cable should go in. Flat part down!
-


To reassemble your device, follow these instructions in reverse order.
To reassemble your device, follow these instructions in reverse order.
Rückgängig: Ich habe diese Anleitung nicht absolviert.
5 weitere Personen haben diese Anleitung absolviert.
9 Kommentare zur Anleitung
Thank you for sharing your experience and knowledge. :-)
How and where do you get this replacement part from DJI ?
I have the exact same issue
I see you didn’t respond back to Romain and I have the same question now, after reviewing your incredible detailed example of replacement. Same reason, obviously, I put the connector in upside down and broke it… thank you, hope you respond soon
Got it somewhere from ebay
Found more info here: DJI Mavic Remote Controller Button Board - iFixit Store