Diese Version enthält möglicherweise inkorrekte Änderungen. Wechsle zur letzten geprüften Version.
Was du brauchst
-
Dieser Schritt ist noch nicht übersetzt. Hilf mit, ihn zu übersetzen!
-
Be sure to repair your device on a clean surface so you are less likely to lose small parts.
-
-
Dieser Schritt ist noch nicht übersetzt. Hilf mit, ihn zu übersetzen!
-
Run your prying tool along the front edge of the device to pop off the front cover.
-
Once the halves are separated your device should look like this.
-
(HINT: be careful of the device's small wiring when separating the two halves.)
-
-
-
Dieser Schritt ist noch nicht übersetzt. Hilf mit, ihn zu übersetzen!
-
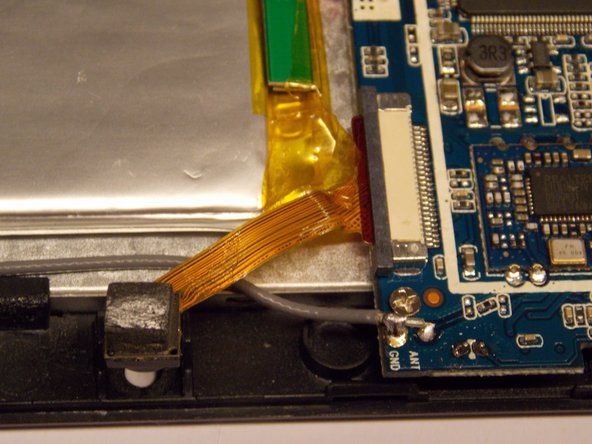
Remove the black tape that is circled.
-
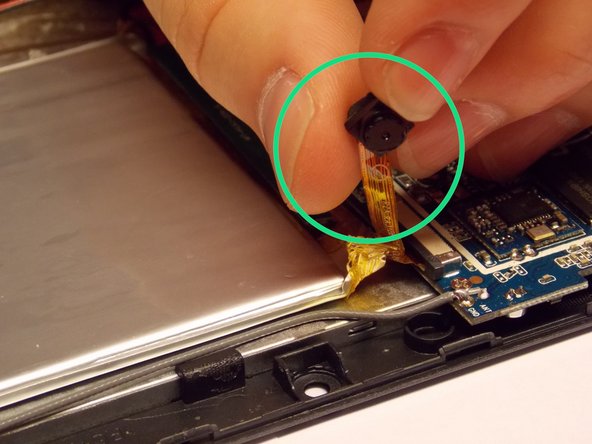
The camera is circled in this picture.
-
-
Dieser Schritt ist noch nicht übersetzt. Hilf mit, ihn zu übersetzen!
-
Carefully remove the camera from its housing.
-
-
Dieser Schritt ist noch nicht übersetzt. Hilf mit, ihn zu übersetzen!
-
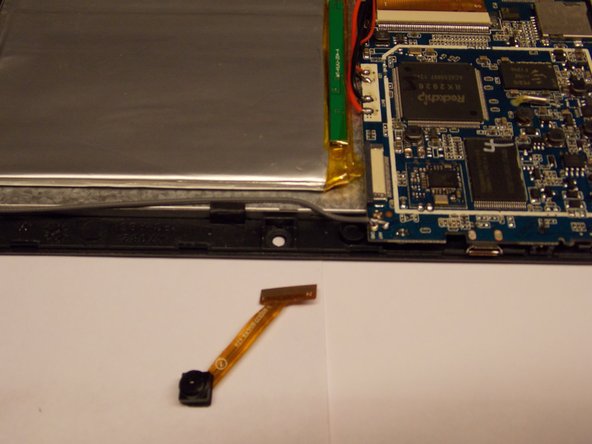
Slide the new camera into its housing carefully.
-
it should look like the second picture when you are finished
-
-
Dieser Schritt ist noch nicht übersetzt. Hilf mit, ihn zu übersetzen!
-
Press the back cover of the tablet on firmly until it clicks
-


Rückgängig: Ich habe diese Anleitung nicht absolviert.
2 weitere Nutzer:innen haben diese Anleitung absolviert.
Team

UMass Dartmouth, Team 6-3, Vijaybhaskar Fall 2014 Mitglied von UMass Dartmouth, Team 6-3, Vijaybhaskar Fall 2014
UMASSD-VIJAYBHASKAR-F14S6G3
3 Mitglieder
6 Anleitungen geschrieben